Mastering Exposure Triangle
Unlock the secret to perfect photos by mastering the exposure triangle. Learn how ISO, aperture, and shutter speed interplay!
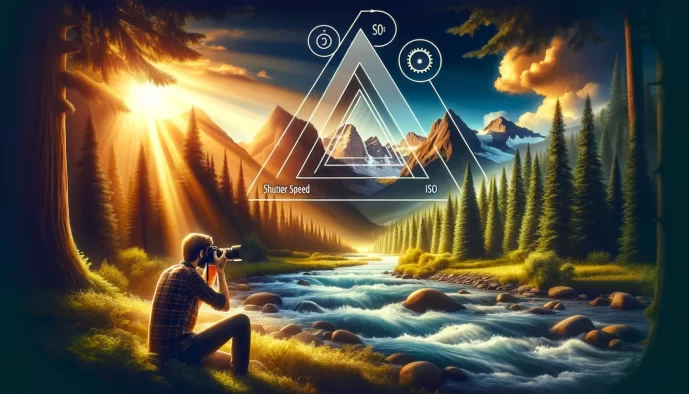
Introduction
Understanding the exposure triangle is essential for any aspiring photographer. This fundamental concept interlinks shutter speed, aperture, and ISO to control light and achieve perfectly balanced images. Mastering these elements offers creative flexibility and enhances your photography skills.
Shutter speed affects how motion is captured, aperture determines depth of field, and ISO adjusts the camera’s sensitivity to light. Balancing these three settings lets photographers adapt to various lighting conditions and artistic intentions.
In this article, we unravel each component of the exposure triangle, provide practical tips, and explore how mastering it can elevate your photography. By the end, you’ll be equipped with the knowledge needed to take full control of your camera settings.
Understanding Exposure Triangle
### What is Exposure Triangle?
The **Exposure Triangle** is the foundation of photography and a crucial concept for anyone serious about mastering their camera. It encompasses three interrelated elements: **Aperture**, **Shutter Speed**, and **ISO**. Think of it as the holy trinity of photography that determines how much light hits the camera sensor, ultimately influencing how an image is exposed. Understanding and balancing these three settings allows you to creatively control the aesthetics of your photograph.
#### Why is it Called a Triangle?
The term “Exposure Triangle” comes from the idea that these three settings are interconnected, like the sides of a triangle. Adjusting one side inevitably affects the other two. For instance, if you widen the Aperture to let in more light, you may need to adjust either the Shutter Speed or the ISO to maintain proper exposure. It’s a delicate dance where each element plays a crucial role.
### Key Elements of the Exposure Triangle
#### Aperture
Aperture refers to the opening in a lens through which light passes to enter the camera. Measured in f-stops, the size of the aperture affects not only the exposure but also the *depth of field*, or how much of the scene is in focus.
#### Shutter Speed
Shutter Speed is the duration for which the camera’s sensor is exposed to light. It significantly impacts motion blur and the amount of light that reaches the sensor. Faster shutter speeds freeze action, while slower ones can create a sense of motion.
#### ISO
ISO measures the sensitivity of the camera sensor to light. A higher ISO allows you to shoot in low-light conditions but can introduce noise, affecting the image quality. Lower ISO settings are ideal for bright conditions and yield cleaner images.
### The Delicate Balancing Act
Balancing the three elements of the Exposure Triangle involves trade-offs and compromises:
– **Increase Aperture size (lower f-stop)**: Allows more light but reduces depth of field.
– **Increase Shutter Speed**: Freezes motion but requires more light.
– **Increase ISO**: Amplifies sensor sensitivity but introduces noise.
Learning the intricacies of this balance helps photographers achieve their desired artistic effects while maintaining correct exposure.
### Why It Matters
Understanding the Exposure Triangle is not just about getting the “right” exposure. It’s about *creative control*.
> “Photography is the story I fail to put into words.”
> — Destin Sparks
Mastering these three settings enables you to craft images that narrate your vision, be it the silky smooth waters of a long-exposure seascape or the razor-sharp snapshot of a sprinter crossing the finish line.
In short, the Exposure Triangle is your gateway to moving beyond auto modes and generic snapshots. Whether you’re striving for artistic flair or technical perfection, controlling these three elements gives you the prowess and versatility to achieve results that truly resonate.
Aperture
### Definition of Aperture
**Aperture** refers to the opening in a camera lens through which light enters the camera body. Think of it as the pupil of your eye, regulating the amount of light that hits the camera sensor or film. This opening can be adjusted, allowing more or less light to enter. The size of this opening is essential for achieving the correct exposure and influences other aspects of your photography.
### Aperture Sizes and f-stops
Aperture size is denoted by **f-stops** (e.g., f/2.8, f/4, f/11). The lower the f-stop number, the larger the aperture, and vice versa. This might sound counterintuitive, but that’s the charm of photography! Larger apertures (small f-stop numbers) allow more light, which is ideal for low-light conditions and achieving a shallow **depth of field**.
**Common f-stop settings**:
– **Large aperture (small f-stop)**: f/1.4, f/2, f/2.8
– **Medium aperture**: f/5.6, f/8
– **Small aperture (large f-stop)**: f/11, f/16, f/22
### Impact of Aperture on Exposure
Aperture directly impacts the **exposure** of an image:
– **Large aperture (e.g., f/2.8)**: More light enters, which is great for dark environments or creating a *dreamy bokeh* effect in portraits.
– **Small aperture (e.g., f/16)**: Less light enters, allowing for better control in brightly lit situations and enhancing the depth of field for landscape shots.
### Depth of Field and Aperture
Depth of Field (DoF) defines how much of the scene stays in focus from front to back. Aperture is a crucial player in controlling this:
– **Shallow Depth of Field**: Achieved with a **large aperture (small f-stop)**. It places emphasis on the subject, blurring out the background. Perfect for portraits where you want the subject’s face to stand out.
“Blurry backgrounds are a photographer’s best friend, except when you’re trying to photograph Bigfoot, then it’s just annoying!”
– **Deep Depth of Field**: Achieved with a **small aperture (large f-stop)**. This keeps most of the scene in focus, excellent for landscapes and architectural photography.
**Quick Tips**:
– Use a **large aperture** for portraits to isolate the subject.
– Use a **small aperture** for landscapes to ensure everything from the foreground to the horizon is in focus.
Understanding these aspects lets you manipulate visual elements artistically and technically, making aperture an invaluable tool in your photography arsenal.
Shutter Speed
### Definition of Shutter Speed
**Shutter speed** refers to the length of time a camera’s shutter is open, allowing light to hit the camera sensor. Essentially, it’s the window of opportunity for light to make its impression, measured in seconds or fractions of a second.
### Shutter Speed and Light Exposure
Shutter speed directly affects the **exposure** of an image:
– **Fast shutter speeds** (e.g., 1/1000s) limit the amount of light, resulting in darker images.
– **Slow shutter speeds** (e.g., 1s) allow more light, resulting in brighter images.
For example, in broad daylight, a fast shutter speed helps prevent overexposure, while a slower speed is beneficial in low-light conditions.
### Motion and Shutter Speed
Shutter speed is pivotal in capturing or freezing motion:
– **Fast shutter speeds** (e.g., 1/2000s) freeze action, ideal for sports or wildlife photography.
– **Slow shutter speeds** (e.g., 1/15s) create motion blur, enhancing the sense of movement. Perfect for waterfall shots or light trails.
Remember: **“The slower the shutter, the more you flutter”**—a handy mantra for knowing that slow speeds can introduce blur from camera shake.
### Shutter Speed Ranges
Understanding the typical ranges can help:
– **Fast: 1/4000s to 1/500s** – Best for freezing fast action.
– **Moderate: 1/500s to 1/60s** – Suitable for everyday scenarios with mild motion.
– **Slow: 1/60s to several seconds** – Ideal for low light or creative effects.
**Pro Tip:** Use a tripod for slow shutter speeds to avoid camera shake and keep your images sharp.
By mastering shutter speed, photographers can control light exposure and motion, adding a powerful tool to their creative arsenal.
ISO
### Definition of ISO
**ISO** is a measure of a camera sensor’s **sensitivity to light**. It originated from the days of film photography as a way to classify film speeds, but in the digital era, it’s all about the sensor’s responsiveness.
### ISO Sensitivity
A lower ISO value (e.g., ISO 100) means that the sensor is less sensitive to light, which is perfect for bright, sunny conditions. Conversely, a higher ISO value (e.g., ISO 3200) increases the sensor’s sensitivity, making it ideal for low-light situations.
**Key Points:**
– Lower ISO: Less sensitivity, cleaner images
– Higher ISO: More sensitivity, more noise
*”Think of ISO as the ‘volume knob’ for light sensitivity. Crank it up in the dark, but beware of the static!”*
### Impact of ISO on Image Quality
Raising the ISO can easily tempt the modern photographer, especially in dim settings. But here’s the catch: higher ISO settings introduce **noise**—that grainy, pesky speckling that can mar an otherwise perfect shot. Imagine crafting a serene, moonlit landscape only to find it plagued by digital confetti. Not cool, right?
**Takeaway:** Balance ISO carefully. Going too high can compromise image clarity.
### ISO Settings in Various Conditions
Choosing the right ISO setting often depends on the environment and the **creative outcome** you desire. Here’s a quick guide to simplify this:
– **Bright Daylight:** ISO 100-200
– **Indoors/Nighttime:** ISO 800-1600
– **Fast Action in Low Light:** ISO 1600-3200
– **Astrophotography or Deep Night Scenes:** ISO 3200 and above (brace for noise!)
Example:
– **Wedding Indoors:** Opt for ISO 800 to 1600 to catch the romance and the cake, minus the grain.
**Pro Tip:** When in doubt, start low and gradually increase ISO, balancing it with **aperture** and **shutter speed** adjustments to achieve the desired exposure.
Remember, mastering ISO is all about finding that sweet spot where sensitivity meets clarity. Practice makes perfect.
Interplay of Aperture, Shutter Speed, and ISO
### Balancing the Triangle
The **exposure triangle** is akin to a three-legged stool; if one leg buckles, the whole thing collapses. The essence of mastering this concept lies in understanding how to balance **aperture**, **shutter speed**, and **ISO**. Think of it like a chef balancing salt, heat, and time – each ingredient significantly influences the final dish.
#### Harmony and Trade-offs
– **Aperture:** It controls the amount of light entering through the lens. A wider aperture (low **f-stop**) lets in more light and creates a shallow **depth of field**. Conversely, a narrow aperture (high **f-stop**) lets in less light but increases depth.
– **Shutter Speed:** This determines how long the sensor is exposed to light. Faster speeds (1/1000) freeze motion but allow less light. Slower speeds (1/30) let in more light but can cause motion blur.
– **ISO:** The camera sensor’s sensitivity to light. Lower ISO settings (100) produce cleaner images with less noise. Higher settings (3200) increase sensitivity but can introduce noise.
Each parameter affects exposure, and altering one requires compensating with another. For instance, if you widen the aperture for a **bokeh** effect, you may need to increase shutter speed or lower ISO to prevent overexposure.
### Creative Control
Mastering the interplay between these settings can unleash your creative potential. Want to capture a waterfall with silky smooth water? Use a **low shutter speed** and adjust aperture and ISO accordingly. Desire a sharp landscape with broad focus? Opt for a **high f-stop** with a balanced shutter speed and low ISO.
#### Examples of Adjustments:
– **Portraits:** Wide aperture (f/1.8), moderate to fast shutter speed (1/125), low ISO (100-200).
– **Sports:** Narrower aperture (f/5.6), very fast shutter speed (1/1000+), moderate ISO (400-800).
– **Night Photography:** Wide aperture (f/2.8), slow shutter speed (30 seconds), high ISO (1600+).
### Common Adjustments for Different Scenarios
Different shooting conditions require different combinations of settings. Here’s a quick glance at typical adjustments:
– **Sunny Day:** Narrow aperture (f/11+), fast shutter speed (1/500+), low ISO (100).
– **Cloudy Day:** Moderate aperture (f/5.6-f/8), moderate shutter speed (1/125-1/250), moderate ISO (400).
– **Indoor Lighting:** Wide aperture (f/2.8), slower shutter speed (1/60), higher ISO (800-1600).
### The Golden Rule
A famous photographer once said, *”Photography is the story I fail to put into words.”* Your camera settings should serve your narrative, striking a balance that encapsulates the scene you envision.
Practical Tips
### Using Aperture Priority Mode
In **Aperture Priority Mode** (often labeled as ‘A’ or ‘Av’), you select the aperture, and the camera automatically adjusts the shutter speed to achieve a proper exposure. This mode is ideal for:
– **Controlling Depth of Field:** Aperture Priority allows you to decide how much of the scene is in focus. A **wider aperture (e.g., f/2.8)** will isolate your subject with a blurred background, while a **narrower aperture (e.g., f/16)** will keep more of the scene sharp.
– **Portraits and Macros:** Use a wide aperture to get beautiful bokeh and highlight your subject.
– **Landscapes:** Use a narrow aperture to keep vast scenic details in focus.
### Using Shutter Priority Mode
In **Shutter Priority Mode** (‘S’ or ‘Tv’), you select the shutter speed, and the camera sets the aperture. This mode shines in scenarios where motion capture is crucial:
– **Freezing Motion:** For sports or wildlife photography, **fast shutter speeds (e.g., 1/1000s)** ensure sharp images of fast-moving subjects.
– **Creating Motion Blur:** To capture the motion of waterfalls or car lights, slow it down to **shutter speeds like 1/30s or slower**.
– **Low-Light Situations:** Experiment with slightly slower shutter speeds, but beware of camera shake.
Tip: When using slow shutter speeds without a tripod, activate **image stabilization** or lean against a stable surface.
### Using Manual Mode
**Manual Mode** (‘M’) puts you in full control of the exposure triangle, where you must balance **aperture, shutter speed, and ISO**:
– **Full Creative Control:** Perfect for when you want consistent settings across multiple shots or want to experiment with unique exposure combinations.
– **Learning Tool:** Using Manual Mode can help you understand how each element of the exposure triangle affects your photos and feeds your inner control freak (in the best way possible).
Here’s a pro tip: start with a middle-of-the-road **ISO (400 or 800)**, set your desired aperture, and then adjust the shutter speed until you get proper exposure.
### Pro Suggestions
– **Use the Histogram:** A histogram can help you understand the exposure distribution of your image. Aim for a balanced histogram with no spikes at the edges.
– **Experiment with Bracketing:** For challenging exposures, bracket your shots by taking multiple photos at different exposures to ensure the perfect shot.
Remember, photography is a balance between **technical skills** and **creative expression**. With these modes, the camera handles some of the technicalities, allowing you to focus on capturing the moment.
Troubleshooting Exposure Issues
### Overexposure Solutions
**Overexposure** can turn a promising photo into a washed-out disappointment. Here are key strategies to address this common issue:
#### Reduce Aperture Size
– **Narrow the aperture** by selecting a larger f-stop number. This limits the amount of light entering the lens.
– Example: Shift from f/2.8 to f/11.
#### Increase Shutter Speed
– A **faster shutter speed** results in less light exposure.
– Example: Change from 1/125s to 1/1000s.
#### Lower ISO
– Reducing the **ISO** setting decreases the camera sensor’s sensitivity to light.
– Example: Drop from ISO 1600 to ISO 200.
#### Use Neutral Density Filters
– **ND filters** reduce the overall intensity of light hitting the sensor, akin to putting sunglasses on your lens.
– Ideal for overly bright conditions, like a sunny beach.
**”Replacing high ISO with appropriate ND filters can make your summer shots flawless, not face-meltingly bright.”**
### Underexposure Solutions
Underexposure results in dark, murky images. Addressing underexposure involves:
#### Widen Aperture
– **Open up the aperture** by choosing a smaller f-stop.
– Example: Move from f/11 to f/2.8.
#### Slow Down Shutter Speed
– A **slower shutter speed** allows more light to hit the sensor.
– Example: Adjust from 1/1000s to 1/125s.
#### Increase ISO
– Raising the **ISO** increases the sensor’s sensitivity.
– Example: Increase from ISO 200 to ISO 1600. Beware of potential noise.
#### Utilize Artificial Lighting
– Sometimes natural light isn’t enough. **Adding external light** sources such as flashes or studio lights can fill in gaps.
### Noise Reduction
Excessive **noise** often appears in images taken with high ISO settings or long exposures. Managing noise is crucial for retaining image quality:
#### Optimize ISO Settings
– Aim for the lowest **ISO** that maintains exposure balance.
– If necessary, compromise shutter speed and aperture first before ramping up ISO excessively.
#### Use Noise Reduction Software
– Post-processing tools like **Adobe Lightroom** or **DxO PhotoLab** offer robust noise reduction functionalities.
– Pro Tip: Apply noise reduction carefully to avoid losing detail.
#### Avoid Long Exposures When Possible
– Long exposures can introduce thermal noise. **Use shorter exposures** and adjust aperture and ISO to compensate.
– *”Think of long exposure as a double-edged sword. It captures dramatic scenes but brings along uninvited noise. Use wisely!”*
By mastering these troubleshooting techniques, you can achieve perfectly exposed photos even in challenging conditions. Understanding the ways to combat **overexposure**, **underexposure**, and **noise** is crucial for any photographer aiming to elevate their craft.
Tools and Resources
### Recommended Gear
When it comes to mastering the **Exposure Triangle**, the right gear can make a world of difference. Here are some recommendations:
**Cameras:**
– **DSLR and Mirrorless Cameras**: Brands like *Canon*, *Nikon*, *Sony*, and *Fujifilm* offer models with excellent manual control options ideal for practicing exposure settings.
– **Entry-Level Options**: *Canon EOS Rebel Series*, *Nikon D3500*, and *Sony Alpha a6000* are beginner-friendly and budget-conscious choices.
**Lenses:**
– **Prime Lenses**: With their wide apertures (e.g., 50mm f/1.8), they allow more light and offer better control over depth of field.
– **Zoom Lenses**: Versatile options like the *24-70mm f/2.8* offer flexibility without compromising aperture capabilities.
**Tripods:**
– **Sturdy and Adjustable**: Brands like *Manfrotto* and *Gitzo* provide solid support, essential for low-light and long-exposure shots.
### Software for Exposure Adjustment
Editing software is invaluable for fine-tuning your exposure settings post-shoot. Here are some top picks:
**Adobe Lightroom**:
A favorite among photographers, **Lightroom** offers powerful **adjustment tools** for exposure, highlights, and shadows. Its intuitive interface makes it accessible for beginners and advanced users alike.
**Adobe Photoshop**:
For more detailed adjustments and **layering capabilities**, **Photoshop** is the go-to. It allows pixel-level precision for those who need it.
**Capture One**:
Developed by Phase One, it’s renowned for its exceptional **color grading** and **detail enhancement** features.
**Free Alternatives**:
– **GIMP**: A robust, open-source option.
– **Darktable**: Excellent for raw file processing and contains many features found in commercial software.
### Further Reading and Courses
Enhance your understanding and skills with these top resources:
**Books**:
– **”Understanding Exposure” by Bryan Peterson**: This classic is considered a must-read for beginners and intermediates looking to grasp the fundamentals.
– **”The Photography Bible” by Daniel Lezano**: Offers a comprehensive guide that covers all aspects of photography, including in-depth sections on the Exposure Triangle.
**Online Courses**:
– **CreativeLive**: Features courses from industry experts such as John Greengo and Lindsay Adler.
– **Udemy**: Affordable courses that cover a range of topics, including specific ones on mastering exposure.
**Websites and Blogs**:
– **Digital Photography School**: Offers a wealth of articles and tutorials focused on practical tips and techniques.
– **Photography Life**: Provides insightful gear reviews and tutorials, including detailed explanations of the Exposure Triangle.
### Conclusion
Equipped with the right gear, software, and educational resources, you’ll be well on your way to mastering the Exposure Triangle. Remember, the journey of a thousand miles (or, in this case, the journey to perfect exposure) begins with a single click! Keep experimenting, keep learning, and most importantly, keep shooting.
Practice Techniques
### Exercises for Beginners
#### Understanding Your Camera
Before diving into complex scenarios, **familiarize yourself with your camera**. Experiment with its **manual mode** to understand how changing one parameter—**aperture**, **shutter speed**, or **ISO**—impacts your exposure. Use a static subject and take multiple shots, adjusting one setting at a time while keeping the others constant.
#### Aperture Exercise
Set your camera to **Aperture Priority Mode** (often denoted as ‘A’ or ‘Av’). Choose a simple subject like a book on a table.
– Begin with a **wide aperture** (e.g., f/2.8) and take a shot.
– Gradually increase to a **narrower aperture** (e.g., f/16) in small increments, documenting how the **depth of field** changes.
Review your shots to see how your changes affect background blur and the overall exposure of the image.
#### Shutter Speed Exercise
Switch to **Shutter Priority Mode** (‘S’ or ‘Tv’). Find a moving subject, such as cars on a street or a person walking.
– Start with a **fast shutter speed** (e.g., 1/1000s) to freeze motion.
– Slow it down gradually to a **longer exposure** (e.g., 1/30s) to capture motion blur.
Analyze how different speeds affect the sharpness and exposure of your images.
#### ISO Exercise
Using **Manual Mode**:
– Set your aperture and shutter speed to maintain consistent exposure.
– Start with a **low ISO value** (e.g., ISO 100) and take a shot.
– Increase the ISO incrementally up to **high values** (e.g., ISO 3200).
Observe how higher ISO settings introduce **noise** and affect image quality, especially in low-light conditions.
### Advanced Practice Scenarios
#### Low Light Photography
Work in dimly lit environments, such as indoors during the evening, to hone your skills in balancing ISO, shutter speed, and aperture.
– Use a **tripod** if necessary, especially if you plan to use a slower shutter speed to gather more light.
– Experiment with high ISO settings but strive to keep it low to **reduce noise**.
#### Action Shots
Photograph sports events or wildlife to practice freezing motion and panning techniques.
– Use **high shutter speeds** to freeze rapid movement.
– Alternatively, use **slower shutter speeds** and move your camera along with the subject for motion blur behind a sharp subject.
### Analyzing Your Results
#### Reviewing and Reflecting
After capturing your images, **import them into photo editing software**. Compare your shots side by side to see the impacts of your settings.
– Evaluate how changes in aperture affected **depth of field** and exposure.
– Note how variations in shutter speed impacted motion blur.
– Assess noise levels at different ISO settings.
“Remember, photography isn’t solely about the technicalities. It’s about capturing **moments**. The Exposure Triangle is your trusty sidekick in making those moments **shine**.”
**Pro Tip**: “Shooting in RAW gives you the flexibility to make finer adjustments later without losing image quality. Think of it as a safety net for when things don’t go exactly as planned.”
Feel free to constantly challenge yourself with **new subjects** and **lighting conditions**. The more you practice, the more intuitive your adjustments will become, eventually enabling you to nail the perfect shot almost instinctively.
Conclusion
Mastering the exposure triangle empowers photographers to creatively and confidently capture the world, transforming technical knowledge into breathtaking artistry.