Tips for capturing landscapes with a smartphone
Unlock stunning smartphone landscape shots with these essential tips. Elevate your photography game today!
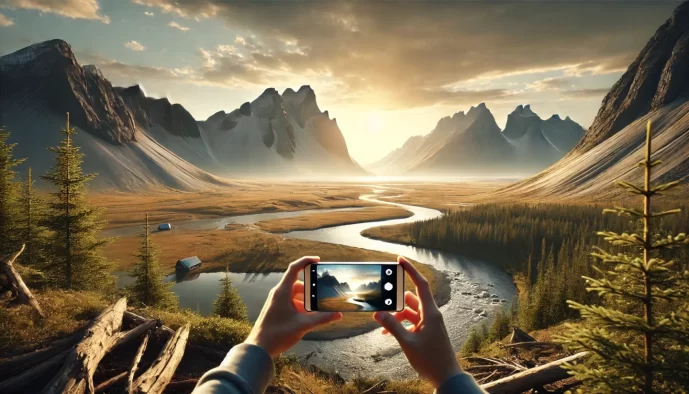
Ever found yourself mesmerized by a breathtaking vista, only to pull out your smartphone and feel like you're missing something? You're not alone! Capturing stunning landscapes with just your smartphone is entirely possible, and this guide is here to prove it.
Forget bulky equipment; we're diving into how you can unlock your phone's potential. We'll cover essential preparation, the secrets to compelling composition, and how to master your smartphone's camera features to transform your everyday shots into frame-worthy masterpieces.
Essentials
Preparation: Setting Yourself Up for Success
A stunning landscape photograph rarely happens by accident. While the spontaneity of smartphone photography is one of its greatest strengths, a little preparation can elevate your images from simple snapshots to thoughtful compositions. Before you even point your camera at a vista, these foundational steps will ensure you and your device are ready to capture the scene at its best.
Always Clean Your Lens
This is the simplest yet most overlooked tip in all of smartphone photography. Your phone’s lens lives in a pocket or a bag, constantly collecting fingerprints, dust, and smudges. A dirty lens will result in hazy, soft images with reduced contrast and unwanted lens flare. Before every shoot, take a moment to gently wipe the lens with a soft, clean microfiber cloth. This single action can dramatically improve the clarity and sharpness of your photos, making a more significant difference than any app or filter.
Essential (But Optional) Gear
While your smartphone is a powerful camera on its own, a few key accessories can unlock its full potential for landscape work. You don’t need a heavy camera bag, but consider these lightweight additions:
- Mini-Tripod: Stability is paramount for sharp photos, especially in the low light of sunrise or sunset. A small, portable tripod eliminates camera shake, enabling you to use slower shutter speeds for techniques like capturing silky water or shooting crisp night scenes.
- Power Bank: Using your camera app, GPS for location tagging, and a bright screen can drain your battery surprisingly quickly. A compact power bank ensures you won’t miss the perfect shot during the golden hour because your phone is at 1%.
- Clip-On Lenses: To push beyond your phone’s built-in lenses, consider a high-quality clip-on lens. A wide-angle attachment is particularly useful for landscapes, allowing you to capture more of an expansive scene without having to resort to a panorama.
Know Your Camera App
Understanding the tool in your hand is crucial. Take time to explore the capabilities of both the built-in camera and more advanced third-party applications.
Native App
Most modern smartphones include a “Pro” or “Manual” mode within their default camera app. Learning to use these settings gives you direct control over key variables like ISO, shutter speed, and white balance, moving you beyond simple point-and-shoot photography and allowing for more creative intent.
Third-Party Apps
For the ultimate control, explore specialized camera apps like Halide or ProCam. These applications often provide a more intuitive interface for manual controls and, most importantly, allow you to shoot in RAW format. A RAW file is essentially a digital negative; it captures all the image data recorded by the sensor without any in-camera processing. This gives you far greater flexibility during editing, allowing you to recover details in highlights and shadows, adjust colors precisely, and correct white balance without degrading the image quality, which is a significant advantage for landscape photographers.
The Art of Composition: Framing Your Landscape
A stunning view doesn’t automatically translate into a stunning photograph. How you arrange the elements within your frame—the composition—is what transforms a simple snapshot into a compelling piece of art. These timeless principles of composition are just as relevant for smartphones as they are for professional cameras.
Apply the Rule of Thirds
This is the foundational rule of photographic composition. Imagine your screen is divided into nine equal segments by two vertical and two horizontal lines. The rule of thirds suggests that placing key points of interest along these lines, or at their intersections, creates a more balanced and engaging image than simply centering the subject.
- Turn on your grid: The easiest way to practice this is to enable the grid overlay in your phone’s camera settings. This visual guide is invaluable for framing your shots. Consider exploring creative mobile photography compositions for more ideas.
- Position your elements: Instead of placing the horizon line directly in the middle of the frame, align it with either the top or bottom horizontal line. Place a focal point, like a lone tree or a distant mountain peak, where two lines intersect.
Find a Strong Foreground Element
A common mistake in landscape photography is capturing only the distant scenery, which can make photos feel flat and two-dimensional. By including an element in the foreground, you create an immediate sense of depth and provide an entry point that leads the viewer’s eye into the rest of the scene. Look for details near you that can anchor the shot. Learning how to add depth to your landscape photos is crucial.
- Examples include a cluster of interesting rocks on a shoreline, a patch of vibrant wildflowers, the gnarled roots of a tree, or a weathered wooden log.
Use Leading Lines
Leading lines are powerful compositional tools that guide the viewer’s eye on a journey through your photograph, often from the foreground to the background. They create a sense of motion and depth. Our eyes are naturally drawn to follow lines, so use them to your advantage when practicing landscape photography.
- Look for both natural and man-made lines. A winding river, a hiking path disappearing into the woods, a rustic fence line, or the curve of a road through rolling hills are all excellent examples of leading lines.
Look for Natural Frames
Framing your landscape within another element from the scene adds context and draws focus to your main subject. This technique creates a “frame within a frame,” which adds an artistic layer and a greater sense of depth. It makes the viewer feel as though they are peering into the scene themselves.
- Be on the lookout for things like overhanging tree branches, the opening of a cave, a natural rock archway, or even the window of an old ruin to frame your distant view. This is a great tip for mountains photography.
Harnessing Your Smartphone’s Camera Features
Your smartphone camera is far more powerful than a simple point-and-shoot device. By moving beyond the automatic settings and learning to leverage its built-in features, you can gain a level of creative control that dramatically improves your landscape photography.
Manually Control Focus and Exposure
While the “auto” mode is convenient, it makes its own decisions about what’s important in your scene. Taking manual control is the first step toward creating intentional, compelling photographs rather than simple snapshots. It’s easier than you think.
- Set your focus point: Simply tap on the area of the screen you want to be the sharpest. If you’re shooting a classic landscape with a strong foreground element, tap on that element to ensure it’s perfectly in focus.
- Adjust the brightness: When you tap to focus, a small sun icon or slider will typically appear. Slide this up or down to manually brighten or darken the image before you take the shot. This is perfect for slightly darkening a bright sky to bring out its color or brightening a shadowed foreground to reveal detail. This is a key aspect of Manipulating Light and Shadows.
- Lock your settings: Once you have your focus and exposure just right, press and hold on your focus point for a second or two. An “AE/AF Lock” message will appear, locking those settings in place. This prevents the camera from readjusting if you shift your composition slightly or if the light changes.
Master HDR (High Dynamic Range)
Landscape photography often involves scenes with extreme differences between the brightest and darkest areas, such as a brilliant sunset over a shadowed valley. Your phone’s HDR mode is specifically designed to handle these high-contrast situations. Understanding how to use HDR can help you avoid boring landscape photos.
- What it is: HDR mode works by capturing several photos at different exposure levels in rapid succession—one dark, one balanced, and one bright. It then automatically merges the best parts of all three into a single image. The result is a photo that retains rich detail in both the bright sky and the dark foreground, appearing much closer to what your eye can see. This technique is crucial for adding depth to your landscape photos.
- When to use it: Turn on HDR for any high-contrast scene. It’s ideal for sunrises, sunsets, or landscapes where part of the scene is in direct sunlight and another part is in deep shadow. For those interested in capturing the magic of twilight, our Blue Hour Photo Guide might be of interest.
- When to avoid it: Because HDR is blending multiple images, it’s not suitable for scenes with significant movement. Wind-blown trees, flowing water, or people walking through your frame can cause “ghosting” or blurry artifacts in the final image. For these scenes, it’s better to turn HDR off.
Use Your Phone’s Different Lenses
Most modern smartphones feature multiple lenses, each offering a distinct perspective. Learning to switch between them effectively is like having a bag of professional lenses at your disposal, allowing you to frame the perfect shot for any landscape. This is a core concept in our Landscape Photography Guide. For those using specific devices, understanding the capabilities of the Xiaomi 14 Ultra Mobile Lenses can be particularly beneficial, as the device is considered a top-tier camera phone Why the Xiaomi 14 Ultra is the best Camera phone in 2024.
- Ultra-Wide: This is the lens for capturing immense, sweeping vistas. It allows you to fit more of the scene into your frame, perfect for dramatic coastlines, vast mountain ranges, and expansive skies. Be mindful that ultra-wide lenses can cause some distortion at the edges, so try to keep important subjects away from the very corners of your composition. This can also be useful for Panorama Photography.
- Standard (Wide): This is your phone’s default, workhorse lens. It offers a natural field of view that is very similar to human vision, making it the most versatile and reliable choice for a wide variety of landscape photos. This is a great lens for general mountains photography.
- Telephoto: More than just a simple zoom, the telephoto lens is a powerful compositional tool. Use it to isolate distant subjects, like a lone cabin on a hillside or a specific mountain peak. It also has the creative effect of compressing the scene, making distant layers in a landscape (like a series of rolling hills) appear stacked closer together for a powerful, graphic look.
Chasing the Light: The Most Important Ingredient
Photography is often described as “painting with light,” and for landscapes, this couldn’t be more accurate. The time of day you choose to shoot will have a more profound impact on your final image than any other single factor. Understanding how to work with different types of natural light is the key to transforming a simple snapshot into a breathtaking photograph. For more general guidance, check out our Landscape Photography Guide.
Shoot During the Golden Hour
If there is one “secret” to stunning landscape photography, it’s the golden hour. This magical period, roughly the first hour after sunrise and the last hour before sunset, is when the sun is low in the sky. This positioning casts a soft, warm, and golden-hued light across the land. The low angle creates long, dramatic shadows that reveal the texture and contours of the landscape, adding a powerful sense of depth and dimension that is absent during the middle of the day. Mastering this is part of tips to take better mountains photography.
Don’t Forget the Blue Hour
Just as the golden hour fades, another equally beautiful period begins: the blue hour. Occurring in the twilight just before the sun rises or just after it has set, this time offers a completely different mood. The light is incredibly soft, diffused, and saturated with cool blue and purple tones. This ambient light is perfect for creating serene, moody, and atmospheric images. It works exceptionally well for scenes involving water, which will reflect the rich colors of the sky, or for landscapes where you want a feeling of tranquility and calm. Learn more about this in our Blue Hour Photo Guide.
Working with Harsh Midday Sun
While most photographers pack up their gear when the sun is high overhead, the midday light offers its own unique creative opportunities. It’s true that the high-contrast light creates hard, dark shadows and can wash out colors, but you can use these characteristics to your advantage. Instead of trying to capture a wide, sweeping vista, shift your focus to different kinds of compositions, and consider how to add depth to your landscape photos.
- Focus on details, patterns, and textures. The strong, direct light is excellent for highlighting the intricate patterns in a leaf, the rough texture of a rock face, or the geometric shapes created by architecture in the landscape. This is key to understanding Manipulating Light and Shadows.
- Use shadows as strong compositional elements. Instead of seeing shadows as a problem, treat them as subjects. A long, sharp shadow from a tree or a building can act as a powerful leading line or create a bold, graphic shape that defines your image.
- Try converting to black and white. By removing color, you eliminate the distraction of washed-out hues. A black and white conversion allows you to emphasize the dramatic interplay between light and shadow, focusing the viewer’s attention on form, shape, and contrast.
Advanced Smartphone Techniques for Wow-Factor
Once you’ve mastered the fundamentals, you can begin to explore more creative techniques that truly elevate your landscape photos. These methods often require a bit more patience and sometimes specific apps, but the stunning results are well worth the effort.
Capture Expansive Panoramas
Sometimes, a standard photo simply can’t contain the grandeur of the scene in front of you. This is where the panorama mode becomes invaluable, allowing you to stitch multiple photos together to create a wide, immersive image that captures the full scale of a mountain range or a sweeping coastline. Learn more about Panorama Photography: Capturing and stitching panoramic images.
- Move your phone slowly and steadily in one continuous motion across the scene. Any sudden jerks can create stitching errors or blurry spots.
- Keep the guide arrow on the centered line your phone displays. This is the key to achieving a perfectly straight and level horizon.
- Don’t forget to think vertically. Turning your phone on its side and shooting a vertical panorama is a fantastic way to capture the full height of towering subjects like waterfalls, giant redwood trees, or dramatic cliff faces.
Create Silky Water with Long Exposure
Have you ever seen photos where waterfalls or ocean waves look soft, misty, and dream-like? This is achieved with a long exposure, a technique that intentionally blurs movement over several seconds. By leaving the camera’s shutter open for longer, the motion of the water is rendered as a smooth, ethereal flow, transforming a chaotic scene into one of serene beauty. Mastering this can help you avoid 10 reasons why your landscape photos are boring.
Achieving this effect on a smartphone requires a couple of key items. First, a tripod is absolutely essential to keep the phone perfectly still; any camera shake will blur the entire image, not just the water. Second, you will need a third-party camera app that offers manual control over the shutter speed, allowing you to set it for a duration of one, two, or even several seconds.
Experiment with Reflections
Reflections add a wonderful sense of symmetry, depth, and intrigue to a landscape photograph. The world is full of natural mirrors if you know where to look. A perfectly calm alpine lake can create a flawless mirror image of the mountains behind it, while a simple rain puddle on a trail can reflect a dramatic sky. Even wet sand on a beach after a wave recedes can provide a fleeting reflective surface. For more on composition, check out Creative Mobile Photography Compositions: Experimenting with angles and perspectives.
For the most compelling reflection shots, try getting your phone as low as you can, almost touching the water’s surface. This perspective minimizes distractions and maximizes the mirror effect, creating a powerful and often surprising composition.
The Final Touch: Editing on Your Phone
Capturing the photo is only half the journey. The post-processing stage, or editing, is where you can truly bring your vision to life. Modern smartphones are not just cameras; they are powerful editing suites. A thoughtful edit can transform a good photo into a great one by refining the light, color, and composition you worked so hard to capture in the field. This is a crucial step in landscape photography.
The Goal of Editing: Enhance, Not Overdo
The most effective editing philosophy is one of subtlety and enhancement. The goal isn’t to create an artificial scene but to draw out the natural beauty that was already present. Think of it as polishing a gemstone rather than creating a new one. Small, precise adjustments to light and shadows will almost always yield a more compelling and believable result than applying a heavy-handed, one-click filter that overwrites the unique qualities of your image.
Key Adjustments for Landscapes
Most editing apps, from the one built into your phone to more advanced options, share a core set of tools. Mastering these few controls will give you the power to significantly improve your landscape photos.
- Straighten and Crop: This should always be your first step. A crooked horizon is one of the most common and distracting mistakes in landscape photography. Use your app’s straightening tool to ensure the horizon is perfectly level. You can also crop the image to remove distracting elements from the edges or to strengthen your original composition, which is a key part of learning tips to take better mountains photography.
- Exposure and Contrast: Exposure controls the overall brightness of your image. If the photo is too dark or too bright, a gentle adjustment here is the solution. Contrast adjusts the difference between the darkest and brightest parts of the photo, which can add a sense of “pop” or drama to the scene.
- Highlights and Shadows: These powerful tools allow for more targeted light adjustments. Use the Highlights slider to recover details in an overexposed sky, bringing back color and texture to the clouds. Use the Shadows slider to lift the brightness in dark foreground areas, revealing details that were lost in the shade.
- Vibrancy and Saturation: Both tools increase the intensity of color, but they do so differently. Saturation boosts all colors in the image equally, which can sometimes look unnatural. Vibrancy is often a more intelligent choice; it primarily boosts the less-saturated colors while protecting skin tones and already-vivid colors from becoming overly intense.
- Sharpening: As a final step, apply a small amount of sharpening to add crispness and definition to the details in your landscape. Be careful not to overdo it, as too much sharpening can create an unnatural, gritty look with distracting halos around edges.
Powerful and User-Friendly Editing Apps
While your phone’s native editor is a great place to start, dedicated apps can unlock a new level of creative control. Here are a few highly regarded options:
- Snapseed: A free yet incredibly powerful editor from Google. Its standout feature is the “Selective” tool, which allows you to place a point on your image and adjust brightness, contrast, and saturation in that specific area without affecting the rest of the photo.
- Adobe Lightroom Mobile: The mobile version of the industry-standard desktop software. It offers professional-grade control over every aspect of your image, including selective adjustments, color grading, and cloud syncing with its desktop counterpart. Many of its core features are free to use.
- VSCO: Best known for its extensive library of beautiful, film-inspired presets. Beyond its filters, VSCO also provides a suite of high-quality, subtle editing tools that are perfect for achieving a refined and timeless aesthetic.
