Travel Photography: Maximizing your mobile device while traveling.
Capture stunning travel shots on your phone with these tips for enhancing photo quality and leveraging mobile editing tools.
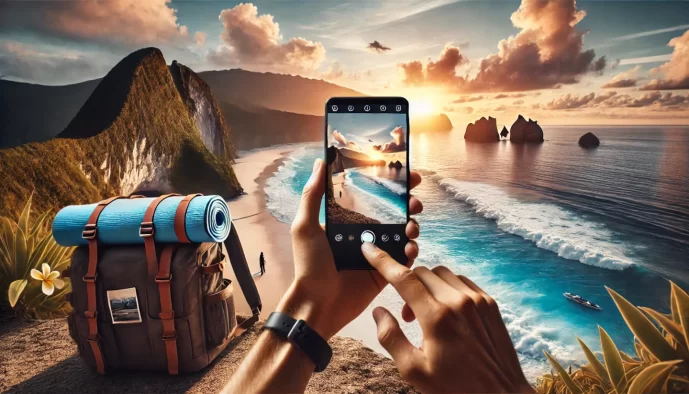
Dreaming of capturing stunning travel memories without lugging around bulky equipment? Your smartphone is likely already in your pocket, and it’s more powerful than you think! This article is your guide to unlocking the full potential of your mobile device for incredible travel photography.
We’ll dive into how to leverage the smartphone advantage, prepare your phone for optimal shooting before you even leave home, and equip you with essential composition and in-field techniques to elevate your travel snaps from ordinary to extraordinary. Get ready to transform your everyday device into your ultimate travel photography companion.
Essentials
The Smartphone Advantage for Travelers
The old adage in photography is that the best camera is the one you have with you. For the modern traveler, that camera is almost invariably the smartphone. While dedicated cameras certainly have their place, dismissing your phone as a lesser tool is a mistake. Its unique strengths make it not just a backup, but often the most practical and effective choice for capturing the spirit of your journey.
Why Your Phone is Your Best Travel Camera
Before delving into technical settings and composition, it’s worth appreciating the inherent benefits of using your mobile device. These advantages are what make smartphone photography a distinct and powerful discipline.
- Convenience and Portability: This is the most evident advantage. A smartphone fits in your pocket, requires no extra camera bag, and adds virtually no weight to your luggage. This unparalleled portability means you are always ready to capture a fleeting moment, from a sudden burst of light on a city street to an unexpected wildlife sighting on a trail.
- Discretion and Approchability: A large camera with a long lens can be intimidating, both to your subjects and to you as the photographer. It can create a barrier and make candid moments feel staged. A smartphone, by contrast, is discreet. It allows you to blend in, capturing the authentic life of a place without drawing undue attention, which is invaluable for respectful street photography and market photography.
- Instant Editing and Sharing Capabilities: The smartphone ecosystem offers a seamless workflow from capture to final product. You can take a photo, refine it using powerful, built-in or third-party editing applications, and share it with friends, family, or your online audience in a matter of minutes. This immediacy allows you to document your travels in near real-time.
Understanding and Overcoming Smartphone Limitations
To truly master your phone’s camera, it’s crucial to understand its limitations not as weaknesses, but as parameters to work within. Knowing what your phone struggles with allows you to find creative solutions and consistently produce high-quality images.
- Digital Zoom vs. Optical Zoom: This is perhaps the most critical distinction to grasp. Optical zoom uses the camera’s lens elements to magnify a scene without losing image quality. Digital zoom, on the other hand, simply crops into the image from the sensor and enlarges it, which significantly degrades sharpness and detail. The best practice is to “zoom with your feet”—physically move closer to your subject. If your phone has multiple lenses (e.g., a 2x or 5x telephoto), use these for true optical magnification rather than pinching to zoom.
- Low-Light Performance Challenges: Due to their compact size, smartphone camera sensors are much smaller than those in dedicated cameras. A smaller sensor captures less light, which can lead to grainy, blurry, or “noisy” images in dark environments. To counter this, use your phone’s dedicated Night Mode, which takes multiple exposures over a few seconds and combines them into one brighter, cleaner image. Bracing your phone on a stable surface like a ledge or a mini tripod is essential during this process to ensure sharpness.
- Sensor Size and Dynamic Range: Dynamic range refers to the camera’s ability to capture detail in both the brightest highlights and the darkest shadows of a single scene. The limited dynamic range of small sensors can cause bright skies to appear completely white (“blown out”) or deep shadows to look like black blobs with no detail. The most effective tool to combat this is your camera’s HDR (High Dynamic Range) mode. When enabled, it takes several photos at different exposures and merges them to create a single, more balanced image that retains detail across the entire tonal range.
Pre-Trip Prep: Setting Your Phone Up for Success
A successful photograph often begins long before you press the shutter. Taking a few moments to configure your smartphone and gather a few key tools can dramatically elevate the quality of your travel images. Think of it as preparing your canvas; a little groundwork ensures you’re ready to capture fleeting moments beautifully and efficiently. This is a key aspect of mastering travel photography.
Essential Native Camera Settings to Master
Before you even download a single app, exploring your phone’s built-in camera settings is the most crucial first step. These native controls are powerful and form the foundation of great mobile photography.
- Activating Grid Lines for Better Composition: This simple overlay, usually a 3×3 grid, is your single best tool for improving composition. It helps you apply principles like the Rule of Thirds, ensuring your subject is placed off-center for a more dynamic and visually appealing image. It also helps you keep your horizons perfectly straight.
- Setting Maximum Photo and Video Resolution: Your phone may default to a lower resolution to save space. Navigate to your camera settings and ensure both photos and videos are set to the highest possible quality. This gives you maximum detail, which is invaluable for printing, cropping, and editing later without a significant loss in quality.
- Understanding HDR (High Dynamic Range): HDR mode is designed for high-contrast scenes, like a bright sky over a shaded landscape. It works by taking multiple exposures at different brightness levels and merging them into a single photo that retains detail in both the darkest shadows and brightest highlights. Use it when your screen shows that either the sky is completely white or the foreground is completely black.
- Shooting in RAW/ProRAW for Maximum Flexibility: This is a transformative setting for anyone serious about editing. A standard photo (JPEG) is a compressed file where the phone has already made decisions about color, sharpening, and contrast. A RAW file, by contrast, is like a digital negative. It captures all the unprocessed image data directly from the camera’s sensor. This gives you far greater control during editing to adjust exposure, recover lost details in shadows and highlights, and fine-tune white balance with incredible precision. It’s a game-changer for achieving a professional look.
Curating Your Mobile Photography App Toolkit
While native camera apps have become incredibly capable, a curated selection of third-party applications can unlock new creative possibilities and provide finer control over your final images.
- Advanced Camera Apps: Applications like Halide (iOS) or ProCam X (Android) transform your phone into a manual camera. They provide direct control over settings like shutter speed, ISO, manual focus, and white balance, allowing you to make creative decisions that are impossible with the default app.
- Powerful Editing Suites: For post-processing, nothing beats a dedicated editing app. Adobe Lightroom Mobile offers a professional-grade toolset, including selective adjustments and cloud syncing with its desktop version. Snapseed (by Google) is another excellent, free option known for its intuitive interface and powerful features like the healing brush and selective adjustments.
- Specialty Apps: Consider adding an app for a specific purpose. For example, apps like Spectre Camera can simulate long exposures, allowing you to capture silky smooth waterfalls or light trails from traffic using just your phone. Others specialize in creating stunning time-lapses or unique lens effects.
Smart Accessories to Pack (Without the Bulk)
The goal is to enhance your phone’s capabilities without weighing down your day bag. A few small, multipurpose accessories can make a world of difference in the quality and variety of shots you can achieve. These are part of essential photography tours essentials: what to bring and how to prepare.
- Mini Tripod or Gorillapod: An absolute essential for low-light and night photography. A small, flexible tripod like a Gorillapod can wrap around railings or rest on uneven surfaces, providing the stability needed for sharp, blur-free images when using Night Mode or long exposure apps. It’s also perfect for group photos and time-lapses.
- Portable Power Bank: Photography, GPS, and sharing will drain your battery faster than you expect. A compact power bank ensures you won’t miss a shot at sunset because your phone died in the afternoon. It’s the most practical accessory a travel photographer can carry.
- Clip-On Lenses (Wide, Telephoto, Macro): While modern phones have multiple built-in lenses, high-quality clip-on lenses can still offer new perspectives. A macro lens allows for incredible close-up detail of flowers or food, while a fisheye or anamorphic lens can provide a unique, creative look. For portraits, consider the versatility of an 85mm lens.
- Bluetooth Shutter Remote: This tiny device is surprisingly useful. It allows you to trigger your camera’s shutter without touching the screen, eliminating any chance of camera shake. It’s indispensable for tripod-based shots, long exposures, and for including yourself in photos without rushing to beat a timer.
Composition and Technique in the Field
Having the right settings and apps is only the beginning. The true art of photography lies in how you see the world and frame it within your screen. A compelling photograph is rarely an accident; it’s the result of thoughtful composition and a keen awareness of your surroundings. This is where you move from taking simple snapshots to creating memorable images that tell a story. Mastering travel photography is about capturing the essence of destinations.
Mastering Foundational Composition Rules
Think of these “rules” not as rigid laws but as timeless guidelines that help create balance, interest, and flow in an image. Once you understand them, you’ll start seeing photographic opportunities everywhere.
- The Rule of Thirds: This is the cornerstone of composition. Imagine your screen is divided into nine equal segments by two vertical and two horizontal lines. The rule suggests placing your main subject or points of interest along these lines or at their intersections. This creates a more dynamic and visually engaging photo than simply centering the subject. Your phone’s grid lines are the perfect tool for practicing this.
- Leading Lines and Framing: Use elements within the scene to guide the viewer’s eye. A winding path, a coastline, a staircase, or a fence can act as a leading line, drawing attention towards your subject. Similarly, look for natural frames like an archway, a window, or the space between two trees. Framing your subject adds depth and context to the image.
- Symmetry and Patterns: The human eye is naturally drawn to symmetry and repetition. Look for them in architecture, reflections on a still lake, or the intricate patterns of floor tiles in a historic building. Centering a symmetrical subject can create a powerful, balanced, and aesthetically pleasing image, intentionally breaking the rule of thirds for great effect.
Finding Unique Perspectives
The most common travel photos are taken from a standing adult’s eye level. To make your images stand out, you need to break from this habit and explore the world from a different point of view.
- Shooting from Low and High Angles: Change your elevation. Crouch down low to the ground to make a small subject appear heroic or to capture the texture of a cobblestone street. Conversely, find a high vantage point—a balcony, a hill, or the top of a tower—to reveal the scale and geometry of a landscape or cityscape.
- Looking for Reflections: Reflections add a layer of magic and complexity to a photograph. A rain puddle can perfectly mirror a city skyline at night. A shop window can superimpose the street scene onto the display inside. Look for these opportunities in water, glass, and polished surfaces to create a more abstract and compelling shot.
- Focusing on Details and Textures: A journey is made up of small moments and details. Instead of only capturing the grand vista, zoom in on the texture of peeling paint on a door, the vibrant arrangement of spices in a market, or the intricate details of a single flower. These close-up shots add a rich, sensory dimension to your travel story. Photographing local markets is a great way to capture these details.
Harnessing the Power of Natural Light
Light is the most critical element in photography; it shapes the mood, color, and dimension of every image. Learning to see and use natural light is perhaps the single most important skill you can develop. You can learn more about how to take pictures of people in natural light when you travel.
- The Magic of Golden Hour and Blue Hour: The period shortly after sunrise and before sunset is known as the Golden Hour. The light is soft, warm, and directional, casting long, flattering shadows and bathing everything in a beautiful glow. The time just before sunrise and after sunset, the Blue Hour, provides a soft, cool, and even light with a deep blue sky, ideal for moody cityscapes and landscapes.
- Working with Harsh Midday Sun: While many photographers avoid the high, harsh sun of midday, it’s often an unavoidable reality when traveling. Instead of putting your phone away, learn to work with it. The strong light creates deep, defined shadows that can be used as powerful compositional elements. Alternatively, seek out open shade, like the side of a building or under a large tree, where the light is much softer and more flattering for portraits. You might find an 85mm lens useful for portraits in these conditions.
Tips for Low-Light and Night Photography
Modern smartphones have made incredible strides in low-light performance. Capturing the ambiance of a candlelit dinner or a city at night is more accessible than ever, but it requires a steady hand and the right technique. Understanding mobile photography techniques is key here.
- Using Your Phone’s Night Mode: Most contemporary phones have a dedicated Night Mode. When activated, the camera captures multiple frames at different exposures over several seconds and merges them into one brighter, clearer image. The key is to understand that the camera needs to be held as still as possible during this capture process, which can last from 2 to 5 seconds.
- Finding Stability for Sharp Shots: Any movement during a long exposure will result in a blurry photo. A mini tripod or a flexible Gorillapod is the best accessory for night photography. If you don’t have one, improvise. Brace your phone against a wall, a railing, a table, or even lean your body against something solid to create a stable base. Using a Bluetooth remote or the phone’s self-timer can also prevent the slight shake caused by tapping the shutter button.
Shooting Specific Travel Scenarios Like a Pro
Every travel destination presents unique photographic opportunities. From sprawling mountain ranges to bustling city streets, your smartphone is equipped to handle them all. The key is to adapt your technique to the scene in front of you. Here’s how to approach common travel scenarios and capture images with professional polish.
Capturing Expansive Landscapes and Cityscapes
Vast scenes can be challenging to fit into a single frame, but modern smartphones offer powerful tools to convey their grandeur. The goal is to translate that awe-inspiring feeling into a compelling two-dimensional image.
- Using Panorama Mode Effectively: Don’t just swipe quickly from left to right. To create a clean, high-resolution panorama, move your phone slowly and steadily. Keep the guide arrow on the line. For best results, pivot your body and arms as a single unit, keeping the phone in the same vertical plane to avoid distortion. You can also use panorama mode vertically to capture the full height of a waterfall or a skyscraper.
- Leveraging the Ultra-Wide Lens: Most contemporary phones feature an ultra-wide lens, which is perfect for exaggerating depth and including more of the scene. Get low to the ground to create dramatic leading lines with roads, rivers, or pathways. Be mindful of distortion at the edges of the frame; keep important subjects closer to the center.
- Creating a Sense of Scale: A landscape without a point of reference can feel flat. To communicate the sheer size of a mountain, canyon, or building, include a familiar object in the frame. A person, a small cabin, a car, or even a lone tree can provide the necessary context that makes the viewer appreciate the scale of the environment.
Engaging Street Photography and Portraits
Travel is as much about the people and culture as it is about the places. Your phone’s discreet nature makes it an excellent tool for capturing candid moments and intimate portraits without being intrusive.
- Using Burst Mode for Candid Moments: The decisive moment in street photography happens in a fraction of a second. By pressing and holding the shutter button, you activate Burst Mode, capturing a rapid series of photos. This greatly increases your chances of catching the perfect gesture, expression, or interaction in a busy scene. You can then review the sequence and select the single best shot.
- Mastering Portrait Mode for Professional-Looking Bokeh: Portrait Mode uses software to simulate the shallow depth-of-field effect of a professional camera, artfully blurring the background to make your subject stand out. For the most natural results, ensure there is some distance between your subject and the background. Tap on your subject’s face to lock focus and exposure, and adjust the background blur (or “f-stop”) before or after you take the shot.
A note on the ethics of street photography: Always approach your subjects with respect. In many cultures, it is considered impolite or invasive to photograph someone without their permission. A simple smile and a gesture towards your camera can go a long way. If someone indicates they do not want their picture taken, respect their wishes immediately. The goal is to document life with empathy, not to exploit it. Be a respectful observer and prioritize human dignity over getting the shot. For more on this, check out our guide on how to take pictures of people when you travel.
Documenting Food and Market Experiences
The vibrant colors of a local market or the artful presentation of a regional dish are an essential part of the travel story. Capturing food well requires an eye for light and detail.
- Finding the Best Light: Good lighting is the most crucial ingredient for great food photography. Whenever possible, sit near a window. Soft, natural, diffused light from the side will bring out the texture and colors of the food without creating harsh shadows. Avoid using your phone’s built-in flash, as it creates an unappetizing, flat look.
- The Overhead “Flat Lay” Shot: The top-down or “flat lay” perspective is popular for a reason—it’s clean, graphic, and showcases the entire tablescape. Stand up (carefully!) and hold your phone parallel to the table. Use your grid lines to ensure everything is aligned. This works wonderfully for beautifully arranged plates, coffee art, and market stalls.
- Focusing on Texture and Color: Get closer to highlight the details that make the food interesting. Focus on the glistening sauce on a pastry, the steam rising from a bowl of soup, or the vibrant arrangement of spices at a market stall. Tapping on a specific point on your screen will tell the camera exactly where to focus, drawing the viewer’s eye to the most delicious part of the scene.
Freezing Action and Conveying Movement
From a passing tuk-tuk to a soaring bird, travel is full of motion. Your phone can be used to either freeze a moment in time with perfect clarity or to creatively blur motion to convey a sense of energy.
- Using Burst Mode to Capture the Perfect Moment: Just as with street photography, Burst Mode is your best tool for freezing action. Whether it’s a jumping photo or a crashing wave, shooting a burst ensures you won’t miss the peak of the action.
- Exploring Pro Mode for Shutter Speed Control: To gain more control, switch to your camera’s Pro Mode or use a third-party app. Here, you can manually set the shutter speed. A fast shutter speed (e.g., 1/1000s) will freeze fast-moving subjects with crisp detail, perfect for sports or wildlife. A slower shutter speed will introduce motion blur.
- Creating Motion Blur with Long Exposure Apps: For artistic shots like silky smooth waterfalls or light trails from traffic at night, you’ll need a slow shutter speed. Since a phone’s native camera may not allow for very long exposures, specialty apps (like Spectre Camera or a manual camera app) are ideal. These apps digitally stack multiple images to simulate a long exposure. A mini tripod is essential here to keep the phone perfectly still and ensure the stationary parts of your image remain sharp.
The Art of Mobile Editing on the Go
The capture is only half the story. Modern mobile editing apps place a powerful darkroom directly in your hands, allowing you to refine and enhance your images moments after taking them. A thoughtful editing process can transform a good photo into a great one, bringing out the mood and details you experienced in person. The key is to develop a consistent workflow and to edit with intention, enhancing reality rather than distorting it. This is a crucial part of learning to master travel photography.
A Simple, Powerful Editing Workflow
Adopting a step-by-step process helps ensure consistency and prevents you from getting lost in the countless sliders and options. This fundamental workflow can be applied in nearly any editing app, from Snapseed to Adobe Lightroom Mobile. Understanding these basic adjustments is key to effective mobile photography.
- Step 1: Crop and Straighten. Before any other adjustment, refine your composition. Straighten a tilted horizon—this is one of the quickest ways to make a photo look more professional. Crop to remove distracting elements from the edges or to reframe your subject according to principles like the rule of thirds.
- Step 2: Adjust Exposure and Contrast. This is where you set the foundational tone of your image. Adjust the overall brightness (exposure) so the photo is not too dark or too light. Then, modify the contrast to control the difference between the darkest and brightest parts of the image. A slight increase in contrast can add depth and make a photo feel more dynamic.
- Step 3: Fine-Tune Colors and White Balance. Our phones don’t always capture colors perfectly. Use the white balance tool (often represented by a temperature slider) to correct color casts, making whites appear truly white. You can then adjust vibrance or saturation to enhance the colors. Vibrance is often the better choice, as it intelligently boosts muted colors while protecting already saturated tones and skin tones.
- Step 4: Sharpening and Noise Reduction. The final polish. Apply a subtle amount of sharpening to bring out fine details in textures and landscapes. Be careful not to overdo it, which can create a harsh, unnatural look. If your photo was taken in low light, use the noise reduction tool to smooth out any distracting graininess. A light touch is always best.
Using Presets and Filters Wisely
Presets and filters offer a convenient way to apply a specific look to your photos with a single tap. While they can be a great starting point, relying on them exclusively can lead to generic-looking images. The art lies in using them as a foundation to build upon.
- Creating a Cohesive Aesthetic for Your Trip: Applying a similar style of edit or a consistent set of presets to your travel photos can tie them together into a beautiful, coherent visual story. This gives your album or social media feed a polished and intentional feel.
- How to Customize Presets to Fit Your Photo: A preset is simply a saved collection of settings. It was created for a specific photo taken in specific light. After applying a preset, always go back and fine-tune the core settings—especially exposure and white balance—to make it perfectly suit your unique image.
- Avoiding the “Over-Edited” Look: The goal of editing is to enhance, not to overwhelm. If skin tones look unnatural, skies are an impossible shade of blue, or details have been sharpened into a crunchy texture, you have likely gone too far. Strive for a final image that is a refined, compelling version of the original scene.
Top Editing Tools Within Popular Apps
Beyond the basic sliders, professional-grade apps offer tools that give you precise control over your edits. Mastering these can elevate your mobile photography significantly.
- The Healing Brush for Removing Distractions: Found in apps like Snapseed and Adobe Lightroom Mobile, the healing or clone tool is a game-changer. It allows you to seamlessly remove unwanted objects from your photo, whether it’s a piece of litter on a pristine beach, a distracting sign, or a person who walked into your frame. This is incredibly useful when trying to master the art of invisibility in street photography.
- Selective Adjustments for Targeting Specific Areas: This powerful feature lets you apply edits to just one part of your image. You can brighten a subject’s face without overexposing the background, or add saturation to a flower without making the entire scene look artificial. It gives you the power to guide the viewer’s eye to what matters most.
- Gradient and Radial Filters for Enhancing Skies: These are specialized forms of selective adjustments. A linear or gradient filter is perfect for making changes to a sky—you can darken it, add contrast, or shift the color without affecting the landscape below. A radial filter allows you to draw a circular or oval shape to brighten a subject or create a subtle vignette effect, focusing attention on the center of the frame.
Managing, Backing Up, and Sharing Your Photos
The journey doesn’t end when you press the shutter. The final, crucial steps involve safeguarding your images and thoughtfully sharing the story you’ve captured. A little organization on the road ensures your memories are protected and presented with the care they deserve.
Keeping Your Memories Safe on the Road
There is perhaps no greater travel mishap than losing your photos. A dropped phone, a theft, or a technical glitch can wipe away your visual diary in an instant. Establishing a simple backup routine is not just a technical task; it’s an essential part of preserving your experience.
- The Importance of Regular Backups: Don’t wait until the end of your trip to back up your photos. Make it a daily or nightly ritual, especially after a significant day of shooting. The best strategy involves having your images in at least two different places—for instance, on your phone and in the cloud. This redundancy is your best insurance against loss.
- Cloud Storage Options: For travelers with reliable Wi-Fi access, cloud services are the most convenient solution. They automatically upload your photos, creating a secure, accessible copy.
- iCloud Photos: If you use Apple devices, iCloud offers seamless integration. Photos you take are automatically uploaded and synced across your iPhone, iPad, and Mac.
- Google Photos: A versatile option for both Android and iOS users, known for its powerful search capabilities. You can search for photos by location, date, or even the subjects within them (e.g., “sunsets in Lisbon”).
- Physical Backup Solutions: When traveling in areas with limited or slow internet, a physical backup is invaluable. This method gives you a tangible copy that isn’t dependent on a connection.
- Portable SSDs: A small, durable Solid State Drive (like a Samsung T7 or SanDisk Extreme Portable SSD) combined with a phone-compatible cable allows you to transfer large files quickly. They are surprisingly compact and resilient.
- SD Card Readers: A simple dongle that connects to your phone’s charging port allows you to offload photos and videos directly to an SD or microSD card, providing another layer of offline security.
Curating and Sharing Your Travel Story
Once your photos are safe, the final step is to share them. This is your opportunity to move beyond a simple “photo dump” and craft a narrative that conveys the essence of your journey. Thoughtful curation elevates your photography from a collection of snapshots to a compelling story. This ties into the broader aspects of mastering travel photography.
- Selecting Your Best Images (Quality over Quantity): Resist the urge to share everything. Review your photos and select only the most impactful ones. Ask yourself: Which image best captures the feeling of this place? Which one is technically the strongest? A small, well-chosen gallery of ten excellent photos is far more powerful than a hundred mediocre ones. Look for images that are sharp, well-composed, and emotionally resonant. Consider using a lens like the 85mm lens for stunning travel portraits to achieve this.
- Crafting Compelling Captions: A photo shows the viewer what you saw, but a caption can tell them what you felt. Share a brief anecdote about the moment, a historical fact you learned, or the name of the delicious dish you photographed. This is a key part of capturing the essence of destinations.
- Best Practices for Galleries and Social Media: Different platforms serve different purposes. Tailor your approach accordingly.
- Instagram: This is a visual-first platform. Lead with your single strongest image or create a carousel that tells a mini-story (e.g., a wide shot of a market, followed by a detail shot of a vendor, and a final shot of the local produce). Pay attention to cropping and creating a cohesive look across your feed. This is a great way to showcase street photography styles and genres.
- Blogs and Online Journals: Here, you have the space to expand your narrative. Weave your selected photos into a longer travelogue, allowing the text and images to support each other. This format is ideal for deeper storytelling, much like what you’d experience on photography tours.
- Shared Photo Galleries: For sharing with family and friends, a dedicated gallery (like a Google Photos album) is often best. You can arrange photos chronologically to guide them through your trip, adding location tags and short descriptions for context without the pressure of a public-facing post. Ensure you have your photography tour essentials sorted before you go.
