Beginner’s Photo Lighting
Master the basics of photo lighting to elevate your shots from good to great.
Ever looked at a stunning photograph and wondered how the photographer achieved that incredible depth and mood? The secret often lies in something surprisingly simple yet profoundly powerful: light. If you're just starting your photography journey and feel overwhelmed by lighting, you're in the right place. This article is designed to demystify photo lighting for beginners, helping you take control of your images.
We'll break down the fundamentals, starting with understanding the very language of light itself. Then, we'll dive into mastering natural light, your free and readily available tool, before introducing you to the exciting world of artificial light. Get ready to transform your photos from ordinary to extraordinary by learning how to shape and control light like a pro.
Essentials
Understanding the Language of Light
Why Light is the Most Important Element in Photography
Before you dive into camera settings, lenses, or editing software, you must first understand light. The word “photography” itself has roots in Greek, literally meaning “drawing with light.” This isn’t just a poetic phrase; it’s the fundamental truth of the craft. Without light, there is no photo. But more than that, the quality and direction of light are what transform a simple snapshot into a compelling image.
Light is what gives your subjects shape and form. It carves them out from the background, reveals their texture, and gives them a sense of three-dimensional depth on a two-dimensional screen. It’s also the primary tool for creating mood. The soft, warm glow of a sunrise can evoke feelings of peace and new beginnings, while harsh, dramatic shadows can create a sense of tension or mystery. Learning to see and control light is the single most important skill you can develop as a photographer. For a deeper dive into this, consider exploring Understanding Natural Light.


The Two Main Categories of Light
As a beginner, it’s helpful to break down all the light in the world into two simple categories. Every light source you ever use will fall into one of these two buckets.
- Natural Light: This is the light that occurs naturally in our environment. The most powerful and common source is, of course, the sun. But natural light also includes the soft, reflected light from the moon, the ambient glow of the sky on an overcast day, and the light that streams through a window. It is dynamic, ever-changing, and best of all, completely free.
- Artificial Light: This is any light source that you, the photographer, add to the scene. It includes everything from the pop-up flash on your camera and dedicated speedlights to studio strobes, continuous LED panels, ring lights, or even a simple household lamp. Artificial light gives you ultimate control, allowing you to create photos anytime, anywhere, regardless of the sun’s position.
Great photographers know how to master both. You’ll start by learning to see and shape the natural light around you, and as you grow, you’ll learn how to introduce artificial light to enhance a scene or create a look entirely from scratch.
Mastering Natural Light: Your Free and Powerful Tool
Before you ever think about buying a single piece of lighting equipment, the best place to start is with the most powerful, versatile, and free light source available: the sun. Learning to see and shape natural light is the single most important skill you can develop as a photographer. It teaches you the fundamentals of direction, quality, and color that apply to every type of lighting.
The Best Times of Day for Photography
The time of day you choose to shoot will dramatically alter the mood and quality of your photographs. The sun’s position in the sky changes its color, direction, and intensity, giving you a completely different palette to work with throughout the day.
Golden Hour
Often called the “magic hour” by photographers, the golden hour is the period shortly after sunrise and before sunset. During this time, the sun is low on the horizon, and its light has to travel through more of the Earth’s atmosphere, which scatters the blue light and leaves behind a warm, golden hue.
- Characteristics: The light is exceptionally soft, warm-toned, and directional. It creates long, gentle shadows that add depth and dimension to your images without being overpowering.
- Best for: This light is famously flattering for portraits, casting a beautiful, warm glow on skin. It’s also ideal for landscape photography, bathing the scenery in rich color and highlighting textures.
Blue Hour
The blue hour is the brief window of time just before the sun rises or right after it sets, when the sun is just below the horizon. The world is bathed in a cool, serene, and deeply blue ambient light.
- Characteristics: The light is very soft, even, and has a distinct cool or blue color temperature. There are no direct shadows, creating a calm and peaceful mood.
- Best for: Cityscapes truly shine during the blue hour, as the cool ambient light provides a stunning contrast to the warm, artificial lights of buildings and streets. It’s also perfect for creating moody, atmospheric landscapes.
Midday Sun
Shooting when the sun is directly overhead (typically between 10 a.m. and 2 p.m.) is often the most challenging time for a beginner. The light is strong, direct, and comes from straight above, creating harsh, unflattering shadows.
- Characteristics: Hard, high-contrast light that produces deep, well-defined shadows. On people, this can create dark shadows under the eyes and nose, often called “raccoon eyes.”
- How to manage it: Don’t just put your camera away! You have options. The best strategy is to seek open shade, like the area under a large tree or on the side of a building away from the sun. This provides soft, even light. Alternatively, you can use a diffuser to soften the direct sun on your subject. Or, you can embrace the harshness for dramatic, high-contrast photos with bold shadows and vibrant colors, which works well for certain architectural or street scenes.
Using Windows as Your First Studio Light
Indoors, a simple window is your best friend. It acts as a large, beautiful, and often diffused light source that you can use to create professional-looking portraits and still-life photos without any extra gear. The key is understanding how to position your subject in relation to it.
- Positioning your subject: How you place your subject relative to the window completely changes the look. Having them face the window provides a flat, even light that minimizes shadows and is great for a clean, simple look. Placing them side-on to the window is a classic portrait technique; it creates soft shadows that sculpt the face, revealing texture and adding a sense of depth. Finally, placing the subject between you and the window (back-lit) can create a beautiful halo of light around their hair and shoulders, or a dramatic silhouette.
- Distance from the window: The distance between your subject and the window directly impacts the light’s softness. The closer your subject is to the window, the larger and softer the light source becomes relative to them, wrapping around them gently. As you move your subject further away from the window, the light becomes harder and more even.
- The natural diffuser: If the direct sunlight coming through the window is too harsh, a simple sheer white curtain is the perfect solution. It acts as a natural diffuser, scattering the light and making it incredibly soft and flattering—exactly what a professional softbox does in a studio.
Introduction to Artificial Light
While natural light is a fantastic and versatile tool, it isn’t always available or ideal for the image you want to create. This is where artificial light comes in, giving you the power to illuminate a scene, add creative flair, and take stunning photos anytime, anywhere. Learning to use artificial light is like adding a whole new set of colors to your photographic palette.
When and Why to Use Artificial Light
Stepping into the world of artificial light opens up a universe of creative possibilities. It’s not just for professional studios; it’s a practical tool for any photographer looking to gain more control over their images. You’ll want to reach for an artificial light source in several key situations:
- When natural light is scarce: This is the most obvious reason. Shooting indoors away from windows, capturing events at night, or working in a dimly lit space all require you to bring your own light to the party.
- To fill in harsh shadows: Have you ever taken a portrait in the bright midday sun and noticed dark, unflattering shadows under the person’s eyes and nose? A gentle burst of artificial light, known as “fill light,” can soften these shadows, creating a more balanced and pleasing exposure.
- For complete creative control: Artificial light allows you to be the master of your scene. You can decide the direction, quality, and color of your light to create drama, highlight textures, or sculpt your subject in a way that simply isn’t possible when relying solely on the sun.
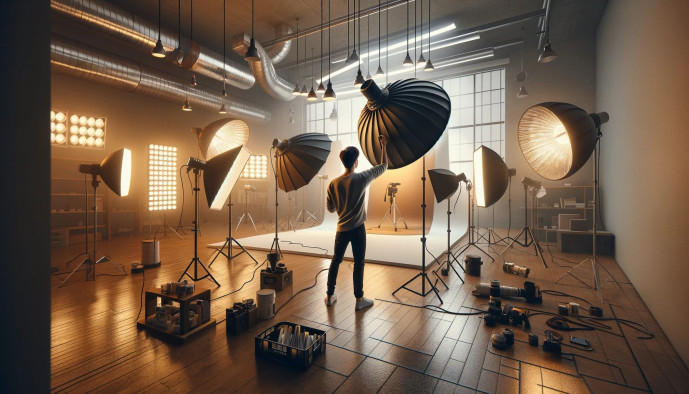
Types of Lights for Beginners
The gear for artificial lighting can seem complex, but you only need to understand a few basic types to get started. Each has its own strengths and is suited for different situations. For a deeper dive into camera equipment, check out our Camera Gear 101 for Newbies.
On-Camera Flash
This is the small flash that pops up from the top of many DSLR and mirrorless cameras. Its biggest advantage is convenience—it’s always with you. However, its direct, head-on position creates a very flat and harsh light, often resulting in the dreaded “deer in the headlights” look with stark shadows and red-eye.
Pro Tip: You can soften the light from a pop-up flash by taping a small piece of translucent material (like a piece of a milk jug or parchment paper) over it to act as a diffuser. For external flashes mounted on your camera, try pointing the flash head up at a low, white ceiling. The light will bounce off the ceiling and fall down on your subject much more softly and naturally.
Off-Camera Flash (Speedlight)
A speedlight is a portable, battery-powered flash unit that can be mounted on your camera or, more importantly, placed anywhere else. Taking the flash off the camera is a creative game-changer. By moving the light source to the side, above, or even behind your subject, you can create depth, shape, and dimension that is impossible with a head-on flash. This freedom is the first major step toward professional-looking lighting.
Continuous Light (LEDs, Ring Lights)
Unlike a flash, which produces a brief, powerful burst of light, continuous lights stay on. This category includes everything from LED panels to the popular ring lights used by vloggers and portrait photographers. The primary benefit for beginners is that what you see is what you get. As you move the light, you can see the effect on your subject in real-time, making it incredibly intuitive to learn how light and shadow work. They are a fantastic choice for video work, portraits, and tabletop product photography.
The Core Properties of Light You Must Know
Once you start seeing light, you can never unsee it. Instead of just looking at a scene, you’ll begin to analyze its light—its quality, its direction, and its color. These three properties are the fundamental building blocks that determine the entire mood and technical quality of your photograph. Understanding them is like learning the grammar of photography. To truly master these, consider diving into Beginner’s Photography 101.
Quality of Light: Hard vs. Soft
The quality of light refers to the transition between the bright, lit areas (highlights) and the dark areas (shadows). This is determined primarily by the size of the light source relative to your subject. Learning about Understanding Natural Light will help you discern these qualities.
Hard Light: This type of light comes from a small or distant light source, like the sun on a clear day or a bare flash bulb. It creates sharp, well-defined shadows and high contrast between light and dark. Hard light can feel dramatic, intense, and edgy. While it can be unflattering for conventional portraits by emphasizing skin texture, it’s perfect for creating graphic, high-impact images.
Soft Light: This light comes from a large or diffused light source, such as an overcast sky, a large window, or a flash fired through a softbox. It creates soft, gradual-edged shadows and lower contrast. Soft light wraps gently around your subject, making it incredibly flattering for portraits as it smooths textures and creates a pleasing, gentle look. You can explore this further in our guide on Continuous Lighting, which often utilizes diffused sources.
Direction of Light: Creating Mood and Dimension
Where you place your light source relative to your subject dramatically changes how the subject’s form, texture, and dimension are rendered. Moving a light just a few feet can transform a flat image into a dynamic one. This is crucial for effective Portrait Photography.
Front Lighting: When the light source is directly in front of the subject (and behind you, the photographer), it illuminates the subject evenly. This minimizes shadows and textures, which can be useful for a clean, straightforward look. However, it can also make the subject appear flat and lacking in depth.
Side Lighting: With the light source positioned to the side of your subject, you create a beautiful interplay of light and shadow. This is the key to revealing texture and creating a sense of three-dimensionality and depth. It sculpts the subject, highlighting its shape and form in a compelling way. This can also be influenced by how you use shadows, as explored in our Face Shadow Play Guide.


Backlighting: Placing the main light source behind your subject points it toward the camera. This technique can be magical, creating a bright rim of light or a “halo” effect that separates your subject from the background. If the background is much brighter than the subject, backlighting can create a powerful, dramatic silhouette.
Color of Light: White Balance and Color Temperature
Not all light is white. Light has a color, or a “color temperature,” which is measured on a scale from warm to cool. Think of the warm, golden-orange glow of a candle or a sunset, versus the cool, blueish light of a cloudy day or a scene in the shade. Our brains automatically correct for these color shifts, but your camera needs to be told what “white” looks like in a given scene. Understanding Color Theory for Photographers can deepen your appreciation for light’s color.
This is where White Balance (WB) comes in. It’s a camera setting that adjusts the color cast of your image to make the colors appear more natural. An incorrect white balance can leave your photos looking too blue or too orange. Mastering this is part of Camera Settings Mastery.
For beginners, the best way to manage this is by using your camera’s white balance presets. These are designed to neutralize the color cast from common light sources. You’ll typically find settings like:
- Auto (AWB): The camera makes its best guess, which works well in many situations.
- Daylight/Sunny: For shooting in direct, midday sunlight.
- Cloudy: For overcast days. This setting warms up the naturally cool, blue light.
- Shade: Similar to cloudy, but adds even more warmth to compensate for the very blue light found in open shade.
- Tungsten/Incandescent: For shooting indoors under standard household light bulbs, which have a very warm, orange cast. This setting adds blue to balance it.
- Fluorescent: To correct the greenish cast typical of fluorescent tube lighting.
Simple Lighting Setups to Try Today
Theory is essential, but the best way to learn is by doing. Armed with your new knowledge of light’s properties, you can now create intentional, beautiful portraits with minimal equipment. Here are two fundamental setups that photographers of all levels use every day.
The Classic One-Light Portrait
You don’t need a studio full of expensive strobes to create a dramatic and professional-looking portrait. A single light source—whether it’s a window, a lamp, or an off-camera flash—is more than enough to get started. By simply changing the position of this one light relative to your subject, you can create classic patterns that have been used by master painters for centuries.
Rembrandt Lighting
Named after the famous Dutch painter who used this style in his portraits, Rembrandt lighting is known for its moody and dramatic effect. It’s identified by a small, inverted triangle of light on the subject’s cheek that is on the less-illuminated side of the face.
- What it is: A classic portrait setup that creates a triangle of light on the cheek.
- How to achieve it: Position your single light source (like a window) approximately 45 degrees to the side of your subject and slightly above their eye level. Have your subject turn their face slightly away from the light. The shadow cast by their nose should connect with the shadow on their cheek, leaving a distinct triangle of light just below their eye.
Loop Lighting
If Rembrandt lighting feels a bit too dramatic, loop lighting is its more versatile and universally flattering cousin. It’s one of the most common lighting patterns for portraits because it provides pleasing depth and dimension without being overly intense.
- What it is: A simple, flattering setup that creates a small “loop” shaped shadow from the nose.
- How to achieve it: Start with your light in a similar position to Rembrandt lighting—about 30-45 degrees to the side—but lower it to be just slightly above eye level. This positioning creates a small shadow from the nose that points down towards the corner of the mouth, but crucially, it does not connect with the cheek shadow.
Introduction to Three-Point Lighting
As you become more comfortable, you may hear photographers talk about “three-point lighting.” While it sounds technical, it’s simply a foundational concept for understanding how different lights can work together. You don’t need to rush out and buy three lights to practice this; it’s a principle you can explore with household lamps, windows, and simple reflectors to understand how to shape a subject completely.
Three-point lighting involves three distinct roles for your light sources:
- Key Light: This is your main, and brightest, light source. It’s placed to one side of the camera and is responsible for establishing the overall look, mood, and primary shadows in your photograph. In a one-light setup, this is your only light.
- Fill Light: Placed on the opposite side of the camera from the key light, the fill light’s job is to “fill in” the dark shadows created by the key light. It should be less powerful than the key light to ensure that you maintain some dimension. For a beginner, a simple white reflector or foam board is the perfect fill light—it doesn’t produce its own light, but softly bounces light from the key light back into the shadows.
- Backlight (or Rim Light): This light is placed behind your subject, often pointing towards the back of their head or shoulders. Its purpose is to create a subtle bright outline, or “rim,” around the subject. This effect beautifully separates them from the background, adding a sense of depth and a professional polish to the final image.
Essential and Budget-Friendly Lighting Gear
Diving into the world of photo lighting doesn’t require emptying your bank account. In fact, some of the most effective tools are surprisingly simple and affordable. Before you even think about complex studio setups, mastering a few key pieces of gear will dramatically improve your photography. For a comprehensive overview of basic photography concepts, check out our Beginner’s Photography 101.
Your First and Most Important Tool: The Reflector
If you buy only one piece of lighting equipment, make it a reflector. A reflector doesn’t create light; it simply redirects existing light. Its primary job is to bounce light back onto your subject, filling in dark shadows and adding a professional-looking catchlight to the eyes. It’s a versatile and lightweight tool that gives you incredible control over both natural and artificial light. For more on how light affects your images, explore our guide to Understanding Natural Light.
Most collapsible reflectors come in a 5-in-1 package, offering different surfaces for different effects:
- White: Bounces a soft, neutral, and flattering light. It’s the most natural-looking option and is perfect for portraits.
- Silver: Bounces a brighter, more specular light. This adds more contrast and “punch” than the white surface but can be harsh if not used carefully.
- Gold: Bounces a warm, golden-toned light. It’s excellent for adding warmth to skin tones, especially during golden hour photography.
DIY Option: You don’t even need to buy one to start. A simple piece of white foam board from a craft store works beautifully as a basic reflector to bounce soft light into shadows.
The Power of Diffusion
While a reflector bounces light, a diffuser softens it. Diffusion works by spreading the light out, effectively making the light source larger relative to the subject. As we learned earlier, a larger light source creates softer light with more gradual shadows. This is the secret to getting that gentle, flattering look that is so desirable in portraiture. You can also experiment with Face Shadow Play to understand how light and shadow interact.
You’ve already encountered diffusers without even realizing it. An overcast sky is a giant diffuser for the sun. You can achieve this effect on a smaller scale with simple tools. Common examples include a purpose-built diffuser panel (often the translucent layer in a 5-in-1 reflector kit), a sheer curtain placed over a window, or a softbox that fits over a flash or LED light. For understanding how to manage light sources, consider learning about Continuous Lighting.
Your First Off-Camera Light
When you’re ready to create your own light, you don’t need a Hollywood-level budget. Moving your light source away from the camera is the single biggest step you can take to create more dynamic and professional-looking images. For a beginner, two excellent options stand out.
An affordable speedlight (an off-camera flash) is a fantastic starting point. It’s powerful, portable, and gives you the ability to freeze motion. Alternatively, a small LED panel offers continuous light, which means “what you see is what you get.” This can make learning much more intuitive because you can see exactly how the light and shadows fall on your subject in real-time before you even press the shutter. If you’re unsure about camera equipment, our Camera Gear 101 for Newbies can help.
The most important thing to remember is that you don’t need the most expensive, feature-packed model to start learning. A basic, manual-control speedlight or LED panel is more than enough to help you master the fundamentals of shaping light. Mastering these basics will help you understand the Mastering Exposure Triangle, which is crucial for any photographer.
