Camera Gear 101 for Newbies
Master the basics of cameras, lenses, and accessories with our beginner's guide.
So, you've got a shiny new camera and a burning desire to capture the world around you. But where do you even begin with all the gear out there? Don't worry, we've all been there! This guide, "Camera Gear 101 for Newbies," is designed to demystify the essential equipment you need to start your photography journey.
We'll break down the core components of your kit, from understanding your camera body to choosing your first lenses and identifying the absolute must-have accessories. Get ready to move beyond the auto mode and confidently start creating the images you envision.
Essentials
- Camera Body is Key: The camera body houses your sensor and processor, making its selection the most crucial first step for new photographers.
- DSLR vs. Mirrorless: DSLRs use a mirror for an optical viewfinder, while mirrorless cameras offer a digital preview (EVF) and are generally smaller and better for video.
- Viewfinder Differences: DSLRs provide a direct, lag-free optical view, whereas mirrorless cameras show a real-time digital preview of your settings.
- Sensor Size Matters: Larger sensors capture more light for better low-light performance and image quality, impacting cost and system size.
Understanding the Heart of Your Kit: The Camera Body
Think of the camera body as the brain of your photography operation. It houses the sensor, processor, and all the controls you’ll use to capture an image. While lenses get a lot of glory, choosing the right type of camera body is the most important first step. For a newcomer, the market is dominated by two main types: DSLR and Mirrorless.
DSLR vs. Mirrorless: The Great Debate Simplified
For decades, the DSLR was the undisputed king of serious photography. But in recent years, mirrorless cameras have surged in popularity, and now represent the cutting edge of camera technology. So, what’s the actual difference, and which one is right for you?
A DSLR (Digital Single-Lens Reflex) camera works using a mirror and a prism. When you look through the optical viewfinder, you are seeing a direct, real-life reflection of the scene through the lens. When you press the shutter button, the mirror flips up, allowing light to hit the sensor and capture the photo. This mechanical process is what gives DSLRs their classic, satisfying “clack” sound.
A Mirrorless camera, as the name suggests, gets rid of the mirror mechanism entirely. Light passes directly through the lens and onto the sensor at all times. The image is then projected onto a tiny electronic screen inside the viewfinder, called an Electronic Viewfinder (EVF). This means you see a digital preview of your shot, complete with your current settings (like exposure and white balance) applied in real-time.
Let’s break down the key differences from a beginner’s perspective:
| Feature | DSLR (Digital SLR) | Mirrorless |
|---|---|---|
| Size & Weight | Generally larger and heavier due to the internal mirror and prism mechanism. | Typically smaller, more compact, and lighter, making them easier to carry around. |
| Battery Life | Often has a much longer battery life, as the power-hungry electronic viewfinder is not always in use. | Battery life can be shorter because the sensor and electronic viewfinder/LCD screen are always on. |
| Viewfinder | An optical viewfinder shows you a true, unfiltered view through the lens. It’s clear and has no lag. | An electronic viewfinder (EVF) shows a digital preview of your final image. You see exposure changes as you make them. |
| Video Capabilities | Capable of great video, but autofocus systems can be slower and less reliable in video mode compared to mirrorless. | Generally superior for video, with faster and more accurate autofocus, plus advanced features even in entry-level models. |
The Sensor Size Question: Full-Frame vs. Crop Sensor
Inside every digital camera is a sensor. This is the electronic chip that captures the light coming through the lens to create your image—it’s the digital equivalent of a frame of film. The size of this sensor has a significant impact on image quality, cost, and the overall size of your camera system.
What is a sensor and why does it matter?
In simple terms, a larger sensor can gather more light and information. This generally translates to better performance in low-light situations (less grainy noise), and a greater ability to create that professional-looking “blurry background” effect, known as a shallow depth of field. Understanding ISO, aperture, and shutter speed is crucial for mastering these effects, which are all part of achieving proper exposure.
Full-Frame: The Professional Standard
- Pros: Superior image quality, especially in low light. Achieves a shallower depth of field more easily, which is great for portraits.
- Cons: Significantly more expensive camera bodies and lenses. The gear is also larger and heavier.
Crop Sensor (APS-C, Micro Four Thirds): The Smart Start
Crop sensor cameras have smaller sensors than their full-frame counterparts. The two most common types you’ll encounter are APS-C (used by Sony, Fujifilm, Nikon, and Canon) and the slightly smaller Micro Four Thirds (used by Panasonic and Olympus/OM System).
- Pros: Much more affordable. Cameras and lenses are smaller and lighter. The “crop factor” gives your telephoto lenses extra “reach,” which is great for wildlife or sports photography.
- Cons: Not as strong in very low-light conditions compared to full-frame. Depth of field is not as shallow.
Why a crop sensor is a great starting point for most newbies.
For someone just starting out, a crop sensor camera is almost always the best choice. The image quality from modern APS-C and Micro Four Thirds cameras is absolutely fantastic and more than enough for stunning prints and online sharing. You get a powerful, versatile system that is more affordable and portable, allowing you to invest the money you save into better lenses—which will have a bigger impact on your photos in the long run. For example, understanding the difference between a 24-70mm f/2.8 and a 24-105mm f/4 can be a key decision when building your lens collection.
Point-and-Shoot and Bridge Cameras
Before you dive into the world of interchangeable lenses, it’s worth knowing about two other categories. Point-and-Shoot cameras are simple, compact cameras with a built-in lens that cannot be changed. Bridge Cameras look like smaller DSLRs but also have a fixed lens, which typically has a massive zoom range (from very wide to extremely telephoto). This can be useful for exploring different focal lengths without the need for multiple lenses, similar to how one might explore different lens types and their uses.
These cameras can be a better choice if your absolute top priorities are simplicity, portability, and convenience. If you want better quality than your smartphone but have no desire to learn about different lenses or carry extra gear, a high-end point-and-shoot or a versatile bridge camera could be the perfect fit. They eliminate the complexity so you can focus purely on the moment.
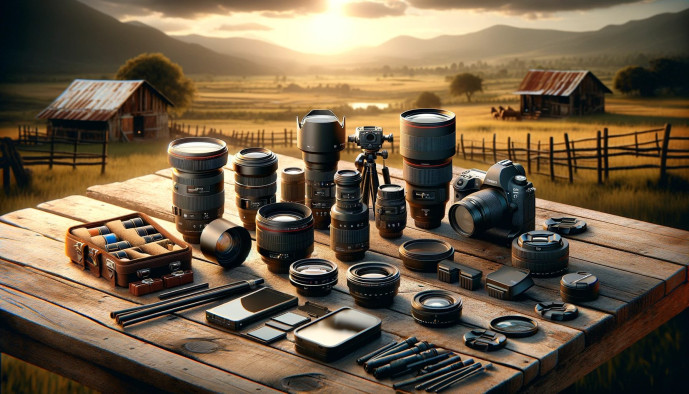
Seeing the World: Your First Lenses
If the camera body is the heart of your kit, the lens is its eye. The lens you choose has a more profound impact on the final look of your photograph than almost any other piece of gear. It dictates how much of the world you can fit into your frame and how you can isolate your subject. Let’s demystify the world of glass.
The “Kit Lens”: Your Versatile Starting Point
Most entry-level cameras are sold in a bundle with a “kit lens,” typically a standard zoom lens like an 18-55mm. It’s easy for new photographers to hear from online forums that this lens is “bad” and should be replaced immediately. We’d suggest you ignore that advice, at least for a while.
Think of the kit lens as your training wheels. It’s an incredibly versatile tool that covers a range from fairly wide-angle (18mm) to a short telephoto (55mm), perfect for portraits. By using it exclusively for a few months, you’ll learn an immense amount about focal length. You’ll discover whether you prefer shooting wide to capture big scenes or if you’re constantly “zoomed in” to isolate details. This experience is invaluable and will guide your first “real” lens purchase far better than any online review.
Prime vs. Zoom Lenses: What’s the Difference?
Lenses fall into two main categories: prime and zoom. Neither is inherently better; they are simply different tools for different jobs.
Prime Lenses
A prime lens has a fixed focal length. A 50mm lens is always a 50mm lens; you can’t twist a ring to zoom in or out. To change your composition, you have to physically move your feet—a practice that many photographers argue makes you a more thoughtful artist. So why give up the convenience of zoom?
- Image Quality: Because they are built for only one focal length, prime lenses often produce sharper, higher-quality images than a zoom lens at a similar price point.
- Wide Apertures: Primes are famous for their “fast” or “wide” apertures (the f-number, like f/1.8). This allows much more light to hit the sensor, making them fantastic for shooting in dark conditions. It’s also the secret to achieving that beautiful, creamy, out-of-focus background (known as “bokeh”) that makes your subject pop.
The undisputed king of first prime lenses is the 50mm f/1.8, affectionately known as the “Nifty Fifty.” It’s inexpensive, lightweight, and produces stunning portraits and low-light images that your kit lens simply can’t match. It’s the most recommended first lens purchase for a reason.
Zoom Lenses
A zoom lens offers a variable focal length. Your 18-55mm kit lens is a perfect example. You can stand in one spot and capture a wide landscape at 18mm and then twist the barrel to 55mm to get a tighter shot of a person.
- Versatility: The primary advantage is convenience. For travel, events, or situations where you can’t easily move around, a zoom lens ensures you can always get the shot. You can carry one lens instead of three primes.
- Drawbacks: The trade-off for this convenience is often a “slower” aperture (like f/3.5-5.6), meaning they don’t perform as well in low light. While high-end professional zoom lenses are incredibly sharp, entry-level zooms can be slightly less sharp than a comparable prime lens.
Common Lens Types and What They’re For
As you explore different lenses, you’ll hear them described by their focal length range. Here’s a simple guide to what those numbers mean in practice.
- Wide-Angle (e.g., 10-24mm): These lenses capture a very wide field of view. They are the go-to choice for sweeping landscapes, grand architectural interiors, and astrophotography where you want to capture as much of the Milky Way as possible. They can distort subjects up close, which can be a creative effect or an unwanted one, depending on your goal.
- Standard (e.g., 35mm, 50mm, 18-55mm): This range offers a perspective that feels natural and similar to what the human eye sees. It’s the most versatile category, perfect for everything from portraits and street photography to everyday snapshots of family and friends. If you could only have one lens, it would likely be in this range.
- Telephoto (e.g., 70-200mm, 55-210mm): These lenses make distant objects appear much closer. A telephoto lens is essential for sports photography from the sidelines, capturing wildlife without disturbing the animals, or getting tightly cropped portraits. They also have an effect called “compression,” which can make background elements appear larger and closer, a popular technique in landscape photography.
The Absolute Essentials: Gear You Can’t Shoot Without
Once you have your camera and a lens, you’re almost ready to go. But a few key items form the foundation of any photography kit. These aren’t flashy accessories; they’re the non-negotiable pieces of gear that make photography possible, reliable, and safe for your equipment.
Memory Cards: More Than Just Storage
Think of a memory card as the digital equivalent of a roll of film. It’s where all your precious images are stored, so choosing the right one is crucial. When you look at a memory card, you’ll see a lot of numbers, but two are most important for a beginner:
- Capacity (GB): This is the total amount of storage space, measured in gigabytes (GB). A higher number means you can store more photos and video clips. For a start, a 64GB or 128GB card is a great sweet spot, offering plenty of room without being excessively expensive.
- Speed (MB/s): This indicates how quickly the card can save (write) and access (read) data. A faster card is better for shooting in burst mode (many photos in a row) or recording high-quality video, as it prevents your camera’s buffer from filling up and slowing you down.
While you might see various card types like CFexpress or microSD, as a beginner, you will almost certainly be using SD (Secure Digital) cards. They are the standard for nearly all entry-level and mid-range cameras. Within SD cards, you’ll see two main speed classes: UHS-I and UHS-II. The simplest way to think about it is that UHS-I is perfectly fine for general photography and standard HD or 4K video. UHS-II cards are faster (you can tell by the second row of metal contact pins on the back) and are beneficial for professional-level video or very fast-action sports photography. For starting out, a good quality UHS-I card is all you need.
Finally, the most important rule of memory cards: always carry a spare. Cards can fail, get lost, or fill up unexpectedly. Having a backup in your bag is a simple, inexpensive insurance policy against a day of missed photos.
Batteries: Powering Your Creativity
There is no feeling more frustrating for a photographer than seeing a perfect shot and realizing your camera is dead. A single battery is rarely enough for a full day of shooting, especially with mirrorless cameras that rely on power-hungry electronic viewfinders and LCD screens. Having at least one fully charged backup battery is essential.
OEM vs. Third-Party Batteries
When buying a spare, you have two choices. OEM (Original Equipment Manufacturer) batteries are made by your camera’s brand (e.g., Canon, Sony, Nikon). They are guaranteed to be fully compatible and reliable, but they come at a premium price. Third-party batteries are made by other companies and are often significantly cheaper. While many are reliable, their performance can sometimes be inconsistent, offering slightly less power or longevity. A good strategy for a beginner is to use the OEM battery that came with your camera as your primary and carry a reputable third-party battery as an affordable backup.
Tips for Maximizing Battery Life
- Dim your LCD screen’s brightness.
- Set your camera to an auto-power-off timer so it doesn’t stay on when idle.
- If you have a viewfinder, use it instead of the large back screen to compose shots.
- Turn off features like Wi-Fi, Bluetooth, and GPS when you aren’t using them.
- In cold weather, keep your spare battery in a warm pocket close to your body, as cold drains batteries faster.
The Camera Bag: Protecting Your Investment
Your camera and lenses are a significant investment, and tossing them into a regular backpack is a recipe for disaster. A dedicated camera bag provides the padding and organization needed to keep your gear safe from bumps, scratches, and the elements. There are a few common styles to consider:
- Backpacks: The best choice for comfort when carrying a lot of gear or hiking. They distribute weight evenly across both shoulders.
- Shoulder/Messenger Bags: Ideal for street, travel, or event photography where you need quick and easy access to your gear without taking the bag off.
- Sling Bags: A hybrid that wears like a backpack but can be swung around to your front for fast access, offering a balance of comfort and convenience.
When choosing a bag, look for thick, adjustable padding, durable and weather-resistant materials, and comfortable straps. And a word of caution: the flimsy, unpadded bag that often comes in a “camera bundle deal” is rarely adequate. It might hold your camera, but it offers minimal protection. Investing in a quality bag from a reputable brand is one of the smartest first moves you can make to protect your new equipment for years to come.
Level Up Your Shots: Highly Recommended Accessories
Once you have the essentials covered, a few key accessories can dramatically expand your creative possibilities. These aren’t just gadgets; they are tools that solve common photographic problems and unlock new techniques that are difficult or impossible to achieve otherwise. Think of these as your next step in moving from taking snapshots to creating photographs.
Tripods: The Key to Stability
Holding your camera by hand is great for capturing fleeting moments, but for maximum sharpness and creative control, a tripod is indispensable. It’s a foundational piece of gear that allows you to control time in your images, forcing you to slow down and compose more thoughtfully.
You’ll find a tripod essential for:
- Crisp Landscapes: Especially during the golden hours of sunrise and sunset when light is low, a tripod eliminates camera shake, ensuring every detail is tack-sharp.
- Long Exposures: Want to capture silky smooth waterfalls, dreamy cloud movements, or dramatic light trails from traffic? A tripod is the only way to hold your camera perfectly still for shutter speeds lasting several seconds or even minutes.
- Self-Portraits & Group Shots: A tripod lets you get in the frame without having to find a wobbly rock or ask a stranger for help.
- Stable Video: If you plan to shoot video, a tripod is non-negotiable for smooth, professional-looking footage.
When shopping for your first tripod, consider these key features:
- Material: Aluminum is the most common choice for beginners. It’s affordable and sturdy, though it can be heavy. Carbon fiber is significantly lighter and better at absorbing vibrations, but it comes at a higher price. An aluminum tripod is a perfect starting point.
- Head Type: The head is what your camera mounts to. A ball head is fast and flexible, allowing you to reposition your camera quickly with a single knob. A pan-tilt head has separate handles for horizontal and vertical movement, offering more precise, deliberate adjustments.
- Weight Capacity: Make sure the tripod can comfortably support the weight of your camera body and your heaviest lens, with some room to spare.
For a great beginner option, look for a reputable brand like Manfrotto, Benro, or K&F Concept. You don’t need the most expensive carbon fiber model to start, but avoid the flimsy, sub-$50 plastic tripods, as they often create more problems than they solve.
Lens Filters: Your Secret Weapons
Lens filters are glass elements that screw onto the front of your lens to modify the light before it ever reaches your camera’s sensor. They are a fantastic way to achieve creative effects in-camera, saving you time in editing and producing results that software often can’t replicate.
UV/Protective Filters: The Ongoing Debate
A UV filter is a clear piece of glass meant to block ultraviolet light and, more commonly, to protect your lens’s front element from scratches, dust, and fingerprints. The debate is whether they’re truly necessary. A good quality lens hood offers excellent physical protection, and a cheap filter can slightly degrade your image quality. Our advice? If you’re shooting in a harsh environment (like a sandy beach), a high-quality UV filter can be a worthwhile piece of insurance. Otherwise, you can often go without one.
Circular Polarizer (CPL)
If you buy only one filter, make it a CPL. Think of it as a pair of polarized sunglasses for your camera. By rotating the filter, you can dramatically cut down on glare and reflections from surfaces like water and glass. It also deepens the blue in skies, adds contrast, and makes foliage look richer and more saturated. It’s a landscape and travel photographer’s best friend.


Neutral Density (ND)
An ND filter is a dark piece of glass that reduces the total amount of light entering the lens, much like very dark sunglasses. This allows you to use much slower shutter speeds than would otherwise be possible in bright conditions. It’s the key to creating motion blur effects in daylight, such as turning a cascading waterfall into a smooth, ethereal curtain or making clouds streak across the sky.


External Flash (Speedlight)
Many beginner cameras have a small pop-up flash, but you’ve likely noticed the photos it produces are often… unflattering. The light is harsh, direct, and creates strong shadows, resulting in that classic “deer-in-the-headlights” look.
An external flash, also called a speedlight, is a game-changer for indoor photography and portraits. Its single greatest feature is an articulating head that you can tilt and swivel. Instead of pointing the harsh light directly at your subject, you can point it at a neutral-colored ceiling or wall. The light bounces off that large surface and comes back down to illuminate your subject with soft, beautiful, and flattering light. This one technique instantly elevates your indoor photos from amateur to professional-looking.
Keeping It Clean: Basic Maintenance Gear
Dust, smudges, and fingerprints are an unavoidable part of photography. A stray fingerprint on your lens can soften an otherwise sharp image, and a speck of dust can show up as an annoying spot in your photos, especially in bright skies. The good news is that basic maintenance is simple and inexpensive. Treating your gear with a little care will ensure it performs its best for years to come.
Your First Cleaning Kit
You don’t need a professional, lab-grade cleaning station. A small, portable kit with a few essential items will handle virtually all of your day-to-day cleaning needs. Think of it as essential as a spare battery—it should always live in your camera bag.
Your must-have items include:
- Rocket Air Blower: This is your first line of defense. Before you ever touch the surface of your lens, a few powerful puffs of air from a blower will safely dislodge most loose dust and grit. This is critical because wiping a dusty lens can drag those abrasive particles across the glass, potentially causing micro-scratches in the lens coating.
- Microfiber Cloths: For fingerprints, water spots, and oily smudges, a good microfiber cloth is essential. Be sure to use one that is designated only for your camera lenses and keep it clean—storing it in a small plastic bag is a great idea. A dirty cloth will just smear grease around.
- Lens Pen or Brush: This is a fantastic two-in-one tool. One end has a soft, retractable brush perfect for whisking away any stubborn particles the air blower couldn’t remove. The other end has a special carbon-based cleaning tip that is incredibly effective at lifting oils and smudges without the need for any liquid solutions.
A Quick Step-by-Step on How to Safely Clean Your Lens
Follow these simple steps to get a spotless lens without risking any damage.
- Blow Before You Wipe: Always start with the rocket air blower. Hold your lens at an angle and give it several strong puffs to remove all loose dust. This is the most important step to prevent scratches.
- Brush Away Stubborn Particles: If you still see any clinging bits of dust, use the soft brush on your lens pen to gently sweep them away. Use light, delicate strokes.
- Address Smudges Last: For a fingerprint or smudge, gently breathe on the lens surface to create a light fog of condensation. Then, using either a clean microfiber cloth or the carbon tip of your lens pen, wipe in a gentle, circular pattern, starting from the center and spiraling outward. This motion pulls debris away from the center of the lens.
- Check Your Work: Hold the lens up to a light source and look at it from different angles to ensure you’ve removed all the smudges. If not, repeat the third step with a clean section of your cloth.
What to Avoid: Never use your t-shirt, a paper towel, or any kind of household cleaner (like Windex) on your lens. These materials are abrasive and the chemicals can strip the delicate, multi-layered coatings that are crucial to your lens’s image quality.
Putting It All Together: Sample Starter Kits
Feeling a bit overwhelmed by all the options? That’s completely normal. To make things easier, we’ve outlined a few sample starter kits. Think of these as templates you can adapt to fit your budget and photographic ambitions. There’s no single “perfect” kit, only the one that’s perfect for getting you started on your journey.
The “Barebones” Budget Kit
This kit is for the aspiring photographer who wants to learn the fundamentals of manual control and interchangeable lenses without breaking the bank. It proves that you don’t need the latest and greatest gear to create beautiful images. The focus here is on solid, reliable tools that will help you grow.
- The Camera: Look for a well-regarded, used DSLR like a Canon Rebel T-series or a Nikon D3xxx/D5xxx series. Alternatively, an older mirrorless model from Sony, Fujifilm, or Olympus can be a fantastic value. These cameras are workhorses and more than capable of producing professional-quality photos.
- The Lens: Your best friend here is the 18-55mm kit lens that likely comes with the camera. It covers a versatile range perfect for everything from landscapes to portraits, allowing you to experiment and discover which focal lengths you enjoy most.
- The Essentials: All you need to add is a reliable SD memory card (a 64GB card is a great start) and at least one spare battery. Running out of power or space mid-shoot is a frustration you can easily avoid.
The “Enthusiast” Starter Kit
If you have a slightly larger budget and you’re confident that photography is a hobby you want to seriously invest time in, this kit provides a bit more creative flexibility right from the start. It builds on the basics with gear that opens up new possibilities, especially in challenging lighting and for achieving that coveted blurry background.
- The Camera: A modern entry-level or mid-range mirrorless camera is a great choice. Models from the Sony a6000 series, Fujifilm’s X-Txx or X-S line, or Canon’s EOS R series (like the R10 or R50) offer excellent image quality, fast autofocus, and great video features.
- The Lenses: Start with the versatile kit lens, but immediately add a “nifty fifty” 50mm f/1.8 prime lens. This second lens will be a revelation for low-light shooting and creating portraits with beautiful background blur (bokeh), instantly elevating your photography.
- The Accessories: Invest in a good quality, sturdy tripod. It’s essential for sharp landscape photos, long exposures, and stable video. You should also get a comfortable and well-padded camera bag (a sling or small backpack) to protect your growing collection of gear.
A Note on Buying Used Gear
Let’s be clear: buying used camera gear isn’t a compromise; it’s one of the smartest things you can do as a beginner. It allows you to access higher-quality cameras and lenses that might otherwise be out of your budget. Photography equipment is built to last, and a well-cared-for camera has years of life left in it. By purchasing from a reputable source, you can get incredible value with very little risk.
Where to Look
To ensure you’re getting quality equipment that has been properly inspected, stick to trusted online retailers. Stores like MPB, KEH Camera, and the used departments of major retailers like B&H Photo Video are excellent places to start. They grade their equipment accurately, provide detailed descriptions, and often include a limited warranty for peace of mind.
What to Check For
When browsing used gear from a reputable seller, they’ve done most of the hard work for you. However, it’s still good to know what to look for in the product description:
- Camera Body: Pay attention to the shutter count, which is like the mileage on a car. Most consumer cameras are rated for 100,000 to 200,000 actuations, so a body with 20,000 clicks is still in its early life. Also, check the seller’s notes on the sensor condition and look at photos for excessive cosmetic wear.
- Lens: The most important thing is the glass. The description should confirm that the lens elements are free from major scratches, fungus, or haze. Minor dust inside the lens is common and won’t affect image quality, but avoid anything that looks like a serious internal flaw.