Capturing Wildlife with a Smartphone: Ultimate Guide from Beginner to Expert
Master the art of wildlife photography using just your smartphone with tips for beginners and pros alike. Dive in now!
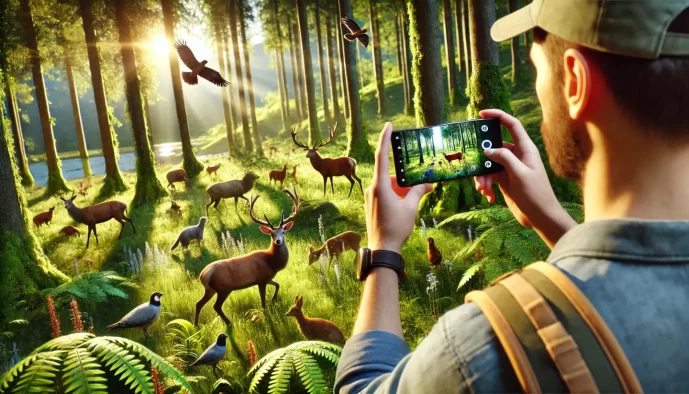
Think you need a bulky DSLR to capture stunning wildlife photos? Think again! Your smartphone, that powerful device already in your pocket, is more than capable of becoming your go-to wildlife camera. This guide is designed to help you unlock its full potential, transforming your everyday snapshots into breathtaking wildlife encounters.
Whether you're just starting or looking to refine your skills, we'll equip you with everything you need. From understanding why your phone is a formidable tool to diving into the essential beginner's toolkit and the core principles of wildlife photography, you'll learn how to get started and progress from novice to expert.
Essentials
- Smartphone Powerhouse: Your smartphone is a capable wildlife camera, shifting focus to photography skills like observation and composition over expensive gear.
- Accessibility & Spontaneity: Always having your phone ready allows you to capture fleeting wildlife encounters that would otherwise be missed.
- Stealth Advantage: Smartphones are less intimidating to wildlife than large cameras, leading to more natural and relaxed behavior for authentic shots.
- Computational Photography: Modern phones leverage advanced software to enhance image quality, balancing exposure, reducing noise, and producing sharp, vibrant results.
Why Your Smartphone is a Powerful Wildlife Camera
Before we dive into the techniques and gear, let’s address a common misconception: that you need thousands of dollars worth of camera equipment to take compelling wildlife photos. While professional DSLRs and mirrorless cameras have their advantages, the sophisticated device in your pocket is more than capable of capturing stunning images. The gap between dedicated cameras and smartphones is shrinking, and in some situations, your phone is actually the superior tool for the job. Discover the benefits of using a smartphone for street and travel photography rather than professional cameras.
The Advantage in Your Pocket
The true power of smartphone photography lies not just in its improving technology, but in its fundamental nature. It shifts the focus from technical mastery of a complex machine to the core skills of a photographer: observation, patience, and composition. Here’s why your phone is an exceptional tool for capturing the natural world.
- Accessibility and Spontaneity: The old saying, “the best camera is the one you have with you,” has never been more true. A fleeting moment—a deer stepping out of the woods at dusk, an eagle soaring overhead—won’t wait for you to assemble a heavy camera and lens. Your phone is always ready, allowing you to capture unexpected encounters that would otherwise be missed. Learn more about mobile photography for beginners and advanced photographers.
- The Stealth Factor: To wildlife, a large camera with a long, dark lens can look like a predator’s eye. It’s an intimidating object that can cause animals to flee or alter their natural behavior. A smartphone, by contrast, is a small, familiar, and non-threatening device. You can shoot more discreetly, which often allows you to capture more relaxed and authentic moments without causing stress to your subject. This is also a key aspect of street photography.
- The Rise of Computational Photography: This is the secret weapon of modern smartphones. While a phone’s sensor and lens are physically small, its powerful processor works magic behind the scenes. Computational photography uses sophisticated software to intelligently capture and merge multiple images in an instant. Features like HDR (High Dynamic Range) balance bright skies and dark shadows, while advanced noise reduction algorithms produce clean images in low light. This software-driven approach compensates for hardware limitations, producing final images that are sharp, vibrant, and rich in detail. The Xiaomi 14 Ultra is a prime example of this technology.
Getting Started: The Beginner’s Toolkit
Before you head into the wild, it’s crucial to understand the tools you have and how a few simple additions can elevate your photography. You don’t need a backpack full of expensive equipment; success begins with what’s already in your pocket and a few key, affordable accessories.
Your Phone is the Most Important Piece of Gear
The best camera is the one you have with you, and modern smartphones are more than capable of producing stunning wildlife shots. However, not all phone cameras are created equal. When evaluating your current phone or considering an upgrade, focus on the underlying technology rather than just the brand name. For a comprehensive look at what makes a good mobile camera, check out our mobile photography guide.
- A Quality Telephoto Lens: This is arguably the most critical feature for wildlife photography. A dedicated optical telephoto lens (often described as 2x, 3x, 5x, or even 10x) allows you to zoom in on distant subjects without the significant loss of quality that comes from digital zoom. It’s the key to filling your frame with the animal, not just the landscape around it. If you’re interested in telephoto capabilities, you might find our review of the Canon RF 200-800mm lens informative, though we focus on mobile here.
- Large Sensor Size: In photography, a larger sensor can capture more light. This translates to photos with more detail, better dynamic range, and less digital “noise” or graininess, especially in the challenging low-light conditions of dawn and dusk when animals are most active.
- Strong Low-Light Performance: This is a combination of a large sensor and powerful software processing. Phones with excellent low-light capabilities, often marketed as a “Night Mode,” are invaluable for capturing clear, vibrant images during the golden hours without needing a flash, which would startle wildlife. Flagship models from major manufacturers typically excel in these areas, continually pushing the boundaries of what’s possible with computational photography. The Xiaomi 14 Ultra is a prime example of a device excelling in this area.
Essential (and Affordable) Accessories
A few small investments can make a world of difference in the field, improving your image quality and allowing you to stay out longer.
- A Sturdy Tripod and Phone Mount: Hand-holding a phone, especially when zoomed in, magnifies every tiny shake, resulting in blurry photos. A lightweight but sturdy tripod eliminates this problem entirely, ensuring your shots are tack-sharp. It’s also essential for video, time-lapses, and any low-light situation.
- A Power Bank: Keeping your screen on, using GPS to navigate, and running the camera app are all major battery drains. A portable power bank is a non-negotiable accessory for any serious outing, ensuring you don’t miss a shot because your phone died. This is particularly relevant when you consider the benefits of using a smartphone for travel photography.
- A Microfiber Cloth: Your phone’s lens lives in your pocket or bag, where it collects dust, lint, and fingerprints. A quick, gentle wipe with a microfiber cloth is the simplest and most effective way to guarantee a clear, sharp photo. A smudged lens can ruin an otherwise perfect shot.
Mastering Your Native Camera App: The Basics
Before you download any fancy third-party apps, take the time to explore the powerful features already built into your phone’s standard camera app. A few simple setting adjustments can dramatically improve your results. Learning these basics is fundamental to street photography with a smartphone.
- Turn on the Grid: Dive into your camera settings and activate the gridlines (usually a 3×3 grid). This visual aid is the best way to practice composition, especially the Rule of Thirds, which involves placing your subject off-center for a more dynamic and pleasing image. Experimenting with different compositions is key to creative mobile photography.
- Set the Highest Possible Resolution: Ensure your phone is set to save photos at its maximum quality and resolution. Higher resolution gives you more data to work with, which is crucial if you need to crop the image later to bring your subject closer in the frame.
- Use Burst Mode to Capture Action: Wildlife is unpredictable. By pressing and holding the shutter button, you activate Burst Mode, which captures a rapid series of photos. This dramatically increases your chances of catching the perfect moment—a bird taking flight, a deer looking up, or a squirrel mid-leap. You can then review the sequence and save the best shot. This is invaluable for capturing dynamic wildlife photography.
- Understand HDR (High Dynamic Range): HDR mode takes several pictures at different exposures and merges them to create a single photo with a greater range of detail in both the bright highlights and dark shadows. It’s incredibly useful for scenes with high contrast, such as an animal in the shade with a bright sky behind it. However, turn it off for fast-moving subjects, as the merging process can sometimes create motion blur or “ghosting.”
Core Principles of Wildlife Photography
Before diving into advanced settings and accessories, it’s crucial to master the fundamental principles that separate a simple snapshot from a compelling photograph. These core concepts are universal, whether you’re using a top-of-the-line DSLR or the smartphone in your pocket. They are less about technology and more about your approach, your awareness, and your connection to the natural world. For those interested in the nuances of capturing nature, exploring wildlife photography can be incredibly rewarding.
The Golden Rule: Patience, Observation, and Silence
If there is one secret to successful wildlife photography, it’s this: the best shots are rarely taken in a hurry. Wild animals operate on their own time, and forcing an encounter will almost always result in a fleeting glimpse of a tail. The true art lies in becoming a quiet, unobtrusive part of the environment.
- Find a good spot and wait. Research your subject’s habitat. Where do they feed, drink, or rest? Find a comfortable, concealed location downwind from that area, settle in, and let the world come to you. The longer you remain still, the more likely animals are to forget you’re there and resume their natural behaviors. Learning about the best spots for wildlife photography can significantly improve your chances.
- Learn to anticipate behavior. Observation is your greatest tool. Watch how an animal moves. Does a bird preen its feathers right before taking flight? Does a deer flick its ears in a specific direction before walking? Recognizing these subtle cues allows you to ready your camera for the action *before* it happens.
- Move slowly and quietly. When you do need to move, do so with deliberate, slow steps. Avoid sudden movements, loud noises, and rustling clothing. Every sound and motion can signal “predator” to a wary animal, causing it to flee.
Working with Natural Light
Light is the paint with which you create your images. The quality and direction of natural light can dramatically alter the mood, color, and texture of your photograph. Understanding how to use it to your advantage is a game-changer.
- The magic of the Golden Hour. The period shortly after sunrise and before sunset is known as the “Golden Hour.” During this time, the sun is low in the sky, casting a soft, warm, and dimensional light. This light brings out rich colors and textures in an animal’s fur or feathers and creates beautiful, long shadows that add depth to your scene.
- Why to avoid harsh midday sun. When the sun is directly overhead, it creates harsh, unflattering shadows and blows out highlights, making it difficult to capture detail. Animals are also typically less active during the heat of the day, so you’ll have better luck during the cooler morning and evening hours anyway.
- Using overcast days for soft, even lighting. Don’t put your phone away on a cloudy day! The cloud cover acts like a giant softbox, diffusing the sunlight and creating soft, even light with minimal shadows. This is perfect for capturing fine details and rich, saturated colors without worrying about harsh contrast.
Nailing Focus and Stability
A blurry photo is a missed opportunity. Even the most perfectly composed, beautifully lit shot will fall flat if the subject isn’t sharp. With smartphones, camera shake is the primary enemy of sharpness, but with a few simple techniques, you can ensure your subject is crystal clear. Mastering these techniques is a key part of mobile photography.
- Tap-to-focus on the animal’s eye. In wildlife photography, the eye is almost always the most critical point of focus. It’s the window to the animal’s soul and the point of connection for the viewer. Simply tap on the animal’s eye on your screen to tell your camera exactly where you want the sharpest focus to be.
- How to lock focus and exposure (AE/AF Lock). Once you’ve tapped to focus, most camera apps allow you to press and hold that point to lock both the focus and the exposure (AE/AF Lock). This is incredibly useful. It prevents your phone from refocusing if the animal moves slightly or if the lighting changes, giving you the freedom to recompose your shot without losing your settings.
- Brace your body or use a tripod. The slightest movement of your hand can introduce blur, especially when zoomed in. To counteract this, find a way to stabilize your phone. Brace your elbows against your chest, lean against a tree or a rock, or better yet, use a tripod. A stable base is the foundation of a sharp image. If you’re considering advanced techniques, learning how to use a super telephoto lens can be beneficial, though for mobile photography, stability is key.
Intermediate Skills: Taking Control of Your Shots
You’ve mastered the basics, and now you’re ready to move beyond point-and-shoot. This is where you transition from taking snapshots to creating photographs. Taking manual control of your phone’s camera and learning the art of fieldcraft will dramatically elevate the quality and impact of your wildlife images.
Unlocking Pro Mode: Your Manual Controls
Most modern smartphones hide a powerful “Pro” or “Manual” mode within their native camera app (or accessible through a third-party app). This mode gives you direct control over the core settings that professional photographers use every day. It might seem intimidating, but understanding these four pillars will unlock a new level of creative freedom. For a deeper dive into mobile photography, check out this complete guide.
ISO: Controlling Light Sensitivity
ISO determines how sensitive your camera’s sensor is to light. A low ISO (like 100) is less sensitive, requires more light, and produces a clean, crisp image with minimal grain. A high ISO (like 1600 or 3200) is very sensitive, works well in low light, but introduces digital “noise” or graininess. For wildlife, aim to keep your ISO as low as the light allows. On a bright day, stick to ISO 100-400. As dusk approaches or you’re in a dense forest, you’ll need to increase it, but be mindful that higher ISOs can soften fine details like fur and feathers.
Shutter Speed: Freezing or Blurring Motion
Shutter speed is the length of time the camera’s sensor is exposed to light. A fast shutter speed (like 1/1000s) freezes motion, which is essential for capturing a bird in flight, a squirrel leaping between branches, or a deer flicking its ear. A slow shutter speed (like 1/15s) creates motion blur. While often used for creative effects like silky waterfalls, it can be used in wildlife photography to show the movement of an animal through its environment, but requires a very steady hand or a tripod to keep the background sharp.
White Balance: Achieving True-to-Life Colors
Our eyes automatically adjust to different light sources, but a camera needs to be told what “white” looks like. This is White Balance (WB). If your photos look too blue in the shade or too orange at sunset, your WB is off. While “Auto” mode works well most of the time, manual control allows you to fine-tune the color temperature for accuracy. Use presets like “Cloudy” or “Daylight,” or set a custom temperature (measured in Kelvin) to ensure the animal’s coat or plumage is rendered in its true, natural color.
Manual Focus: Using Focus Peaking for Precise Sharpness
While tap-to-focus is good, manual focus gives you ultimate control. This is crucial when shooting through grass or branches, as the camera’s auto-focus might mistakenly lock onto the foreground. Pro modes often include a feature called focus peaking, which highlights the sharpest areas of your image with a bright color (like red or yellow) on your screen. By sliding the manual focus control, you can watch the colored highlights move and ensure they are perfectly placed on the animal’s eye—the most critical point of focus in any wildlife portrait.
The Art of Fieldcraft: Getting Closer, Safely
The best camera skills are useless if you can’t get close enough to your subject without disturbing it. Fieldcraft is the patient, respectful art of understanding and moving through the natural world. It’s about becoming an observer, not an intruder.
- Use your vehicle as a mobile hide. Many animals, especially birds and roadside mammals, are accustomed to vehicles and see them as non-threatening objects. By staying in your car and shooting from an open window (with the engine off), you can get remarkably close without causing alarm. Rest your phone on the window frame for extra stability.
- Understand wind direction. Most mammals have a powerful sense of smell. If the wind is blowing from you towards the animal (downwind), it will scent you long before it sees you and flee. Always try to position yourself so the wind is blowing from the animal towards you (upwind) or across your path.
- Use natural cover. Your upright human silhouette is instantly recognizable and alarming to wildlife. Break up your outline by using trees, boulders, and bushes to conceal your approach. Move slowly and deliberately, pausing often to scan your surroundings. The less you look like a human, the more wildlife you’ll see.
Upgrading Your Gear: Add-on Lenses and Remotes
While not strictly necessary, a few carefully chosen accessories can extend your phone’s capabilities and help you capture shots that would otherwise be impossible. For those focused on wildlife, understanding best spots for wildlife photography is also key.
Telephoto Lenses: The Pros and Cons
Clip-on telephoto lenses are the most popular accessory for smartphone wildlife photographers. They optically magnify your subject, allowing you to fill more of the frame without relying on quality-degrading digital zoom. The pro is obvious: greater reach for shy or distant animals. The cons can include a slight loss of sharpness, particularly around the edges of the frame, and potential color fringing (chromatic aberration). High-quality lenses from reputable brands minimize these issues and are a worthwhile investment if you’re serious about getting closer. Consider exploring the capabilities of specific devices like the Xiaomi 14 Ultra to see how these lenses perform.
Macro Lenses: For the Smaller Wonders
Wildlife isn’t just about large mammals and birds. A clip-on macro lens allows your phone to focus incredibly close, revealing the intricate, hidden world of insects, spiders, frogs, and lichens. It’s a fantastic tool for exploring the biodiversity at your feet and capturing stunning, detailed images of nature’s smaller inhabitants. Learn more about macro photography with a mobile phone.
Bluetooth Shutter Remotes: For Vibration-Free Shots
When your phone is on a tripod and you’re zoomed in, even the simple act of tapping the shutter button can cause enough vibration to blur your photo. A small, inexpensive Bluetooth shutter remote solves this problem completely. It allows you to trigger the camera without touching the phone, ensuring maximum sharpness. It’s also invaluable for setting up your phone near a bird feeder or watering hole and taking pictures from a discreet distance. This is another advantage of using a smartphone for photography.
Expert Techniques: Creating Unforgettable Images
Once you’ve mastered the fundamentals, it’s time to elevate your smartphone wildlife photography from a simple snapshot to a compelling story. This is where you combine technical skill with artistic vision, moving beyond just documenting an animal to creating an image that evokes emotion and wonder. These expert techniques are your final step in transforming your phone into a true creative tool.
Advanced Composition and Storytelling
A technically perfect photo can still feel flat without strong composition. While the Rule of Thirds is an excellent starting point, truly memorable images often employ more sophisticated compositional techniques to guide the viewer’s eye and build a narrative. Learn more about creative mobile photography compositions.
- Leading Lines: Use natural elements like a winding river, a fallen log, or the curve of a shoreline to draw the viewer’s eye directly to your subject. This creates a sense of depth and journey within the frame.
- Natural Framing: Look for opportunities to frame your subject with elements in the foreground. Shooting through the branches of a tree, between two large rocks, or from inside a hollow log can add context and a sense of intimacy to the scene.
- Negative Space: Don’t be afraid of empty space. A vast, empty sky above a lone bird or a wide, calm lake with a distant swimming deer can emphasize a feeling of solitude, scale, and freedom. Negative space gives your subject room to “breathe” in the frame.
Think beyond a simple portrait and focus on capturing the “animal in its environment.” A wide shot showing a mountain goat on a precarious cliff edge tells a more complete story than a tight close-up. It provides context, illustrating the animal’s habitat and the challenges it faces, making for a much more powerful photograph.
The most engaging images often tell a story by capturing behavior. Be patient and wait for those decisive moments. A photo of a bird simply sitting on a branch is nice, but an image of it feeding its young, preening its feathers, or taking off in flight is dynamic and far more interesting. Look for interactions, foraging, grooming, or any action that reveals something about the animal’s life.
Shooting in RAW for Maximum Editing Flexibility
If you’re serious about getting the absolute best quality from your phone’s camera, shooting in RAW is non-negotiable. Many modern smartphones offer this feature in their “Pro” or “Expert” modes, and it fundamentally changes what’s possible in post-processing. For a deeper dive into mobile photography, check out this mobile photography guide.
So, what is a RAW file? Often appearing with a .DNG (Digital Negative) extension on phones, a RAW file is the unprocessed, uncompressed image data captured directly from the camera’s sensor. Think of it as a digital negative in a film camera. A standard JPEG, by contrast, is an image that your phone has already processed for you—it has applied sharpening, color adjustments, and compression, then discarded the “extra” data it deemed unnecessary.
By capturing all of that original sensor data, RAW files offer immense benefits during the editing process:
- Greater Dynamic Range: You have an incredible ability to recover details from the brightest highlights and the darkest shadows. Was the sky a bit too bright or the animal’s fur a little too dark? A RAW file gives you the data you need to balance the exposure perfectly without losing quality.
- Precise White Balance Control: Instead of being locked into the white balance your phone chose, you can adjust the color temperature and tint precisely after the fact, ensuring perfectly natural and accurate colors, no matter the lighting conditions.
- More Detailed Sharpening: Because RAW files are unsharpened, you have complete control over how much and where you apply sharpening in your editing app, resulting in cleaner, more detailed images without the “crunchy” artifacts that can appear in over-sharpened JPEGs.
Mastering Post-Processing on Your Phone
The click of the shutter is only half the creative process. Editing is where you refine your image, enhance its best qualities, and bring your artistic vision to life. Powerful desktop-grade editing apps are now available right on your phone, allowing you to perfect your shots before you even leave the field. Apps like Adobe Lightroom Mobile and Snapseed are industry standards, offering a huge range of tools from simple tweaks to advanced selective adjustments.
When editing your wildlife photos, focus on a few key adjustments that make the biggest impact:
- Cropping for Stronger Composition: Your initial framing might not be perfect. Don’t hesitate to crop your image to remove distracting elements, place your subject more effectively according to the Rule of Thirds, or create a more dramatic panoramic format.
- Selective Adjustments: This is the most powerful tool in your arsenal. Instead of brightening the entire image, use a brush or radial filter to selectively increase the exposure or shadows on just your animal subject. This makes the subject “pop” from the background and directs the viewer’s attention right where you want it.
- Sharpening the Details: A sharp photo is critical in wildlife photography. Apply a moderate amount of sharpening, paying close attention to the animal’s eyes. In most portraits, if the eyes are sharp, the entire image feels sharp and alive. Be careful not to overdo it, which can create an unnatural look.
- Noise Reduction: If you were shooting in low light with a high ISO, your photo might have some digital “noise” or graininess. Use the noise reduction tool sparingly to smooth this out, especially in the shadows and background areas. A little goes a long way.
The Ethical Wildlife Photographer’s Code
This is the most important section of this guide. While the pursuit of a stunning photograph is thrilling, it must never come at the expense of the subject’s well-being. These are not mere suggestions; they are the non-negotiable rules of responsible Wildlife Photography that apply to everyone, from the casual beginner to the seasoned expert. A great photo is a privilege, not a right, and it is never worth causing stress or harm to an animal.
The Animal’s Welfare Always Comes First
Your primary role as a wildlife photographer is that of a silent, respectful observer. The moment your presence alters an animal’s natural behavior, you have crossed a critical line. Learning to recognize the subtle (and sometimes not-so-subtle) signs of stress is an essential skill.
- Watch for Alertness: If an animal stops feeding, grooming, or resting to stare intently at you, you are too close. Its head may be raised, and its ears pointed in your direction.
- Listen for Alarms: Many birds and mammals have specific calls they use to warn others of a potential threat. If you hear them, it’s a clear signal to back away slowly.
- Look for Agitation: Pacing, circling, flattened ears, a raised tail, or ruffled feathers are all signs of discomfort and agitation.
- The “Freeze” Response: Some animals will become completely still, hoping you won’t see them. This is a stress response, not an invitation to get closer.
The golden rule is simple: if your presence causes an animal to change its behavior, you are too close. Your goal is to capture a moment of its life, not to become an intrusive part of it.
Keep a Respectful Distance
The best tool for an ethical photographer isn’t a longer lens—it’s a deep respect for an animal’s personal space. Getting too close can cause immense stress, flush birds from their nests, or separate parents from their young. This is where your smartphone’s capabilities can be a significant advantage. Use the optical telephoto lens on your phone to its full potential, and don’t be afraid to use a moderate amount of digital zoom to frame your shot. A slightly less sharp, ethically captured photo is infinitely better than a “perfect” shot that endangered the subject.
Be especially cautious around sensitive areas like nests, dens, or burrows. The presence of a predator (which is how wildlife sees you) can cause parents to abandon their young. Stay far away and use your phone’s zoom to observe from a safe, non-threatening distance.
Never Bait, Feed, or Call Wildlife
Tempting wildlife with food or using calls to attract them is a serious ethical breach. This practice fundamentally alters natural behavior and can have devastating consequences. Feeding animals habituates them to humans, which can lead to them becoming a nuisance or a danger, often resulting in the animal’s removal or destruction. It also disrupts their natural diet and foraging skills, creating an unhealthy dependency.
The ethical alternative is simple, though it requires more effort: patience. Find a promising location, make yourself comfortable and inconspicuous, and wait. The reward of capturing a truly wild and authentic moment far outweighs the hollow victory of a staged, baited shot.
Leave No Trace
Your responsibility extends beyond the animals themselves to the habitats they call home. Every environment you enter is a delicate ecosystem that deserves your respect. The principles of Leave No Trace are fundamental to ethical photography.
- Stay on Designated Trails: Venturing off-trail can damage fragile vegetation, disturb ground-nesting birds, and contribute to erosion.
- Pack It In, Pack It Out: Never leave anything behind, including food wrappers or other trash.
- Be Quiet: Loud noises disrupt the natural peace of the environment and can cause stress to wildlife over a wide area.
- Observe, Don’t Disturb: Resist the urge to “tidy up” a scene by removing a branch or leaf. Capture the environment as it is, not as you wish it to be.
By following this code, you ensure that the wild places you love and the creatures that inhabit them will remain for future generations to appreciate and photograph responsibly.
Beyond Stills: Capturing Wildlife Video
Sometimes, a still photograph can’t fully capture the magic of a moment. The gentle rustle of leaves as a deer forages, the powerful beat of an eagle’s wings, or the playful interaction between two fox cubs—these are stories best told through motion. Modern smartphones are exceptional video cameras, and adding video to your repertoire can bring the wilderness to life in an entirely new way. For those looking to get started, our mobile photography guide offers a comprehensive overview.
Setting Up for High-Quality Footage
Before you press record, a few simple settings can dramatically elevate the quality of your wildlife videos. Think of this as laying the foundation for a compelling visual story. Taking a moment to prepare ensures your footage is crisp, stable, and focused on the subject, not on your camera’s technical quirks.
- Resolution and Frame Rate: For the most detailed and cinematic results, set your phone to record in 4K at 30 frames per second (fps). This provides a beautiful, clear image with smooth, natural motion. If storage space is a concern or you plan to share primarily on social media, 1080p is still an excellent, high-definition choice.
- Lock Focus and Exposure: This is one of the most critical steps for professional-looking video. Tap and hold on your subject (ideally the animal’s eye) until you see an “AE/AF Lock” confirmation on your screen. This prevents the camera from distractingly shifting focus or suddenly changing brightness if the animal moves or the light changes slightly. It gives you, the creator, control over the shot.
The Power of Slow-Motion and Time-Lapse
Video offers creative tools that can reveal hidden aspects of animal behavior. Slow-motion and time-lapse modes transform our perception of time, allowing us to see the world from a different perspective.
Slow-motion is perfect for capturing fast action with grace and detail. By recording at a high frame rate (like 120fps or 240fps), you can slow down the footage to reveal the intricate mechanics of a bird’s wingbeat or the explosive power of a fish leaping from the water. It turns a fleeting moment into a mesmerizing ballet.
Time-lapse, on the other hand, condenses a long period into a short, dynamic clip. This is ideal for stationary scenes with gradual change. Imagine setting up your phone on a tripod overlooking a watering hole at dusk; a time-lapse could reveal the sequence of different animals that visit over an hour, telling a story of the ecosystem’s rhythm. This is a great technique for capturing the essence of a location, much like our tips for travel photography.
Tips for Smooth, Professional-Looking Video
The biggest giveaway of amateur video is shaky, erratic camera movement. The goal is to make the camera an invisible observer, and stability is the key to achieving this. Smooth, deliberate movements guide the viewer’s eye and create a more immersive and pleasant viewing experience.
- Embrace Stability: While it’s possible to handhold for a very short clip, any video longer than a few seconds will benefit immensely from stabilization. A tripod is essential for static shots, time-lapses, and long-lens filming. For shots where you need to follow a moving animal, a smartphone gimbal is a game-changer, providing fluid, cinematic motion that is impossible to replicate by hand.
- Move with Intention: Avoid jerky, rapid movements. If you need to pan the camera to follow an animal, do so slowly and steadily. Start the movement before the animal enters the frame and continue it after it leaves. This technique, known as a “deliberate pan,” feels much more polished and intentional than abruptly starting and stopping your camera movement.