ISO in Photos
Master ISO settings for optimal exposure and minimal noise in your photography.
Ever looked at a photo and wondered how the photographer captured that perfect shot, especially in challenging light? You're not alone. Understanding the technical side of photography can feel daunting, but there's one crucial element that often makes all the difference: ISO. This article, "ISO in Photos," is your visual guide to unlocking the power of ISO.
We'll demystify what those numbers really mean, how ISO fits into the essential Exposure Triangle, and most importantly, we'll show you the tangible visual impact ISO has on your images. Get ready to see your photos in a whole new light.
Essentials
- Exposure Triangle: Understanding aperture, shutter speed, and ISO is crucial for mastering camera exposure, with each element balancing the others.
- ISO's Role: ISO electronically amplifies the light signal captured by your camera's sensor, rather than controlling the physical amount of light.
- Sensitivity Control: ISO dictates how sensitive your camera's sensor is to light, making it a key tool for challenging or low-light conditions.
- Creative Tool: Increasing ISO allows for correct exposure when aperture and shutter speed adjustments are insufficient, especially for freezing fast action in dim environments.
The Exposure Triangle and ISO’s Place
Understanding the Three Pillars of Exposure
To truly master your camera, you first need to understand the concept of exposure—the total amount of light that reaches your camera’s sensor to create an image. A photo that is perfectly exposed is neither too dark (underexposed) nor too bright (overexposed). This balance is controlled by three fundamental settings known as the exposure triangle: aperture, shutter speed, and ISO. Each setting relates to the others; changing one will require you to adjust at least one of the others to maintain the same level of exposure.
A helpful way to visualize this relationship is the “bucket of water” analogy. Imagine your goal is to fill a bucket with rainwater to a specific level (a perfect exposure). You have three ways to control the process:
- Aperture is the width of the bucket’s opening. A wider opening (a low f-stop number like f/1.8) lets in more water at once.
- Shutter Speed is the amount of time you leave the bucket out in the rain. A longer time (a slow shutter speed like 1/30s) collects more water.
- ISO, in this analogy, is like the “sensitivity” of the bucket itself. A low ISO is a standard bucket. A high ISO is like having a magical bucket that multiplies every drop of water that lands inside, filling it up much faster with the same amount of rain.
Your job as a photographer is to balance these three elements to fill the bucket just right. Learning about achieving proper exposure is key to photography.
ISO as the Sensitivity Control
While aperture controls the amount of light entering the lens and shutter speed controls the duration of that light exposure, ISO functions differently. It doesn’t change the physical amount of light hitting the sensor; instead, it electronically amplifies the signal produced by the light that has already been captured. In simple terms, ISO controls how sensitive your camera’s sensor is to the light it receives. Understanding what is dual native ISO can also be beneficial.
Think of ISO as your tool for challenging light conditions. It comes into play when you’ve already adjusted your aperture and shutter speed as much as you can, or as much as you want to. For example, if you’re shooting a fast-moving subject in low light, you need a fast shutter speed to freeze the action. You might also have your aperture opened as wide as your lens allows. If the image is still too dark, your only remaining option is to increase the ISO to make the sensor more sensitive and achieve a correct exposure.
What is ISO? Demystifying the Numbers
While the concept of ISO can seem technical, understanding it is fundamental to taking creative control of your camera. It’s not just a brightness knob; it’s a powerful tool with a rich history and a direct impact on the final look and quality of your images. For a good overview of camera functions, check out our guide on Camera Anatomy & Functions.
From Film Speed to Digital Sensitivity
The term ISO originates from the days of film photography. Photographers would buy film rated at a specific “film speed,” governed by standards like ASA (American Standards Association) or DIN (from Germany). A roll of ASA 200 film was twice as sensitive to light as a roll of ASA 100 film. The ISO (International Organization for Standardization) eventually unified these systems into a single, universal standard.
In the digital world, we don’t swap film rolls, but the principle remains the same. Digital ISO refers to the sensitivity of your camera’s sensor. Technically, it’s a measure of the amplification applied to the light signal captured by the sensor. Think of it like turning up the volume on a stereo. A low ISO is like listening at a normal volume—the sound is clear and crisp. A high ISO is like cranking the volume way up; you hear the music louder, but you also start to hear a background hiss or static. This “static” in photography is what we call digital noise.
Understanding the ISO Scale
The ISO scale is standardized and easy to understand once you grasp its core principle: each step up in the main scale doubles the sensor’s sensitivity to light. This doubling corresponds to one “stop” of light in photography. To understand how ISO works with other settings, learning about the Exposure Triangle is crucial.
The ISO scale is easy to understand once you grasp its core principle: each step up in the main scale doubles the sensor’s sensitivity to light. This doubling corresponds to one “stop” of light in photography. To learn more about how this affects your images, explore our guide on Achieving Proper Exposure.
The typical ISO scale looks like this: 100, 200, 400, 800, 1600, 3200, 6400, and beyond. Changing your ISO from 100 to 200 doubles the brightness of the resulting image, assuming your aperture and shutter speed stay the same. Moving from ISO 100 to ISO 400 quadruples the brightness (+2 stops). This logarithmic progression is key to understanding how a small change in the number can have a big impact on your exposure.
| ISO Value | Increase in Light Sensitivity (Stops) |
|---|---|
| 100 | Base |
| 200 | +1 Stop (2x brighter than ISO 100) |
| 400 | +2 Stops (4x brighter than ISO 100) |
| 800 | +3 Stops (8x brighter than ISO 100) |
| 1600 | +4 Stops (16x brighter than ISO 100) |
| 3200 | +5 Stops (32x brighter than ISO 100) |
Base ISO and Native ISO
You’ll often hear photographers talk about “Base” or “Native” ISO. These terms relate to getting the absolute best quality from your camera’s sensor. For beginners, understanding how to set your camera is crucial, so we recommend starting with Beginner’s Photography 101.
- Base ISO: This is the lowest ISO setting your camera can achieve without any digital manipulation. For most cameras, this is ISO 100 or 200. At its base ISO, the sensor produces its highest quality image with the maximum dynamic range and the least amount of digital noise. Whenever light allows, shooting at your camera’s base ISO is the goal for pristine image quality. This is also a good starting point when learning about Understanding Exposure.
- Native ISO vs. Extended ISO: Native ISO refers to the range of sensitivity the sensor can achieve through hardware amplification alone. An “Extended” or “Expanded” ISO (often labeled “L” for low or “H” for high) is a software-based push. For example, an “L” setting like ISO 50 is often just the base ISO 100 image being digitally darkened, which can reduce highlight detail. High “H” settings are a software amplification of the highest native ISO, which significantly increases noise and reduces image quality. For critical work, it’s best to stick within your camera’s native ISO range. If you’re curious about a specific advanced sensor feature, you might want to learn What is Dual Native Iso ?.
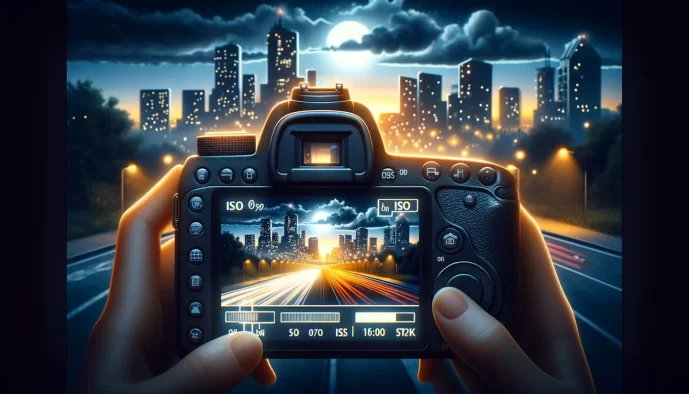
The Visual Impact of ISO on Your Photos
Understanding what ISO is numerically is one thing, but seeing its effect on your images is what truly matters. Adjusting your ISO has a direct and sometimes dramatic impact on your photo’s brightness, clarity, and overall quality. Let’s break down these visual changes.
Brightness: The Primary Effect
At its core, increasing the ISO makes your photo brighter. If your aperture and shutter speed are set, but the image is still too dark, raising the ISO is the simplest way to add light to the exposure. Think of it as digitally brightening the image as it’s being captured. Each time you double the ISO number (e.g., from 200 to 400, or 800 to 1600), you are effectively doubling the brightness of the photo.
This is incredibly useful in low-light situations where you can’t use a slower shutter speed (to avoid motion blur) or a wider aperture (as you may already be at your lens’s maximum). Mastering the exposure triangle, which includes aperture, shutter speed, and ISO, is key to achieving proper exposure.
ISO 100
(Underexposed)
ISO 1600
(Correctly Exposed)
ISO 6400
(Brightly Exposed)
Digital Noise: The Inevitable Trade-off
This increased brightness doesn’t come for free. The primary trade-off for raising your ISO is the introduction of digital noise. This is the visual distortion that appears as a grainy or speckled texture, degrading the overall sharpness and clarity of your image. It’s the digital equivalent of film grain. There are two main types of noise to be aware of:
- Luminance Noise: This is the most common type, appearing as a fine, salt-and-pepper or sandy texture across the image. It affects the brightness of pixels but not their color, making the image look grainy, similar to traditional film grain.
- Chrominance Noise: Often more distracting, this is color noise that appears as random, splotchy colored speckles (usually magenta and green) in your image, particularly noticeable in the shadow areas.
The relationship is simple: as the ISO increases, the signal from the sensor is amplified more aggressively, which also amplifies any random electronic interference, resulting in more visible noise. This is a fundamental concept for anyone starting out with photography.
100% Crop at ISO 100
(Clean and sharp)
100% Crop at ISO 12800
(Visible luminance and chrominance noise)
Dynamic Range and Color Fidelity
Beyond noise, extremely high ISO settings can also impact two other subtle but important aspects of image quality: dynamic range and color. Dynamic range refers to the camera’s ability to capture detail in both the darkest shadows and brightest highlights of a scene simultaneously. Understanding the exposure range helps in managing this.
As you push the ISO higher, the dynamic range tends to compress. This means your camera becomes less capable of retaining subtle details in the extreme ends of the tonal range. You might find that shadows become “crushed” (losing all detail to black) and highlights are more easily “blown out” (losing all detail to white). This gives you less flexibility when editing your photos, as trying to recover information from these areas can be difficult or impossible. This is why achieving proper exposure is so crucial.
Similarly, at the highest ISO levels, you may notice a slight loss in color saturation or even minor shifts in color accuracy. The colors can appear a bit muddier or less vibrant than they would at your camera’s base ISO. While modern cameras handle this exceptionally well, it’s another small compromise to be aware of when you’re forced to shoot in challenging light. Understanding white balance and color temperature can also help mitigate some of these issues.
Choosing the Right ISO: A Practical Guide
Understanding the theory is one thing, but applying it in the field is what truly matters. Your ISO choice is a constant balancing act between light, motion, and image quality. Here’s a practical breakdown of which ISO ranges to use and when.
When to Use Low ISO (100-400)
This is the ideal range for achieving the highest possible image quality. Whenever the lighting conditions permit, you should aim to keep your ISO as close to your camera’s base ISO (usually 100 or 200) as possible. This ensures maximum detail, the widest dynamic range, and virtually no digital noise.
Use a low ISO for scenarios like:
- Bright, sunny landscapes: Abundant light means you don’t need to boost the sensor’s sensitivity.
- Studio portraits: When using powerful strobes or continuous lights, you control the light, so a low ISO is standard practice.
- Architectural photography: Typically done from a tripod, allowing for longer shutter speeds instead of higher ISOs.
- Any situation where you want maximum detail and minimal noise, and can use a tripod to compensate for a slow shutter speed.
When to Use Mid-Range ISO (400-1600)
This range is your versatile workhorse for situations where the light is good, but not perfect. Modern cameras handle this range exceptionally well, producing clean images with very little noticeable noise. It gives you the flexibility to use faster shutter speeds to freeze motion or a narrower aperture for greater depth of field without needing a tripod.
Consider a mid-range ISO for scenarios like:
- Overcast days or shooting in open shade: The light is softer and less intense, requiring a slight sensitivity boost.
- Well-lit indoor events or museums: Where flash is often prohibited but there’s enough ambient light to work with.
- Street photography: When you need a faster shutter speed (like 1/250s or more) to capture fleeting moments and sharp subjects.
- Action shots in good light: Freezing the motion of a subject often requires a shutter speed that a low ISO can’t accommodate.
When to Use High ISO (1600+)
This is the realm of low-light photography. When the sun goes down, you move indoors, or you simply can’t use a flash or tripod, a high ISO becomes your most valuable tool. While it introduces digital noise, it’s the key to getting a usable, sharp photograph when the alternative is a dark, blurry mess.
Turn to a high ISO for scenarios like:
- Indoor sports or concerts: These environments are often dimly lit with fast-moving subjects, demanding both high ISO and fast shutter speeds.
- Handheld night photography: Capturing cityscapes or street scenes at night without a tripod.
- Astrophotography: To capture the faint light of stars and the Milky Way, very high ISO settings (e.g., 3200, 6400, or even higher) are essential.
- Any low-light situation where a tripod isn’t an option and you need to keep your shutter speed fast enough to avoid motion blur.
Remember the photographer’s mantra: “A noisy photo is better than a blurry photo.” A blurry image from camera shake or subject motion is almost always unusable. Digital noise, on the other hand, can be effectively reduced in post-processing. Don’t be afraid to push your ISO when necessary to get a sharp, well-exposed shot. Capturing the moment is what counts.
Advanced Tips for Managing ISO
Once you understand the fundamentals of ISO, you can begin to use it with more nuance and control. Mastering ISO isn’t just about avoiding noise; it’s about making deliberate choices to achieve your creative vision, even in challenging conditions. These advanced strategies will help you take full command of your camera’s sensitivity settings.
Know Your Camera’s Limits
One of the most important things to understand is that not all cameras handle high ISO settings equally. Performance varies significantly based on sensor size and technology. A modern full-frame camera will generally produce cleaner images at ISO 6400 than an older crop-sensor (APS-C) or Micro Four Thirds camera. This is due to larger photosites (pixels) on the sensor, which can gather more light and produce a stronger signal-to-noise ratio.
Instead of relying on online reviews, the best approach is to discover your own camera’s capabilities and your personal tolerance for noise. Here’s a simple test to find your “acceptable” ISO ceiling:
- Set up a controlled scene: Find a well-lit indoor area with a variety of colors, textures, deep shadows, and bright areas. A bookshelf or a cluttered desk works well.
- Use a tripod: Mount your camera on a tripod to eliminate any camera shake. This ensures you’re only evaluating noise, not motion blur.
- Fix your aperture and exposure mode: Switch to Aperture Priority mode (A or Av) and set a mid-range aperture like f/8.
- Take a series of shots: Start at your camera’s base ISO (e.g., 100 or 200). Take a picture. Then, double the ISO for each subsequent shot (200, 400, 800, 1600, etc.) until you reach your camera’s maximum setting. The camera will automatically adjust the shutter speed to maintain a consistent exposure.
- Review at 100%: Load the images onto your computer and view them at 100% magnification. Compare the images side-by-side. Pay close attention to the shadow areas, where noise appears first and most prominently. The point at which the grain, color splotches, and loss of detail become unacceptable to you is your personal maximum ISO.
Leveraging Auto ISO
In the past, many photographers avoided Auto ISO, but modern implementations have made it an incredibly powerful tool, especially in dynamic shooting environments. Auto ISO allows the camera to automatically adjust the sensor’s sensitivity within a range you define, ensuring a proper exposure while you concentrate on aperture and shutter speed. This is a crucial part of mastering camera settings.
This is a game-changer for event, wedding, and street photography, where light conditions can change in an instant as you move from indoors to outdoors or as clouds pass overhead. To use it effectively, you must set its boundaries:
- Setting a Maximum ISO: This is the most critical constraint. Based on the test you performed above, set the maximum allowable ISO to the highest value you find acceptable. This prevents the camera from pushing into noisy territory that you’re not comfortable with.
- Setting a Minimum Shutter Speed: This setting tells the camera when to start increasing the ISO. For example, if you set a minimum shutter speed of 1/125s, the camera will use the lowest possible ISO until the light requires a shutter speed slower than 1/125s to get a good exposure. At that point, it will begin raising the ISO to keep the shutter speed at or above your minimum, protecting your images from motion blur. Many cameras also offer an “Auto” minimum shutter speed that intelligently adjusts based on your lens’s focal length.
Post-Processing and Noise Reduction
Even when you have to push your ISO beyond your comfort zone, all is not lost. Modern post-processing software is remarkably effective at minimizing digital noise while preserving critical image detail. The key is to give the software the best possible starting point.
This is where shooting in RAW format becomes essential. A RAW file is an uncompressed, unprocessed digital negative that contains all the data captured by your camera’s sensor. A JPEG, by contrast, is a compressed file where the camera has already made decisions about sharpening, color, and noise reduction, discarding much of the original data in the process.
When you apply noise reduction to a RAW file in software like Adobe Lightroom, Capture One, or specialized tools like DxO PureRAW, the algorithms have far more information to work with. This allows for a much more sophisticated and effective reduction of both luminance and chrominance noise, resulting in a final image that is significantly cleaner and more detailed than what could be recovered from a JPEG file.