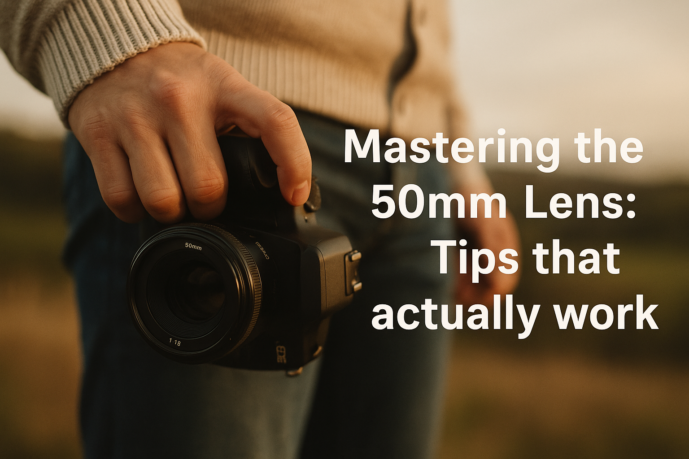
Mastering the 50mm Lens: Tips that actually work
Unlock your 50mm lens's full potential. Essential tips for stunning shots.
Essentials
Why the 50mm is a Master’s Tool, Not Just a Beginner’s Lens
Beyond the “Nifty Fifty” Nickname
For many photographers, the 50mm lens is their first foray into the world of prime lenses, earning it the affectionate but somewhat diminutive nickname, “Nifty Fifty.” It’s often recommended as an inexpensive, fast-aperture alternative to the standard 18-55mm kit lens. While it certainly serves that purpose well, this reputation sells it short. In the bags of seasoned professionals, the 50mm is not a stepping stone; it’s a destination. It’s a versatile workhorse prized for its exceptional optical quality, low-light capability, and ability to render images with a clarity and character that many zooms can’t match. From gritty street photography to polished commercial portraits, the 50mm lens is a tool for masters who value its blend of performance and simplicity.
The Power of Prime: How Constraints Breed Creativity
The biggest challenge for anyone new to a 50mm lens is the complete absence of a zoom ring. You can’t simply twist the barrel to get tighter or wider. This initial limitation, however, is the lens’s greatest strength. A fixed focal length removes a variable, forcing you to engage with your environment and subject in a more physical and deliberate way. Instead of relying on your gear, you must rely on your vision.
This constraint is a catalyst for creativity. It compels you to “zoom with your feet,” moving your body to perfect the composition. Do you step closer to create intimacy and blur the background, or do you step back to include environmental context? This constant decision-making process makes you a more thoughtful photographer, forcing you to consider perspective, angles, and subject-to-background relationships with every single shot. The reward is a deeper understanding of composition and a set of images that feel more intentional and artistically directed.
The Human Eye Perspective
There’s a fundamental reason why images from a 50mm lens feel so right: on a full-frame camera, its angle of view is approximately 46 degrees. This closely mimics the central cone of human vision—the area where we see with the most detail, excluding our peripheral vision. It doesn’t dramatically compress backgrounds like a telephoto lens, nor does it distort and stretch the edges of the frame like a wide-angle. This is why understanding prime lenses vs. zoom lenses for travel photography can be so beneficial.
This “normal” perspective is incredibly powerful. It renders the world without exaggeration, creating photos that feel honest, natural, and immediately relatable. When a viewer looks at a 50mm photograph, they feel like they are standing right where the photographer stood. This inherent lack of distortion makes it a perfect tool for authentic storytelling, allowing the subject and the composition to be the stars of the show, not the optical characteristics of the lens itself.
Foundational Techniques You Must Master First
Before you can bend the rules, you need to master them. The 50mm lens is simple in design, but its power lies in a few core principles. Nailing these fundamentals will transform your images from simple snapshots into deliberate, compelling photographs. Think of these as your non-negotiable skills for unlocking the lens’s true potential.
“Zooming with Your Feet”: The Art of Deliberate Composition
With a prime lens, the most powerful feature you have isn’t in your camera bag—it’s your own two feet. The inability to zoom forces you to become an active participant in creating your image, not just a passive observer. Moving your body is the single most critical skill for mastering the 50mm. Instead of twisting a lens barrel, you physically alter your perspective, which changes everything: the framing, the background compression, and the relationship between elements in your scene. This is a fundamental aspect of elevating your photography.
Want to create a sense of intimacy and focus on a specific detail? Step closer. This will fill the frame with your subject and naturally blur the background. Need to show your subject within their environment and give the viewer more context? Take a few steps back. This simple act of movement is the foundation of intentional composition.


Nailing Critical Focus at Wide Apertures
One of the biggest draws of a 50mm lens is its wide maximum aperture, like f/1.8 or f/1.4. This allows for beautiful background blur (bokeh) and incredible low-light performance. However, it also creates a razor-thin plane of focus. At f/1.4, the depth of field can be mere millimeters deep. If you’re shooting a portrait, you might get the tip of the nose sharp while the eyes are soft—a classic beginner mistake. Nailing critical focus is paramount.
- Use Single-Point AF on the Eye: Don’t let your camera decide where to focus. Switch to Single-Point AF mode and move that single point directly over your subject’s eye (the one closest to the camera). Many modern cameras have advanced Eye AF, which automates this and is a game-changer.
- Embrace Focus Peaking: If you enjoy manual focusing, turn on Focus Peaking. This feature highlights the in-focus areas of your image with a colored overlay (often red, yellow, or blue) on your screen or in your viewfinder, giving you a clear visual confirmation of what’s sharp.
- Use the Focus Magnifier: For static subjects, your camera’s focus magnifier is your best friend. This function lets you punch in on your live view screen to see a magnified view of your focus point, allowing you to make micro-adjustments and ensure perfect sharpness exactly where you want it.
Harnessing Depth of Field for Storytelling
Aperture on a 50mm lens isn’t just about light; it’s a primary storytelling tool. The amount of your scene that is in focus—your depth of field—directly influences what the viewer pays attention to. By consciously choosing your f-stop, you guide their eye and control the narrative of the image.
Isolating Your Subject
When you want to make your subject the undeniable hero of the photo, use a wide aperture like f/1.4, f/1.8, or f/2.8. This shallow depth of field melts the background away into a soft, creamy blur, eliminating distractions and creating a powerful sense of separation. The effect is strongest when there’s significant distance between your subject and the background. If your subject is standing right in front of a brick wall, even f/1.4 won’t blur it much. Pull them away from the wall, and you’ll create that dreamy, three-dimensional pop. This is a key difference when considering prime lenses vs. zoom lenses.
Telling a Wider Story
Sometimes, the background isn’t a distraction; it’s part of the story. For environmental portraits, street photography, or travel scenes, you often want to show where your subject is. In these cases, stop down your aperture to f/4, f/5.6, or even f/8. This increases the depth of field, bringing more of the background into focus. This technique provides context, grounding your subject in their environment and telling a much richer, more complete story than a simple headshot ever could.


Practical 50mm Applications by Genre
Theory is essential, but the true magic of the 50mm lens unfolds when you apply it in the real world. Its unique characteristics make it a surprisingly powerful tool across various photography genres, each time asking you to adapt your approach in a slightly different way. Let’s explore how to get the most out of it in four popular fields.
Portraits: From Classic Headshots to Environmental Stories
The 50mm is a legendary portrait lens for good reason. Its “normal” perspective renders faces without the significant distortion that wider lenses can introduce. However, there’s a sweet spot for distance. Get too close for a tight headshot, and you might notice slight facial feature exaggeration. Step back for a half-body or full-body portrait, and the 50mm shines, capturing your subject beautifully in relation to their surroundings.
To add professional polish, think like a director and frame your subject. Use elements in the environment as natural frames—shoot through a doorway, use overhanging branches, or capture their reflection in a window. These layers add depth and context, making the portrait feel more immersive and less like a simple snapshot.
While the allure of a blurry f/1.8 background is strong, it’s often not the best choice for a classic portrait. At such a wide aperture, the depth of field is so thin that you might get a subject’s eyelashes in focus but their ears are soft. For a more flattering and reliably sharp image, try stopping down to f/2.8 or f/4. This provides enough depth of field to get all their key facial features tack-sharp while still creating beautiful separation from the background.
Street Photography: Capturing the Candid World
For the street photographer, the 50mm lens is a perfect partner. It’s typically small, lightweight, and unobtrusive. Unlike a large, imposing zoom lens, a 50mm doesn’t scream “photographer,” allowing you to blend into the scene and capture genuine, candid moments without altering people’s behavior. Its field of view is wide enough to capture context but tight enough to isolate interesting subjects.
To catch fleeting moments, you need to be fast. This is where the zone focusing technique is invaluable. Instead of hunting for focus for every shot, you pre-set your focus to a specific distance (say, ten feet) and stop down your aperture to f/8 or f/11. This creates a deep “zone” of acceptable sharpness. Now, anything that happens within that zone can be captured instantly just by raising your camera and clicking the shutter.
As you walk, train your eye to see the geometry of the street. Use the strong diagonal of a crosswalk as a leading line to guide the viewer to a subject. Frame a person within the arch of a bridge or the reflection in a shop window. The 50mm encourages you to actively find and use these compositional elements to create more dynamic and compelling street scenes.
Food and Product Photography: Making Details Pop
You don’t always need a dedicated macro lens for stunning tabletop photography. The 50mm offers an ideal working distance for most food and product shots, letting you fill the frame without having to stand on a chair. It captures details cleanly and renders colors and textures beautifully.
The key is to use your aperture to tell a story. A wide aperture like f/2.2 can guide the viewer’s eye precisely where you want it to go. Focus on the glistening drizzle of honey on a stack of pancakes or the logo on a product, and let the surrounding elements fall into a soft, pleasing blur. This creates a sense of focus and appetite appeal that is hard to resist.
Don’t be afraid to experiment with your angles. The two most popular approaches are:
- The 45-degree shot: This mimics how you would naturally view a plate of food sitting at a table. It feels familiar, inviting, and shows off the height and texture of the dish.
- The flat lay: A direct overhead shot is perfect for showcasing a collection of items, the ingredients of a recipe, or a beautifully arranged table setting. It creates a clean, graphic, and modern look.
Low-Light Photography Without a Flash
One of the most celebrated features of a 50mm prime lens is its wide maximum aperture. An f/1.8 or f/1.4 lens can gather vastly more light than a standard kit zoom, making it a low-light powerhouse. This allows you to shoot in dimly lit environments—like cozy cafes, city streets at dusk, or candlelit rooms—without resorting to a disruptive flash.
The secret to great low-light work is not just having a fast lens, but learning to see and use available light. Look for pockets of illumination. Position your subject so they are lit by the soft glow of a streetlamp or the warm light spilling from a window. These natural sources create mood and dimension that flash photography often destroys.
Technically, it’s a balancing act. Use your widest aperture to let in the most light, but be mindful of your shutter speed. To avoid motion blur from shaky hands, try to keep it above 1/60th of a second. Brace yourself against a wall or table for extra stability. Don’t be afraid to increase your ISO; a little bit of digital grain in a modern camera is far better than a blurry, unusable photo.
Advanced Techniques to Elevate Your Images
Once you’ve mastered the fundamentals, the 50mm lens opens up a world of creative possibilities that go far beyond simple point-and-shoot photography. These advanced techniques leverage the unique characteristics of the lens to produce images with professional polish and artistic depth. If you’re looking to elevate your photography, exploring these methods is a great next step.
The Brenizer Method (Bokeh Panorama)
Have you ever wanted the wide, sweeping context of a landscape shot combined with the paper-thin depth of field of a portrait at f/1.4? The Brenizer Method, also known as a bokeh panorama, is a powerful post-production technique that makes this possible. By stitching together multiple images taken with a 50mm lens, you can create a final photograph with a field of view similar to a wide-angle lens but with the beautiful, compressed bokeh that only a longer focal length can provide. This is the secret to crafting epic, dreamy portraits where the subject is sharply in focus against a background that melts away into a swirl of color and light—a look that is physically impossible to capture in a single shot.
Here’s a simple process to try it yourself:
- Set your camera: Switch to full Manual mode (M). Set your aperture wide open (e.g., f/1.8), choose your shutter speed and ISO for a good exposure, and set your white balance manually (like “Daylight” or a specific Kelvin value). Most importantly, set your focus to manual after locking onto your subject. These settings must remain constant for all shots.
- Photograph your subject: Take the first shot, ensuring your subject is perfectly in focus. This is your anchor image.
- Shoot the panorama: Without changing your focus or settings, begin taking photos around your subject in a grid-like pattern. Overlap each frame by about 30-50%. Capture more of the scene than you think you’ll need—above, below, and to both sides of your subject.
- Stitch it together: Use software like Adobe Lightroom or Photoshop to merge the photos into a panorama. The software will align the overlapping areas and blend them into one large, high-resolution image with a uniquely shallow depth of field.
Creating Intentional and Artistic Lens Flare
While often seen as an imperfection, lens flare can be a powerful artistic tool when controlled. The 50mm lens, with its relatively simple optical design, can produce beautiful, warm flare that adds a distinct mood to your images. It can evoke feelings of nostalgia, warmth, and cinematic drama. This technique can be particularly useful when shooting during the blue hour or sunrise/sunset, where light sources are often ideal for creating such effects.
To create intentional flare, position yourself so that a strong light source, like the setting sun, is just outside the edge of your frame or partially blocked by your subject. As the light skims across the front element of your lens, it will create hazy, colorful artifacts. Experiment by slightly shifting your position or angle; small movements can dramatically change the flare’s shape, color, and intensity. Use it to add an ethereal glow to a portrait or a golden, cinematic wash over a street scene.
Layering Your Compositions with Foreground Elements
One of the most effective ways to create a sense of depth and immersion is to layer your composition. The 50mm lens excels at this. Instead of shooting your subject in open space, try shooting through something. Place an out-of-focus foreground element between you and your subject to frame them and add context. This is a great technique for mountain photography or any scene where you want to emphasize scale and distance.
Look for opportunities to shoot through foliage, a chain-link fence, a window with raindrops, or even over the shoulder of another person. Because you’ll be focused on your main subject, the wide aperture of the 50mm will render these foreground elements as soft, abstract shapes and colors. This effect not only adds visual interest but also works as a powerful compositional device, drawing the viewer’s eye directly through the blur and onto the sharp, intended subject, making the image feel more intimate and three-dimensional.
Common 50mm Pitfalls (And How to Fix Them)
The 50mm lens is incredibly rewarding, but its simplicity can also lead to a few common traps. Recognizing these pitfalls is the first step to avoiding them and consistently creating stronger images. Here’s what to watch out for and how to correct your course.
The “Stuck in the Middle” Composition
The Problem: When you can’t zoom, there’s a natural tendency to stand at a “safe” distance and simply place your subject in the dead center of the frame. This creates a static, predictable image that lacks energy and engagement. The subject often feels isolated, with too much uninteresting space around them, and the photo fails to make an impact.
The Fix: Break the habit by making a conscious choice with your feet. Instead of shooting from where you happen to be standing, actively decide on your composition.
- If you want to create intimacy, get closer. Move forward until your subject fills a significant portion of the frame. Don’t be afraid to crop tightly.
- If you want to show context, take a step back but then deliberately recompose. Use the rule of thirds, placing your subject along one of the lines or at an intersection to create a more balanced and dynamic image that guides the viewer’s eye through the scene.
Overusing f/1.8 and Getting Soft Photos
The Problem: The most exciting feature of a fast fifty is its wide-open aperture, like f/1.8 or f/1.4. The temptation is to shoot everything with that dreamy, blurry background. However, at these apertures, the depth of field is razor-thin. If you focus on a person’s eye, the tip of their nose might already be soft. A slight sway by you or your subject at the moment of capture can result in a completely missed focus and a soft, unusable photo.
The Fix: Think of f/1.8 as a specialized tool, not the default setting. For most portraits, especially when you’re starting out, stop down to f/2.2 or f/2.8. This small adjustment makes a world of difference. You still get beautiful background separation and lovely bokeh, but you gain a crucial extra sliver of sharpness. This “safety net” ensures that your subject’s key features are perfectly in focus, dramatically increasing your rate of successful, sharp images. This technique is essential for stunning travel portraits, even with a different focal length.
Forgetting to Check Your Background
The Problem: You nail the exposure, the focus is tack-sharp on the eye, and the expression is perfect. Later, you look at the photo on your computer and your heart sinks. There it is: a tree branch, a telephone pole, or a bright sign that looks like it’s growing out of your subject’s head. A distracting background can instantly ruin an otherwise flawless shot.
The Fix: Train yourself to see the entire frame, not just your subject. Before you press the shutter, take one second to consciously scan the background from corner to corner. Look for bright spots, awkward lines, or “mergers” where background objects awkwardly intersect with your subject. The solution is often incredibly simple: take a single step to the left or right. This small change in perspective can completely alter the relationship between your subject and the elements behind them, hiding distractions and creating a much cleaner, more professional image. This is a fundamental part of elevating your photography.
