Panorama Photography: Capturing and stitching panoramic images
Capturing and Stitching Panoramic Images
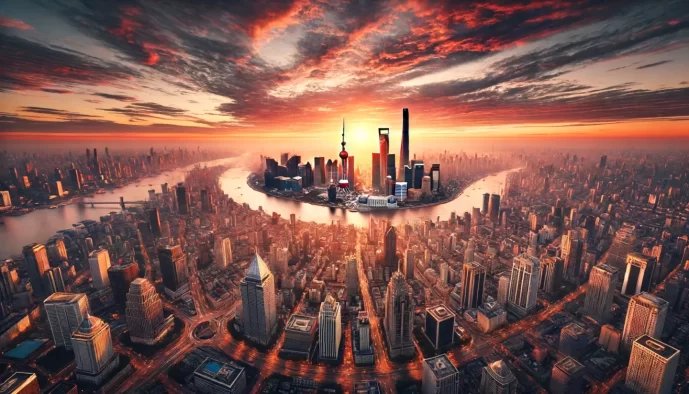
Ever found yourself gazing at a breathtaking landscape, wishing you could capture the entire sweeping vista in a single shot? That's where the magic of panorama photography comes in. This article is your comprehensive guide to mastering the art of capturing and stitching stunning panoramic images, transforming your ordinary photos into immersive visual experiences.
We'll dive into what makes a panorama so captivating, explore the essential gear that will elevate your panoramic game, and provide a practical field guide for capturing those crucial source images. Get ready to expand your photographic horizons!
Essentials
What is Panorama Photography?
The Art of the Wide View
At its core, panorama photography is the art of digitally stitching multiple individual photographs together to create a single, seamless image with a much wider field of view. Think of it as painting a scene with your camera, not in a single stroke, but by carefully capturing and combining multiple canvases to reveal the full picture.
The primary purpose of this technique is to transcend the physical limitations of your camera’s sensor and lens. It allows you to capture the breathtaking expanse of a mountain range, the sweeping curve of a coastline, or the towering height of a skyscraper-lined street—scenes that are simply too vast to fit within a single frame. The result is an image that more closely mimics the immersive experience of the human eye.
Why Shoot Panoramas?
While the wide perspective is the most obvious benefit, the reasons to create panoramic images go much deeper. It’s a technique that offers significant advantages for photographers looking to elevate their work:
- Immersive, High-Impact Images: Panoramas draw the viewer into the scene. The elongated format encourages the eye to travel across the frame, creating a dynamic and engaging experience that is perfect for dramatic landscapes and sprawling cityscapes.
- Incredible Resolution and Detail: By combining the pixel data from multiple photos, the final stitched image has a resolution far greater than any single shot. This means you can create massive, gallery-quality prints that retain stunning sharpness and intricate detail even when viewed up close.
- Enhanced Storytelling: Sometimes, a single frame can’t tell the whole story. A panorama can show the relationship between different elements in a scene—the quiet beach, the dramatic cliffs, and the storm clouds gathering on the horizon—all within one cohesive photograph, providing the full context of the moment.
Types of Panoramas
The term “panorama” can refer to several different approaches, each suited to a specific creative goal. Understanding these types will help you choose the right technique for the scene in front of you.
- Horizontal (Single-Row): This is the most classic and common type of panorama. The photographer sweeps the camera horizontally across a scene, capturing a series of overlapping images. It’s the go-to method for traditional landscapes, seascapes, and horizon lines.
- Vertical: Sometimes called a “vertorama,” this technique involves rotating the camera vertically to capture a tall subject. It’s perfect for emphasizing the height and scale of waterfalls, giant redwood trees, or architectural marvels like cathedrals and skyscrapers.
- Multi-Row / Tiled: For the ultimate in resolution and field of view, a multi-row panorama combines both horizontal and vertical sequences. By capturing a grid of images (e.g., three rows of five shots), you can create a massive, high-resolution file that feels almost like a medium-format photograph in its depth and detail.
- 360-Degree: The most complex type, a 360-degree panorama captures an entire scene in all directions, creating a fully immersive, spherical image. Often used for virtual tours and interactive media, it places the viewer directly in the center of the environment.
Essential Gear for Capturing Panoramas
While you can technically create a panorama with just a smartphone, achieving professional, high-quality results requires a more deliberate approach to your equipment. The right gear isn’t about spending a fortune; it’s about ensuring stability, control, and consistency—the three pillars of a perfect panoramic image.
The Non-Negotiables
These are the foundational pieces of equipment you absolutely need to get started. Without them, you’ll be fighting a constant battle against misaligned frames, inconsistent exposures, and blurry results.
- A Camera with Manual Mode: To ensure every frame in your panoramic sequence is perfectly consistent, you need total control over the settings. A DSLR or Mirrorless camera that allows you to manually set the focus, aperture, shutter speed, and ISO is essential. This prevents the camera from making automatic adjustments between shots, which would lead to visible banding and seams in the final stitched image.
- A Sturdy Tripod: This is the single most important piece of gear for panorama photography. A solid tripod is the absolute cornerstone of a sharp, perfectly aligned series of images. While it might be tempting to try shooting handheld, the results are almost always disappointing. Handheld shots introduce subtle shifts in position and rotation on multiple axes, making it nearly impossible for software to stitch the images without significant distortion or errors. A tripod guarantees a single, consistent plane of rotation, which is critical for a seamless final product.
- A Leveling Base or Ball Head: It’s not enough for your camera to be level; the axis of rotation must be perfectly level. If your tripod head is tilted even slightly, your camera will dip as you pan across the scene, creating a curved, distorted horizon that is difficult to correct. A leveling base, which sits between the tripod legs and the head, is the ideal tool for this. Alternatively, a high-quality ball head with a separate panning base can also work, as long as you level the panning base itself before mounting the camera.
Gear for Pro-Level Results
Once you’ve mastered the basics, this specialized equipment can elevate your panoramas from good to gallery-worthy, eliminating common frustrations and opening up new creative possibilities.
The Right Lens
It might seem counterintuitive, but you should often leave your ultra-wide-angle lens in the bag. While great for capturing a wide view in a single frame, these lenses produce significant barrel distortion, stretching and warping elements near the edges. When you try to stitch multiple distorted images together, the software has to work overtime to correct it, often resulting in strange artifacts and a loss of quality. Instead, a standard or short telephoto lens—typically in the 35mm to 85mm range on a full-frame camera—is a far better choice. These lenses render scenes with a more natural perspective and minimal distortion, leading to cleaner, more realistic, and much easier stitches.
A Panoramic Tripod Head / Nodal Slide
This is the secret weapon for flawless stitching, especially when you have objects in the foreground. A panoramic head allows you to rotate your camera around its “no-parallax point” (often called the nodal point). This is the precise optical point within the lens where light converges. When you pivot the camera around this point, the relative position of foreground and background objects remains constant. Without it, as your camera pans, a nearby tree branch might shift its position relative to a distant mountain, creating a “parallax error” that makes it impossible to stitch the two frames together without visible seams or ghosting. A nodal slide is an adjustable rail that lets you position your camera perfectly over this point, eliminating parallax and guaranteeing a perfect stitch every time.
A Remote Shutter Release or Self-Timer
Even on a sturdy tripod, the simple act of pressing the shutter button can introduce a tiny vibration that can soften your image. When you are creating a high-resolution panorama intended for large prints, every bit of sharpness counts. Using a remote shutter release (either a cable, wireless remote, or a smartphone app) allows you to trigger the camera without touching it at all. If you don’t have a remote, the camera’s built-in two-second self-timer is a perfectly effective, free alternative. This brief delay gives any vibrations time to settle before the shutter opens, ensuring maximum sharpness in every frame of your sequence.
The Field Guide: Capturing the Source Images
With your gear prepared, it’s time to move into the field. The success of your final panoramic image is almost entirely determined by the quality and consistency of your source photos. This methodical, step-by-step process ensures you capture the perfect building blocks for a seamless final stitch.
Step 1: Composition and Setup
Before you even touch your camera, take a moment to observe the scene. A great panorama isn’t just wide; it has a compelling composition that leads the viewer’s eye through the frame.
- Scout and Compose: Walk around and find the best vantage point. Mentally frame your shot, identifying the ideal starting and ending points of your sweep. Look for leading lines, a strong foreground, and a compelling subject to anchor the scene.
- Establish a Stable, Level Base: Set your tripod on the most solid ground you can find. The most critical step here is to ensure the plane of rotation is perfectly level. Don’t just level the camera itself; level the tripod base or the top of your panoramic head. An unlevel base will cause the camera to dip as it rotates, creating a curved, difficult-to-stitch panorama. Use the bubble level on your tripod or leveling base to get this perfect before mounting the camera.
- Choose Camera Orientation: Decide whether to shoot your source images in landscape (horizontal) or portrait (vertical) orientation. While shooting a wide scene horizontally seems intuitive, portrait orientation is almost always the better choice. It captures more vertical information, giving you a taller final image with more flexibility for cropping. This also helps minimize the distortion that is more pronounced at the left and right edges of a horizontal frame.
Step 2: Dialing in Manual Camera Settings
Consistency is the golden rule of capturing panoramic source images. Any automatic setting can introduce subtle (or dramatic) shifts between frames, leading to a flawed final image. This is where full manual control becomes non-negotiable.
Switch to Full Manual (M) Mode
Your camera must be in Manual (M) mode. This locks in your Aperture, Shutter Speed, and ISO, ensuring every single frame in your sequence is exposed identically.
Set Your Focus
Autofocus will try to re-focus for each shot, which can ruin a panorama. You must set your focus once and lock it in.
- Switch your lens and camera to Manual Focus (MF).
- Activate your camera’s Live View and use the digital zoom to magnify a point about one-third of the way into the deepest part of your scene.
- Carefully adjust the focus ring on your lens until this point is tack-sharp.
- Once set, do not touch the focus ring again for the entire sequence.
Set Your Exposure
Your exposure must remain constant across the entire sweep. To do this, find the brightest area of your planned panorama and set your exposure for that part of the scene. This prevents “blowing out” or losing detail in the highlights.
- Point your camera at the brightest part of your final composition (e.g., the sky with bright clouds).
- In Manual mode, set your core settings:
- Aperture: Choose a mid-range aperture like f/8 to f/11. This provides a deep depth of field, ensuring most of your scene is in sharp focus.
- ISO: Set your ISO to the lowest native value (usually 100 or 200) for maximum image quality and minimal noise.
- Shutter Speed: Adjust your shutter speed until the exposure meter indicates a correct exposure for that brightest area.
- Once these three values are locked in, they must not be changed.
Set Your White Balance
Leaving White Balance on Auto (AWB) is a common mistake. The camera may interpret color differently in each frame, especially as you pan from a warm, sunlit area to a cool, shaded one. This causes ugly color shifts in the final stitch. Avoid this by choosing a specific preset that matches the lighting conditions, such as “Daylight” or “Cloudy.”
Step 3: The Shooting Sequence
With your setup and settings locked in, you are ready to capture the images. The key here is a smooth, deliberate technique with generous overlap.
- Start the Sequence: Begin at one end of your composition (e.g., the far left). Use your remote shutter or the camera’s 2-second timer to take the first shot without introducing any shake.
- Rotate and Overlap: Smoothly rotate your camera on the tripod to the next position. The most important rule here is to ensure sufficient overlap between frames. You need to provide the stitching software with enough common data to work with. Aim for an overlap of about 30-50%.
A good way to visualize this is to look through your viewfinder or at your screen. Notice a distinct object on the far right edge of your first shot (like a tree or a rock). When you rotate for your second shot, that same object should now be on the far left, about one-third of the way into the new frame. This guarantees you have plenty of overlap.
- Repeat Across the Scene: Continue this process—shoot, rotate, overlap, shoot—until you have captured your entire desired field of view, including a little extra on both ends just in case.
- Work Smoothly and Quickly: While you want to be deliberate, you also need to work with purpose. If there are moving clouds, changing light, or waves in your scene, a faster sequence will minimize movement between frames and make for a cleaner stitch.
- Pro-Tip: Mark Your Sequence. It can be hard to find where a panoramic sequence begins and ends when you’re looking at hundreds of photos later. A simple trick is to take a photo of your hand before you start the first frame and another photo of your hand after the last frame. This creates clear visual bookends for your sequence in your photo library.
The Digital Darkroom: Stitching Your Panorama
You’ve returned from the field with a sequence of carefully captured images. Now, the digital magic begins. Stitching is the process of combining these individual frames into a single, seamless panoramic image. Modern software has made this process remarkably powerful and accessible, transforming your raw materials into a breathtaking final piece.
Choosing Your Stitching Software
The tool you choose depends on the complexity of your panorama and your desired level of control. For most photographers, the tools built into their existing workflow are more than capable.
Integrated Options
These are the most convenient choices if you already use Adobe’s photography suite. They are powerful, easy to use, and handle the vast majority of panoramas with excellent results.
- Adobe Lightroom Classic: The Photo Merge feature is incredibly intuitive. It allows you to select your images, merge them, and receive a new RAW (DNG) file back into your library, all within a non-destructive workflow. This is the recommended starting point for most photographers.
- Adobe Photoshop: The Photomerge tool (found under
File > Automate > Photomerge) offers a bit more manual control and powerful content-aware fill options for cleaning up edges. It’s a great choice if your panorama needs more complex blending or retouching.
Dedicated Professional Tools
When you encounter very complex scenes, multi-row panoramas, or need absolute precision, dedicated software offers unparalleled control.
- PTGui: Widely considered the industry standard, PTGui gives you complete control over every aspect of the stitch. You can manually add control points, fine-tune projection, and correct for lens distortion with incredible accuracy. It’s the go-to for professionals creating massive, flawless images.
- Hugin: For those seeking a powerful tool without the price tag, Hugin is a fantastic open-source alternative. It has a steeper learning curve than Lightroom but offers a deep feature set comparable to many professional applications.
A Step-by-Step Stitching Workflow in Lightroom
Lightroom Classic has streamlined the panorama process beautifully. Here’s a typical workflow that yields professional-quality results.
Import and Prepare
Before you even think about merging, a little preparation ensures a smoother stitch. Consistency is key.
- Import all the source images from your panoramic sequence into your Lightroom library.
- Select the first image in the sequence and go to the Develop module. In the “Lens Corrections” panel, check “Enable Profile Corrections” and “Remove Chromatic Aberration.”
- With that first image still selected, select all other images in the sequence. Click the “Sync…” button and ensure only “Lens Profile Corrections” and “Chromatic Aberration” are checked, then synchronize the settings. This applies the exact same correction to every frame. Do not apply any other edits like exposure changes, graduated filters, or local adjustments at this stage.
The Merge Process
With all your prepared source images still selected in the Library or Develop module, the process is straightforward:
- Right-click on any of the selected images.
- Navigate to Photo Merge > Panorama.
- Lightroom will open a new window and generate a preview of your stitched image. This may take a moment depending on the number and size of your files.
Understanding Projection Options
The dialog box gives you several “Projection” options, which determine how the flat images are mapped onto a viewing surface. Choosing the right one can prevent unwanted distortion.
- Spherical: This projection works as if you’re mapping your images onto the inside of a sphere. It’s the best choice for very wide, multi-row, or 360-degree panoramas, but it can cause straight lines to appear curved.
- Cylindrical: This is often the best all-around choice for standard, single-row horizontal panoramas. It keeps vertical lines straight while effectively handling the wide horizontal view, making it great for landscapes.
- Perspective: This projection keeps all lines straight, making it ideal for architectural photography. However, on very wide panoramas, it can severely stretch and distort the objects near the left and right edges.
Refining the Stitched Image
Before finalizing the merge, you have a few powerful tools to clean up the result:
- Boundary Warp: This incredible slider (from 0 to 100) warps and stretches the edges of the image to fill the entire rectangular frame, saving you from having to crop out significant portions of your photo. Use it to preserve as much of the original scene as possible.
- Auto Crop: If you prefer a more traditional approach, this option simply crops the image to the largest possible rectangle, removing the uneven, transparent edges.
- Once you’re satisfied with the preview, click “Merge.” Lightroom will work in the background to create a brand new, high-resolution DNG file containing all the data from your source images.
Final Touches and Edits
The newly created DNG file is not just a simple picture; it’s a fresh RAW file with immense flexibility. Now you can treat it as you would any other single photograph and begin your creative editing process.
- Final Composition: Use the crop tool to refine your final composition. The panoramic format offers many creative possibilities, from a classic letterbox look to a more balanced frame.
- Global and Local Adjustments: Now is the time to apply your edits. Adjust exposure, contrast, and color balance. Use graduated filters to enhance the sky or radial filters to draw attention to a subject. The massive resolution of the file can handle significant adjustments with grace.
- Scan for Artifacts: Finally, zoom in to 100% and carefully scan the image from one side to the other. Look closely for any small stitching errors, repeating patterns, or misalignments that the software might have missed. These can usually be fixed quickly with the Clone Stamp or Healing Brush tool.
Common Panorama Problems and Solutions
Even with careful planning, things can go wrong when shooting or stitching a panorama. Fortunately, most common issues are easily diagnosed and, more importantly, preventable. Understanding these pitfalls is the key to consistently creating flawless, high-impact panoramic images.
The Dreaded Parallax Error
This is perhaps the most frustrating technical problem in panorama photography because it can be impossible to fix in software. Parallax error occurs when objects at different distances from the camera shift their relative positions as the camera rotates.
- The Symptom: You’ll see stitching “seams” or “ghosts” that the software cannot resolve. A fence post in the foreground might appear broken, or a distant mountain peak might not align correctly with a nearby tree. The closer the foreground elements are to your lens, the more pronounced this effect will be.
- The Cause: The camera was rotated around the tripod mount instead of its “no-parallax point” (often called the nodal point). This point is the optical center of the lens. Rotating from anywhere else causes a shift in perspective between frames, confusing the stitching software.
- The Solution: The professional solution is to use a panoramic tripod head with a nodal slide. This specialized gear allows you to position your camera so it rotates precisely around the no-parallax point of your lens. If you don’t have this gear, the best workaround is to compose your panorama without any significant foreground elements close to the camera.
Banding and Exposure Mismatches
A beautifully stitched panorama can be ruined by obvious vertical bands of varying brightness or color, especially noticeable in smooth gradients like a clear blue sky or calm water.
- The Symptom: The final image has visible vertical strips where each source photo was joined. One section of the sky might be slightly darker or warmer in tone than the one next to it, creating an unnatural, patchwork effect.
- The Cause: This is almost always caused by using an automatic camera setting. If your camera is in Aperture Priority, it will adjust the shutter speed for each frame based on the light it meters. If you use Auto White Balance (AWB), it will recalculate the color temperature for each shot. These subtle changes become jarringly obvious when stitched together.
- The Solution: This problem is 100% preventable in the field. Always shoot in full Manual (M) mode. Set your aperture, shutter speed, ISO, and a specific White Balance preset (like Daylight or Cloudy) before you take the first shot, and do not change them for the entire sequence.
Ghosting and Moving Objects
Landscapes are rarely static. People walk, cars drive, and waves crash. Any movement between your frames can create strange and distracting artifacts in the final stitched image.
- The Symptom: Objects that moved during your shooting sequence may appear transparent, duplicated, or bizarrely cut in half. You might see a “ghost” of a person, a car that’s stretched or has two fronts, or a choppy, unnatural pattern in moving water.
- The Cause: The subject was in one position in the overlapping area of frame one, and a different position in the overlapping area of frame two. The stitching algorithm tries to merge both, resulting in these visual glitches.
- The Solution: You have a few options. The simplest is to work quickly to minimize the time for subjects to move significantly. You can also wait for a lull in the action before starting your sequence. For a more advanced fix, you can address it in post-processing. After stitching the panorama, open the result in Photoshop and layer one of the original source files on top. By using a layer mask, you can paint in the “correct” version of the moving object from the single best frame, effectively hiding the ghosted artifact.
