Photography Tours 101: A Step-by-Step Guide to Getting Started
Discover essential tips and steps to kickstart your photography tour journey, from gear selection to planning your route.
Dreaming of capturing breathtaking landscapes and vibrant street scenes, but don't know where to start? Photography tours offer an incredible opportunity to hone your skills, discover new destinations, and connect with fellow shutterbugs. If you've ever wondered how to get started with photography tours, you've landed in the perfect spot.
This comprehensive guide, "Photography Tours 101," is designed to demystify the world of organized photography adventures. We'll walk you through everything from understanding what a photography tour entails and why it's a game-changer for your photographic journey, to the crucial steps of selecting the ideal tour and packing the essential gear to make your trip a resounding success.
Essentials
What is a Photography Tour (and Why You Should Go on One)
Defining the Photography Tour Experience
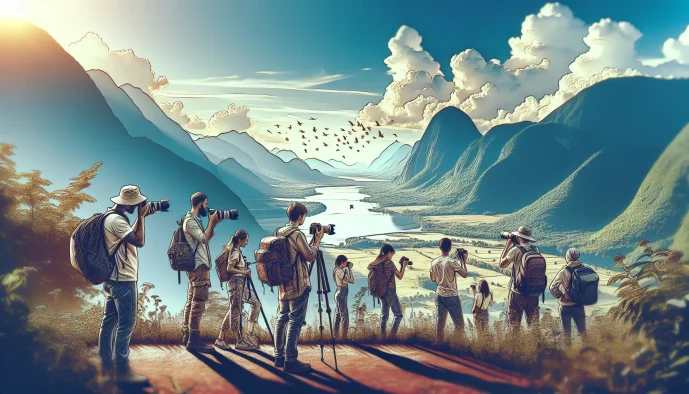
Many of us have taken a vacation with a camera in hand, snapping pictures of landmarks and moments as they happen. A photography tour, however, is a fundamentally different endeavor. It’s not simply a trip where you happen to take photos; it is an immersive experience where photography is the central purpose. The entire itinerary is designed around capturing compelling images.
Unlike a standard holiday, a photography tour prioritizes learning and practice. Every aspect, from the timing of excursions to the choice of accommodation, is meticulously planned to place you in the right location at the perfect moment. This means dedicated, unhurried time for your craft, free from the compromises of a typical travel schedule. The focus shifts from merely seeing a place to truly observing it and translating that vision into a powerful photograph.
At the heart of this experience is the tour leader—an expert guide who is also a professional photographer. Their role extends far beyond logistics. They provide in-the-field instruction, offer creative insights, share their deep knowledge of the location, and help you navigate technical challenges, ensuring you return not just with beautiful images, but with enhanced skills and a refined artistic eye.
Key Benefits for Aspiring Photographers
Joining a photography tour is an investment in your creative growth. It’s an opportunity to step away from the everyday and dedicate yourself fully to the art of seeing. The rewards go far beyond a collection of new pictures; they are about transforming your entire approach to photography.
- Accelerated Learning Curve: Imagine having a professional mentor by your side, offering real-time feedback as you compose a shot. This hands-on guidance is invaluable. You’ll learn practical techniques and creative concepts far more quickly than you could through online tutorials or books, solidifying your understanding of everything from mastering manual mode to advanced compositional theory.
- Unparalleled Access and Timing: Tour leaders use their local expertise to take you to stunning, often hard-to-reach locations. More importantly, they get you there when the light is most magical. You’ll be setting up your tripod for the soft glow of the golden hour or the deep, rich tones of the blue hour while other travelers are just arriving or have already left.
- A Surge of Creative Inspiration: Immersing yourself in a new environment, whether it’s a dramatic mountain landscape or a vibrant city street, is a powerful catalyst for creativity. Sharing this journey with a small group of like-minded individuals creates a supportive and inspiring atmosphere where ideas and perspectives are exchanged freely, pushing everyone’s artistic boundaries.
- Logistical Simplicity: Leave the stress of planning behind. All the complex details—transportation, lodging, park permits, and optimized daily schedules—are expertly handled for you. This frees your mind to focus entirely on what matters most: observing the world through your lens and creating meaningful photographs.
Step 1: Choosing the Right Photography Tour for You
The world is filled with remarkable photography tours, but the sheer volume of choice can be overwhelming. The key to a successful and fulfilling experience is not finding the “best” tour, but finding the one that is truly right for you. This begins with a moment of self-reflection to align your passions, skills, and practical needs with the journey ahead. To truly elevate your photography, understanding these elements is key.
Identify Your Photography Niche and Goals
Before you even look at a single itinerary, consider what subject matter truly ignites your creative spark. A tour focused on your specific interests will not only yield images you are proud of but will also deepen your connection to the craft. Each niche offers a unique set of challenges and rewards.
- Landscape and Astrophotography: These tours are for those who chase epic light and celestial wonders. They often involve early mornings for sunrise, late nights for starry skies, and travel to remote locations with dramatic scenery, such as the glacial lagoons of Iceland or the rugged canyons of the American Southwest.
- Wildlife and Nature: Patience and a passion for the natural world are paramount. These expeditions focus on ethically observing and photographing animals in their native habitats. Expect to learn about animal behavior, tracking, and the use of long telephoto lenses on an African safari or a birding tour in the cloud forests of Costa Rica.
- Street and Documentary: If you are drawn to the candid energy of human life, a street photography tour is ideal. These workshops immerse you in the vibrant pulse of a city, teaching you to anticipate moments, compose quickly, and capture the authentic stories unfolding on the streets of places like Tokyo, Havana, or Marrakech.
- Cultural and Travel Portraits: This niche centers on the human element of travel, focusing on creating respectful and powerful portraits. These tours often provide unique access to local communities and teach the art of connecting with subjects across cultural and language barriers, whether in the villages of Southeast Asia or the markets of Peru. Learning to pose for travel photos can also enhance this.
- Architectural Photography: For those fascinated by design, history, and form, architectural tours explore the world’s most iconic structures and hidden gems. You will learn to master lines, perspective, and light to capture the essence of buildings, from the historic grandeur of Rome to the modern skylines of Dubai.
Match the Tour to Your Skill Level
Honesty about your current abilities is crucial for a positive learning experience. Choosing a tour that is either too basic or too advanced can lead to frustration. Reputable companies are clear about the intended skill level for each of their trips. You can learn more about finding the perfect photography tour for your skill level here.
- Beginner-Focused Tours: Perfect if you’re still getting comfortable with shooting in Manual mode. These tours emphasize the fundamentals: mastering the exposure triangle (Aperture, Shutter Speed, ISO), understanding light, and learning foundational rules of composition. The pace is patient, with plenty of hands-on instruction. If you’re just starting, a beginner’s photography course is a great starting point.
- Intermediate/Advanced Workshops: Designed for photographers who have a solid technical foundation and are looking to refine their artistic vision. The focus shifts to more advanced techniques like focus stacking, using complex filter systems, advanced post-processing workflows, and building a cohesive portfolio of images. Understanding how to manipulate light and shadow is a key skill at this level, as discussed in our guide to manipulating light and shadows.
- All-Levels Tours: These tours offer a flexible learning environment suitable for a range of abilities. The instructor is adept at providing personalized guidance, offering complex challenges to advanced shooters while helping beginners with the basics. This is an excellent option for friends or partners traveling together with different skill sets.
Research Tour Leaders and Companies
The quality of your guide and the organization behind the tour will define your experience. Thorough research is a non-negotiable step to ensure your investment of time and money is well-placed. The benefits of attending photography tours often come down to the expertise of the leader and the quality of the organization.
- Vet the Tour Leader: Look beyond their portfolio. While stunning images are a prerequisite, a great photographer is not always a great teacher. Look for testimonials that speak to their teaching style, patience, and ability to communicate concepts clearly. Do they have a blog, a YouTube channel, or behind-the-scenes content that gives you a sense of their personality and approach?
- Evaluate the Company: A reputable tour company prioritizes safety, logistics, and responsible travel. Read reviews from multiple independent sources. Check their safety record and ensure they have contingency plans. Importantly, look for a commitment to sustainability and ethical practices, which indicates a deeper respect for the destinations they visit.
- Consider the Group Size: In photography, smaller is almost always better. A small group (typically under 8-10 participants) ensures you get significant one-on-one instruction from the leader. It also means less crowding at shooting locations and a more intimate, collaborative atmosphere among fellow photographers.
Crucial Logistics to Consider
With your creative and skill-based needs identified, it’s time to address the practical details that will shape your final decision. Answering these questions will help you narrow down the perfect photographic adventure. Understanding concepts like shutter speed is fundamental for many travel photography scenarios.
- Destination: A local tour or weekend workshop can be a fantastic way to explore your own region with fresh eyes, involving simpler travel and lower costs. An international expedition offers the thrill of a new culture and exotic landscapes but requires more planning for flights, visas, and acclimatization.
- Duration: How much time can you commit? A weekend workshop is an excellent, intensive boost for your skills. A multi-week expedition allows for deep immersion in a location, providing more opportunities to wait for perfect conditions and build a comprehensive body of work.
- Physicality Level: Be realistic about your fitness. Tour descriptions should clearly state the physical demands. This can range from easy walks on flat ground to strenuous hiking at high altitudes. Choosing a tour that matches your physical ability is essential for your safety and enjoyment.
- Budget: Understand the full cost. Read the fine print to see what is included in the tour price. Typically, this covers accommodation, ground transportation, guide fees, and some meals. Common exclusions are international flights, travel insurance (which is essential), visa fees, alcoholic beverages, and tips for local guides.
Step 2: Essential Gear and Packing Strategy
Once you’ve chosen your tour, the next exciting phase is preparation. Packing for a photography tour is a balancing act between being prepared for every opportunity and not overloading yourself. A well-thought-out kit allows you to focus on creativity rather than worrying about missing equipment. Here’s a breakdown of what to pack, from the core camera gear to travel essentials.
The Core Photography Kit
This is the heart of your setup. While the specific gear depends on your tour’s focus (e.g., a long telephoto for wildlife, a fast prime for street), this checklist covers the versatile foundation that will serve you well on most trips. For a comprehensive overview of how to improve your shots, consider elevating your photography.
- Camera Body: Whether you choose a DSLR or a more modern Mirrorless system, the most important factor is your familiarity with it. Mirrorless cameras are often lighter and more compact, a significant advantage for travel, but be mindful of their electronic viewfinders and potentially shorter battery life in cold conditions. Bring the camera you know and trust. If you’re just starting out, a beginner’s photography 101 guide can be very helpful.
- Lenses: For maximum versatility, consider the “holy trinity” of zoom lenses. A wide-angle zoom (e.g., 16-35mm) is essential for sweeping landscapes and architecture. A standard zoom (e.g., 24-70mm) is your all-purpose workhorse for travel scenes and environmental portraits. A telephoto zoom (e.g., 70-200mm) is crucial for compressing landscapes, isolating details, and capturing wildlife. If space allows, a fast prime lens (e.g., 50mm f/1.8) is excellent for low-light situations and portraits with beautiful background blur, much like those you might capture with an 85mm lens for travel portraits.
- A Sturdy Tripod: This is non-negotiable for any serious landscape, astrophotography, or low-light work. A tripod allows you to use slow shutter speeds for silky water, capture sharp images during the golden and blue hours, and eliminate camera shake. Invest in one that is a good compromise between stability and lightweight portability for travel. Understanding shutter speed is key to using this effectively.
- Filters: Filters are creative tools, not just lens protectors. A Circular Polarizer (CPL) is essential for cutting glare on water and foliage while deepening the blue in skies. Neutral Density (ND) filters reduce the amount of light entering the lens, enabling long exposures even in daylight. Graduated ND (GND) filters help balance the exposure between a bright sky and a darker foreground, a common challenge in landscape photography. You can also explore manipulating light and shadows for dramatic effects.
Beyond the Camera: Essential Accessories
These small items can make a huge difference in the field, often saving a shoot from being cut short by a preventable issue. Don’t leave home without them.
- Extra Batteries and Charger: Long days of shooting, cold weather, and using live view can drain batteries surprisingly fast. Bring at least two or three fully charged spares. A portable power bank can also be a lifesaver for charging batteries or your phone on the go.
- Memory Cards: Bring more than you think you will need. High-resolution images and video fill cards quickly. It’s often safer to use several smaller-capacity cards rather than one enormous one; if a card fails, you won’t lose your entire trip’s work.
- Remote Shutter Release: Whether it’s a simple cable release or a wireless remote, this tool allows you to trigger your shutter without touching the camera, which is critical for preventing vibration during long exposures on a tripod. Many also function as an intervalometer for creating time-lapses.
- Lens Cleaning Kit: Dust, rain, and fingerprints are inevitable. Pack a basic kit containing a rocket blower to remove dust, a microfiber cloth for smudges, and a soft brush for stubborn particles. A clean lens is the first step to a sharp photo.
- Camera Bag: Your camera bag is your mobile base of operations. Choose one that is comfortable to wear for long periods, offers protection from the elements (a built-in rain cover is a huge plus), and allows for easy access to your gear when a photographic moment suddenly appears.
Packing Smart for Travel
Your comfort and ability to manage your data are just as important as your camera gear. Thoughtful packing in these areas ensures you stay warm, dry, and organized. Remember that attending photography tours can greatly enhance your skills and experiences.
- Clothing and Footwear: The keyword is layering. Pack a moisture-wicking base layer, an insulating mid-layer (like a fleece or down jacket), and a waterproof/windproof outer shell. This system allows you to adapt to changing weather conditions. Sturdy, comfortable, and waterproof footwear that you’ve already broken in is absolutely essential.
- Laptop or Tablet: A portable device is invaluable for reviewing your images in a larger format at the end of the day. It allows you to check for critical focus and begin flagging your best shots, making the post-tour editing process much more manageable.
- Portable Hard Drives: Data backup is critical. Your photos don’t truly exist until they are in at least two places. At the end of each shooting day, back up your memory cards to your laptop and to at least one (preferably two) portable hard drives. This redundancy protects your priceless images against card failure, loss, or theft.
Step 3: Pre-Tour Preparation for Success
The success of a photography tour often begins long before you board the plane. Thoughtful preparation ensures that once you’re on location, your focus can be entirely on creativity and learning, not fumbling with your equipment or wishing you’d done more research. This phase is about building a foundation of confidence so you can make the most of every photographic opportunity. This is a great first step in your journey to elevate your photography.
Know Your Gear Inside and Out
Your camera should feel like an extension of your eye, not a confusing piece of technology that gets in the way of capturing a fleeting moment. When the light is perfect and a rare animal appears, you won’t have time to search through menus. Develop muscle memory with your equipment so that its operation becomes second nature.
- Master the Exposure Triangle: Spend time understanding the intricate relationship between Aperture, Shutter Speed, and ISO. Know how adjusting one affects the others and the final image. Practice shooting in Manual or Aperture/Shutter Priority modes until you can confidently control depth of field and motion blur. Understanding shutter speed is key.
- Practice in the Dark: A significant portion of landscape or astrophotography happens before sunrise or after sunset. Practice changing lenses, adjusting settings, and using manual focus in low-light conditions. Being able to find your camera’s buttons and dials by feel is an invaluable skill. Learning to work with light and shadows is essential for low-light photography.
- Perform Pre-Trip Maintenance: Don’t let dust spots ruin a series of beautiful sky photos. A few days before you leave, give your gear a thorough check-up. This includes cleaning your lenses and, most importantly, cleaning your camera’s sensor (or having it professionally cleaned if you’re not comfortable doing it yourself).
Research Your Destination
Arriving at a location with a sense of its character, light, and potential will dramatically improve your photography. While spontaneity is wonderful, informed preparation allows you to be in the right place at the right time. Your tour leader will handle the main logistics, but your personal research will enrich the experience. Consider how to capture the essence of destinations you visit.
- Study the Environment: Look into the typical weather patterns for the season you’ll be visiting. Research the direction of sunrise and sunset to anticipate the quality of light at key locations. If wildlife is a focus, learn about the local species, their habitats, and their behavior. This is part of how you can master travel photography.
- Pre-visualize, Don’t Copy: Use tools like Google Maps, photo-sharing sites, and articles to get a feel for the landscape. This can help you brainstorm compositions and ideas. The goal is to find inspiration and understand the possibilities, not to simply replicate shots you’ve already seen.
- Embrace the Culture: If traveling internationally, learning a few key phrases like “Hello,” “Thank you,” and “May I take your picture?” in the local language can make a world of difference. It shows respect and can open doors to more authentic interactions and portrait opportunities. You might even want to check out a travel photo poses guide.
Set Personal Photography Goals
A photography tour is a significant investment in your craft. To maximize your return, go into it with a clear purpose that extends beyond simply “getting good shots.” Setting specific, personal goals will give your shooting a clear direction and provide a framework for measuring your growth. For beginners, starting with beginner’s photography 101 can be very helpful.
Instead of a vague desire for nice photos, consider focusing on a tangible outcome. This targeted approach helps you filter out distractions and concentrate on what’s most important to your development as a photographer. Your goals might include:
- Mastering a New Technique: Decide that this is the trip where you will finally become proficient with long-exposure seascapes, focus stacking for ultimate depth of field, or capturing sharp images of birds in flight.
- Creating a Cohesive Series: Think like a storyteller. You could aim to create a series of 10-12 images that explore a specific theme, such as the relationship between people and their environment, the textures of a landscape, or the abstract patterns found in nature.
- Improving Your Composition: Make a conscious effort to move beyond eye-level snapshots. Your goal could be to experiment with leading lines, framing, and layering in every composition you create.
Step 4: Making the Most of Your Time on Tour
The preparation is complete, your bags are packed, and the adventure is underway. Now, the focus shifts to maximizing every moment. The success of your tour isn’t just measured in the quality of your final images, but in the richness of your experience and the depth of your learning. Here’s how to ensure you get the most out of your time in the field. This is all part of elevating your photography.
Engage with Your Tour Leader
Your tour leader is more than just a guide; they are your mentor, local expert, and creative facilitator. Their expertise is the primary resource you’ve invested in. Tapping into their knowledge is essential for your growth as a photographer.
- Ask questions. Don’t hesitate to ask about anything, from fundamental camera settings to the cultural context of a scene. There are no “basic” questions. Your curiosity is a tool for learning. Consider reviewing our Beginner’s Photography 101 if you’re new to the craft.
- Request critiques in the field. In a quiet moment, ask your leader for a quick review of an image on your camera’s LCD screen. In-the-field feedback is incredibly effective for making immediate improvements to your composition and technique.
- Listen to their advice. Pay close attention to their suggestions on where to stand, what to look for in the light, and the stories behind the locations. Their local knowledge can reveal photographic opportunities you would otherwise miss. Understanding manipulating light and shadows is key here.
Collaborate with Fellow Photographers
You are traveling with a group of individuals who share your passion. This shared environment is a powerful catalyst for creativity and learning. Look at your fellow participants not as competition, but as collaborators in a shared creative pursuit. Discovering the benefits of attending photography tours can enhance this collaborative spirit.
- Share tips and learn from others. Everyone brings a unique perspective. You might learn a new post-processing trick from one person and a clever composition idea from another. Be open to both teaching and learning.
- Be mindful of each other’s space. When you arrive at a location, be aware of where others are setting up their tripods. Avoid walking in front of someone’s lens and communicate to ensure everyone gets a chance to capture their desired shot.
- Build your creative community. The connections you make on a tour can last a lifetime. Exchange contact information and continue to share work and offer encouragement long after the trip has ended.
Be Present and Patient
Exceptional photography is rarely a rushed process. It requires a calm, observant mindset. The temptation is to constantly be shooting, but often the best images come from moments of quiet patience and deep observation.
Photography is often a waiting game. You might wait for the sun to dip below the horizon, for clouds to break, or for a shy animal to emerge. Use this time to study the scene, anticipate changes in light, and refine your composition. Mastering shutter speed can be crucial for capturing movement or stillness.
Make a conscious effort to put the camera down occasionally. Experience the location with all your senses. Feeling the wind, hearing the sounds, and simply being present will deepen your connection to the place, which will ultimately be reflected in your photographs. This practice aids in capturing the essence of destinations.
Embrace what you cannot control. Unexpected rain, fog, or dramatic clouds are not setbacks; they are creative opportunities. Moody, atmospheric conditions can often lead to more unique and compelling images than a perfectly clear blue sky. Understanding color theory can help you leverage these conditions effectively.
Practice Ethical Photography
As a photographer, you are both an artist and an ambassador. Your presence has an impact on the people, wildlife, and environments you visit. The goal is to create beautiful images while leaving a positive, or at least neutral, footprint. This commitment to being a responsible photographer, not just a tourist, is the foundation of sustainable and meaningful travel. This is essential for anyone looking to master travel photography.
- Wildlife: The welfare of the animal always comes first. Maintain a respectful and safe distance, using a telephoto lens to get closer. Never use bait or calls to attract wildlife, as this alters their natural behavior. Observe quietly and leave them as you found them.
- People: When photographing individuals, remember they are not just subjects. They are people with their own stories and right to privacy. Always ask for permission before taking a close-up portrait—often a simple smile and gesture towards your camera is enough. Be culturally sensitive, learn local customs, and never be intrusive. Consider our Travel Photo Poses Guide for interacting with people.
- Environment: Adhere to the principles of “Leave No Trace.” Stay on designated trails to protect fragile ecosystems, pack out everything you pack in, and respect all local rules and protected area regulations. Your goal is to preserve the beauty of the location for all future visitors and photographers.
Step 5: Post-Tour Actions to Cement Your Learning
The adventure doesn’t end when you return home. In fact, the post-tour process is where the lessons truly solidify and your best work emerges. Coming back with memory cards full of images is exhilarating, but what you do next is crucial for transforming those experiences into a stronger portfolio and a more refined photographic eye. This final phase is about organization, reflection, and integrating your newfound knowledge into a lasting practice.
The Digital Darkroom: Culling and Editing
Your computer is now your darkroom, the place where raw captures are developed into finished pieces. A methodical approach here will save you time and help you identify your strongest images while reinforcing the techniques you learned in the field.
- Organize and Back Up Immediately: Before you do anything else, secure your images. Transfer all photos from your memory cards to your computer and at least one external hard drive. A good system is to create a main folder for the tour (e.g., “Iceland – September 2024”) with subfolders for each day. This simple step prevents catastrophic data loss and makes finding specific shots much easier later on.
- The Culling Process: It’s tempting to keep every photo, but a great photographer is also a great editor. Go through your images in several passes. First, discard any that are technically flawed—out of focus, completely over or underexposed, or accidental shots. On your second pass, be more critical. Compare similar compositions and choose only the most compelling one. Ask yourself: does this image tell a story? Is the composition strong? Does it evoke the feeling you had at that moment?
- Apply Your New Editing Skills: Now is the time to apply the post-processing techniques discussed on your tour. Whether your guide demonstrated advanced color grading, luminosity masking, or simply a refined workflow in Lightroom or Capture One, practice it on your own images. This hands-on application is what cements the learning.
Sharing Your Work and Getting Feedback
Photography is a visual language, and it’s most powerful when shared. Putting your work out there not only allows others to enjoy your vision but also opens the door to valuable feedback and a sense of community.
- Choose the Right Platforms: Not all platforms are equal. A personal portfolio website is the ideal place for your absolute best, most polished work—a curated gallery that represents you as a photographer. Social media platforms like Instagram are excellent for sharing the stories behind the images, behind-the-scenes moments, and engaging with a wider community.
- Write Meaningful Captions: A picture may be worth a thousand words, but a few well-chosen ones can provide essential context. Tell the story of the shot. What did you have to do to get it? What was the weather like? What technical or creative choice did you make? This enriches the viewer’s experience and demonstrates your thoughtful approach.
- Reconnect with Your Group: Your fellow tour participants are your new creative network. Create a shared online album or a group chat to share your final edits. It’s fascinating to see how ten different photographers captured the same scene. This is an excellent, low-pressure way to exchange feedback and keep the collaborative spirit of the tour alive.
Integrating New Skills into Your Daily Practice
The greatest risk after a photography tour is losing momentum. The key is to view the tour not as a one-time event, but as a catalyst that permanently elevates your daily photographic habits.
- Avoid the Post-Trip Slump: Don’t let your camera go back on the shelf. Challenge yourself to a small project, even if it’s just for 15 minutes a day. The subject doesn’t have to be exotic; the goal is to keep the camera in your hands and your mind thinking creatively.
- Apply Tour Concepts Locally: The principles of great photography are universal. You don’t need a dramatic landscape to practice composition. Apply the rule of thirds to your local park. Scout your own neighborhood for the best light during golden hour. Practice the patience you learned waiting for wildlife while observing birds in your backyard. This brings the lessons home and proves that you can create beautiful images anywhere.
- Plan Your Next Adventure: The best way to keep learning is to have another goal on the horizon. Reflect on what you enjoyed most about the tour. Was it the culture, the wildlife, the landscapes? Use that insight to start dreaming about and researching your next photographic journey. This creates a continuous cycle of learning, practicing, and exploring.
Takeaways
