Photography tours Essentials: What to Bring and How to Prepare
Discover the must-have gear and essential tips for a successful photography tour, ensuring you're well-prepared and ready.
Dreaming of capturing breathtaking landscapes and unforgettable moments on your next photography tour? The excitement of a new destination is thrilling, but being unprepared can turn your photographic adventure into a frustrating experience. This guide is your ultimate companion to ensure you're ready for anything the world throws your way, from the perfect shot to unexpected weather.
We'll walk you through everything you need to know, starting with a comprehensive pre-trip checklist and diving deep into the essential photography gear that will elevate your images. Plus, we'll cover those crucial non-camera items that make the photographer's journey smoother and more enjoyable. Get ready to pack smarter and shoot better.
Essentials
The Pre-Trip Checklist: Preparing for Your Photography Tour
The most memorable photographs from a journey are often the result of meticulous planning that happens long before the camera even leaves its bag. A successful photography tour isn’t just about showing up; it’s about arriving prepared, knowledgeable, and ready to create. This pre-trip checklist will guide you through the essential steps of research, equipment mastery, and personal preparation to ensure you can focus on what truly matters: capturing the moment.
Research Your Destination and Itinerary
Knowledge is as crucial as any lens in your bag. Understanding the environment you’re about to enter will transform your photography from simple snapshots into thoughtful, compelling images. Take the time to immerse yourself in the details of your destination before you depart.
- Study the Light and Climate: The quality of light dictates the mood of your photographs. Research the local weather patterns for the season you’re visiting. More importantly, use tools like PhotoPills or The Photographer’s Ephemeris to check precise sunrise and sunset times, as well as the angle and direction of the sun throughout the day. This allows you to anticipate the golden hour and plan where to be for the most dramatic lighting.
- Understand Cultural Norms: Photography is an interaction with a place and its people. Be a respectful observer. In many cultures, it is considered rude to photograph someone without their permission. Learn a few words of the local language, such as “hello,” “thank you,” and “may I take your picture?” This simple effort can turn a potential intrusion into a welcome exchange.
- Review Your Itinerary: A detailed review of your tour schedule helps you anticipate your needs. Identify the primary types of shooting you’ll be doing—sweeping landscapes, bustling street scenes, or elusive wildlife. This will inform your lens choices and gear selection for each day. Also, take note of the physical demands, such as long hikes or travel days, to prepare accordingly.
- Check Local Regulations: Ignorance of the law is no excuse. Research any restrictions on photography, particularly in religious sites, government buildings, or military areas. If you plan to fly a drone, it is absolutely essential to understand and comply with local aviation laws, which can vary dramatically from one country to another.
Master Your Equipment Before You Leave
A remote, beautiful location is the worst place to discover you don’t know how your camera works. Your gear should feel like an extension of your creative vision, not a technical barrier. Build muscle memory with your equipment at home so you can operate it instinctively in the field.
- Know Your Camera Intimately: Move beyond the automatic settings. A photography tour is the time to be in full creative control, which means shooting in Manual or Aperture Priority mode. Practice adjusting ISO, shutter speed, and aperture until you can do it quickly without taking your eye from the viewfinder. Know how to change focus points, use exposure compensation, and read your histogram.
- Practice with New Gear: Never take brand-new, untested equipment on a major trip. If you’ve purchased a new lens, tripod, or filter system, spend several days using it in familiar surroundings. This helps you understand its unique characteristics and uncover any potential defects or technical issues before they can ruin a once-in-a-lifetime shot.
- Test Your Technical Limits: Many of the most stunning travel photos are created at the edges of the day. Before you go, practice your low-light technique. Shoot in the dark to see how your camera handles high ISO noise. Set up your tripod and practice long exposures to capture light trails or silky-smooth water.
- Develop a “Shot List”: This isn’t a rigid to-do list, but rather a set of creative goals. Perhaps you want to capture a wide-angle landscape at dawn, a detailed portrait of a local artisan, or a long exposure of a waterfall. Having a mental or written list of desired images keeps you focused and encourages you to seek out specific opportunities.
Physical and Mental Preparation
Photography tours can be as demanding as they are rewarding. They often involve early mornings, long days on your feet, and unpredictable conditions. Preparing your body and mind is just as important as packing your camera bag.
- Assess the Physical Demands: Be honest with yourself about the tour’s activity level. Will you be hiking at high altitudes, navigating crowded city streets for hours, or carrying a heavy pack over uneven terrain? Understanding the physical challenges allows you to prepare for them properly.
- Begin a Conditioning Routine: If your tour involves significant physical activity, start preparing a few weeks in advance. Regular walks or hikes, especially while wearing the shoes you plan to bring and carrying a weighted backpack, can make a significant difference in your stamina and comfort.
- Prepare for the Photographer’s Schedule: The best light waits for no one. Be mentally ready for a schedule that revolves around sunrise and sunset. This often means waking up before dawn and finishing your day long after dark. Embrace the unique rhythm of the tour and remember to rest whenever possible.
- Set Realistic Expectations: While you should aim high, it’s important to remember that not every moment will yield a portfolio-worthy image. Weather can be uncooperative, locations can be crowded, and sometimes the creative spark just isn’t there. The goal is to enjoy the process of discovery and travel. See the trip as a complete experience, where the incredible photographs you capture are a wonderful result of the journey itself.
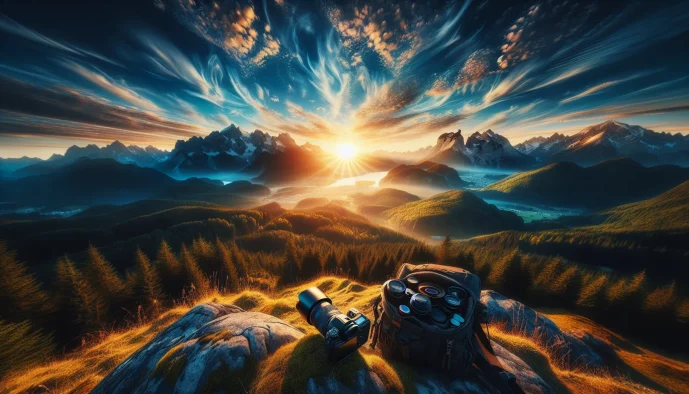
What to Pack: Your Essential Photography Gear
Assembling your photography kit for a tour is a thoughtful exercise in balancing capability with portability. The goal is not to bring every piece of equipment you own, but to select the right tools for the destination and your creative vision. A well-packed bag frees you to focus on the experience, confident you have what you need to capture it beautifully. This is a key part of mastering travel photography.
The Core Camera Kit
The foundation of your travel kit should be reliable, familiar, and versatile. This is not the time for brand-new, untested equipment.
-
Primary Camera Body: This should be the camera you know best—your trusted workhorse. Its settings and handling should be second nature, allowing you to react quickly to fleeting moments without fumbling through menus.
-
Backup Camera Body: While it may seem like a luxury, a backup body is invaluable insurance. A primary camera can be lost, stolen, or malfunction at the worst possible moment. Your backup can be a smaller mirrorless model, a high-end compact, or an older body you no longer use as your primary. It ensures a trip-ending disaster becomes a minor inconvenience.
-
Lenses: A versatile trio of lenses can cover nearly any situation you’ll encounter:
- Wide-angle lens: Essential for capturing sweeping landscapes, grand architecture, and immersive street scenes. A focal range like 16-35mm is a classic choice.
- Mid-range lens: Your walk-around lens for general purpose shooting, environmental portraits, and documentary-style images. A 24-70mm zoom or a 35mm or 50mm prime lens fits this role perfectly.
- Telephoto lens: Necessary for bringing distant subjects closer, such as wildlife, architectural details, or creating compressed landscape perspectives. A super telephoto lens is a popular and highly effective option.
A Note on Zooms vs. Primes for Travel
The choice between zoom and prime lenses is a personal one, revolving around convenience versus creative intent. Zoom lenses offer unparalleled versatility, allowing you to reframe a scene instantly without moving. This convenience is ideal for fast-paced environments or when you need to travel light with fewer lenses. The trade-off can be a heavier weight and a smaller maximum aperture compared to primes. Prime lenses, with their fixed focal length, are often sharper, lighter, and feature wider apertures (e.g., f/1.8 or f/1.4). This makes them superb for low-light situations and for creating images with a shallow depth of field. While they require you to “zoom with your feet,” this limitation can encourage more thoughtful composition and a deeper engagement with your surroundings.
Critical Camera Accessories
Beyond the camera and lenses, a collection of essential accessories provides the support and maintenance needed to execute your vision in the field.
-
Tripod: A sturdy yet lightweight travel tripod is non-negotiable for landscape, low-light, and long-exposure photography. Look for carbon fiber models to save weight without sacrificing stability. A quality ball head will allow for precise and fluid composition.
-
Filters: These are the photographer’s tools for controlling light before it ever hits the sensor.
- A Circular Polarizer (CPL) is essential for managing reflections on water or glass and for deepening the blue tones in the sky, adding richness and contrast to your images.
- Neutral Density (ND) filters reduce the amount of light entering the lens, enabling you to use slow shutter speeds in broad daylight. They are the key to creating silky smooth water and ethereal, streaking clouds.
- Graduated Neutral Density (GND) filters help balance scenes with a high dynamic range, like a bright sky over a darker landscape, by darkening only the top portion of the frame.
-
Batteries: Pack a minimum of three to four fully charged batteries for your camera. Cold weather, long exposures, and extensive use of the LCD screen can drain them surprisingly quickly. Always bring the corresponding charger.
-
Memory Cards: Bring more storage than you anticipate needing. High-capacity, high-speed cards are crucial for shooting in RAW format or capturing bursts of action. Having multiple smaller cards can also be a safer strategy than relying on a single large one, mitigating the risk of a total loss from card failure.
-
Remote Shutter Release or Intervalometer: To achieve maximum sharpness in your tripod-mounted shots, a remote release is essential. It allows you to trigger the shutter without touching the camera, eliminating any potential for vibration. An intervalometer also enables you to shoot time-lapses.
-
Camera & Lens Cleaning Kit: Dust, rain, and fingerprints are inevitable travel companions. A small kit containing a rocket blower to remove dust, several microfiber cloths for smudges, and a lens pen for stubborn spots will keep your optics clean and your images pristine.
Carrying Your Gear: The Right Bag
How you transport your equipment is just as important as the equipment itself. A good bag protects your gear, provides comfort for long days, and allows for efficient access when a photo opportunity arises.
Choosing Your Main Camera Bag
Your primary bag needs to hold the bulk of your kit securely and comfortably. The two most common choices are the backpack and the sling bag. A camera backpack is ideal for heavier loads and long treks, distributing weight evenly across both shoulders for maximum comfort. It typically offers superior protection and more space for personal items. Its main drawback is slower access to your gear. A sling bag, worn over one shoulder, excels in accessibility. It can be swung around to your front for quick camera or lens changes, making it perfect for street and event photography. However, it can become uncomfortable with heavy kits over extended periods.
Regardless of style, look for these key features:
- Weather resistance: A durable, water-repellent exterior and an included rain cover are essential.
- Customizable dividers: Padded inserts that can be reconfigured to securely fit your specific gear.
- Laptop/tablet sleeve: A dedicated, padded compartment for your digital workflow.
- Tripod straps: A secure system for carrying your tripod externally.
A Day Bag Strategy
Often, you won’t need to carry your entire kit. For shorter excursions from your hotel or basecamp, a smaller day bag is invaluable. This could be a lightweight, packable backpack into which you place a padded camera cube containing just your camera and a lens or two. Alternatively, a small, dedicated shoulder bag can be perfect for a city walk. This strategy allows you to stay light and agile, reducing fatigue and making you less of a target for theft, while your main bag and backup gear remain safely stored.
Beyond the Camera: Packing for the Photographer
While your camera gear is the star of the show, your personal comfort and safety are the critical supporting cast. A successful photography tour depends as much on being warm, dry, and healthy as it does on having the right lens. Neglecting personal items can cut a shooting session short or turn a dream trip into a miserable experience. Here’s how to pack for the person behind the camera.
Clothing and Personal Items
The right clothing allows you to adapt to changing environments and stay focused on your photography, not on being uncomfortable. The key is strategic selection, not a massive wardrobe.
The Layering System
Weather is unpredictable. A layering system allows you to add or remove clothing to perfectly regulate your body temperature throughout the day, from a cool, pre-dawn start to a warm afternoon and back to a chilly evening.
- Base Layer: This is the layer against your skin. Its primary job is to wick moisture away to keep you dry. Choose materials like merino wool or synthetic fabrics (polyester, nylon). Avoid cotton, as it absorbs moisture and can leave you feeling cold and damp.
- Mid Layer: This is your insulation layer. It traps body heat to keep you warm. Fleece jackets, down vests, or synthetic insulated puff jackets are excellent options. The thickness and type will depend on the climate of your destination.
- Outer Shell: This is your protection from the elements. A high-quality outer shell should be both waterproof and windproof. Look for jackets with features like sealed seams and a hood to shield you and your gear from rain, snow, and wind.
Essential Wearables
Beyond the core layers, a few key accessories make a significant difference in your comfort and ability to operate effectively in the field.
- Footwear: Your feet are your foundation. Invest in a pair of sturdy, comfortable hiking boots or shoes that are well broken-in before your trip. Waterproofing is highly recommended, as wet feet can ruin a day of shooting. Ensure they provide adequate support for the terrain you’ll be covering.
- Head and Hand Protection: A wide-brimmed hat is essential for sun protection, while a warm beanie or toque is crucial for cold climates. Pack a pair of gloves, preferably a thinner pair that allows you to operate your camera controls, or a convertible mitten-glove style. Good sunglasses are non-negotiable to protect your eyes from UV rays and reduce eye strain.
- Headlamp or Flashlight: Many of the best photographic opportunities happen before sunrise or after sunset. A headlamp is invaluable as it keeps your hands free to set up your tripod, change lenses, or navigate a dark trail. Pack extra batteries or ensure it’s fully charged.
Health, Safety, and Documentation
Being prepared for minor mishaps and having your essential documents in order provides peace of mind, allowing you to immerse yourself in the creative process without worry.
- Personal First-Aid Kit: While your tour guide may have a kit, it’s wise to carry your own small kit with personal items. Include blister treatment (e.g., Moleskin), antiseptic wipes, bandages, pain relievers, and any personal medications you require.
- Sunscreen and Insect Repellent: Sunburn and insect bites are unwelcome distractions. Pack a broad-spectrum sunscreen with a high SPF and an insect repellent appropriate for your destination’s climate and wildlife.
- Important Documents: Carry physical and digital copies of your passport, visa, driver’s license, and travel insurance policy. Store the copies separately from the originals, perhaps in a cloud service and on your phone, in case of loss or theft.
- Portable Power Bank: In a connected world, a dead phone can be more than an inconvenience. A portable power bank ensures you can keep your smartphone, headlamp, and other small electronics charged, which is crucial for navigation, communication, and emergencies.
Digital Workflow on the Road
The exhilarating work of capturing images in the field is only half the process. A disciplined digital workflow is crucial to ensure every photo you take makes it home safely. Neglecting to back up your work is one of the greatest risks a traveling photographer can take. Establishing a simple, consistent routine at the end of each day will provide peace of mind and protect your valuable images.
In-Field Data Management
Your physical tools for data management are just as important as your camera. Having a reliable system for transferring and storing files allows you to clear your memory cards for the next day’s shoot with confidence.
- Laptop or Tablet: A lightweight laptop or a powerful tablet is the hub of your mobile digital darkroom. It allows you to view your images on a larger, more detailed screen than your camera’s LCD, helping you to spot focus issues and confirm you got the shot. More importantly, it serves as the primary tool for managing your backups.
- Portable Hard Drives: A single backup is not a backup; it’s a delay before a disaster. It is essential to bring at least two portable hard drives. This enables you to create redundant copies of your files, adhering to the industry-standard 3-2-1 backup rule. This simple principle is your best defense against data loss:
- Have at least three total copies of your data.
- Store the copies on two different types of media (e.g., your laptop’s internal drive and an external drive).
- Keep one copy off-site. In a travel context, this means keeping one backup drive in a separate bag from your primary laptop and other drive, such as in your hotel safe or a different piece of luggage.
- Memory Card Reader: While you can transfer files directly from your camera, a dedicated, high-speed memory card reader is often faster and more reliable. It also saves your camera’s battery. Invest in a quality reader from a reputable brand to minimize the risk of file corruption during transfer.
Software and Cloud Storage
Your digital toolkit extends beyond hardware. Ensuring your software is ready and having a plan for online storage can add a powerful layer of security and convenience to your workflow.
Before you depart, make sure your preferred photo editing and management software (like Adobe Lightroom or Capture One) is updated on your laptop. This prevents any unexpected licensing issues or compatibility problems when you are far from reliable internet. A simple check and update at home can save significant trouble on the road. Learn more about things you should do before any photography trip.
If your tour destination is known to have consistent and fast internet access, consider using a cloud storage service for an additional backup. This can serve as your ultimate off-site copy. You may not be able to upload every single RAW file, but a strategy of uploading your top selects or smaller JPEG previews each night can be an effective way to secure your most important work against theft or complete hardware failure.
Takeaways
