Portrait Photography
Master portrait photography: lighting, posing, gear, and post-processing essentials.
Ever looked at a photograph and felt an instant connection to the person captured within it? That's the magic of portrait photography. It's more than just snapping a picture; it's about revealing personality, emotion, and the unique story of an individual. If you're looking to create captivating portraits that resonate, you've come to the right place. This article will guide you through the fundamentals of portrait photography.
We'll delve into understanding what truly makes a portrait compelling, explore the essential gear that will elevate your shots, and demystify the camera settings crucial for stunning results. Get ready to transform your approach and capture images that truly speak volumes.
Essentials
- Capturing Essence: Portrait photography goes beyond likeness to reveal a person's identity, character, and emotions, aiming for viewer connection.
- Intentional Creation: Unlike snapshots, portraits are deliberate, using light, composition, and posing to tell a story and convey a deeper truth.
- Photographer-Subject Connection: Building rapport and trust is paramount; clear, positive communication and a relaxed atmosphere foster genuine expressions.
- Beyond Technical Skill: The photographer's role includes being an artist, director, and empathetic guide to elicit authentic personality and emotion.
Understanding the Essence of a Portrait
At its heart, portrait photography is an art form dedicated to capturing the identity, character, and essence of a person or a group of people. It goes far beyond simply documenting what someone looks like. A truly great portrait invites the viewer to connect with the subject on a deeper, more human level, offering a glimpse into their world, their emotions, and their story.
Beyond Just a Picture of a Person
Anyone can take a quick picture with their phone, but a portrait is a more deliberate and thoughtful creation. It’s a collaboration that aims to distill a person’s spirit into a single frame. The distinction lies in the intent and the result.
- Capturing personality, character, and emotion: A successful portrait feels authentic. It captures the subject’s quiet introspection, their infectious laughter, their gentle nature, or their commanding presence. The goal is to create an image that makes a viewer say, “I feel like I know this person.”
- The story a single image can tell: Through expression, environment, and lighting, a portrait can suggest a narrative. Is the subject a hopeful artist in their chaotic studio? A confident CEO in a sleek office? A parent sharing a tender moment with their child? The details work together to tell a story without a single word.
- The difference between a snapshot and a portrait: A snapshot is often a reactive capture of a moment—a quick photo at a party or on vacation. A portrait is a proactive creation. It involves intentional choices about light, composition, posing, and expression to create a specific feeling and reveal a deeper truth about the subject.
The Connection Between Photographer and Subject
The most crucial element in portraiture isn’t the camera or the lens; it’s the relationship you build with the person in front of you. Technical perfection means little if the subject looks uncomfortable or disconnected. The photographer’s role is part artist, part director, and part psychologist.
- Building rapport and trust: Spend a few minutes talking with your subject before you even pick up the camera. Ask them about their day, their work, or their passions. This simple act breaks down barriers and helps them see you as a person, not just a photographer. When a subject trusts you, they are more willing to be vulnerable and genuine.
- The importance of communication and direction: Most people are not professional models and feel awkward in front of a camera. It’s your job to guide them. Give clear, positive, and simple directions. Instead of saying “look natural,” try “take a deep breath and let it out slowly,” or “think about your favorite vacation spot.” This gives them something concrete to do and results in more authentic expressions.
- Creating a comfortable and relaxed atmosphere: The environment you create is paramount. Play some music, offer a drink of water, and keep the mood light and encouraging. Your own calm and confident energy is contagious. If you are relaxed, your subject is far more likely to relax as well.
Key Elements of a Compelling Portrait
When the human connection is established, you can focus on the technical and artistic elements that elevate an image from good to great. These components work in harmony to support the emotion and story of the photograph.
- Emotion and expression: This is the soul of the portrait. A genuine smile, a pensive gaze, a moment of laughter—these are the expressions that resonate with viewers and make an image memorable. For tips on capturing genuine smiles, check out our guide on eliciting laughter for perfect portrait photography.
- Connection with the viewer (the eyes): The old saying “the eyes are the window to the soul” is a fundamental truth in portrait photography. When the eyes are in sharp focus and convey emotion, they create a powerful point of connection that draws the viewer into the image.
- Lighting and mood: Light is what shapes your subject and sets the entire mood of the photograph. Soft, diffused light can feel gentle and romantic, while hard, dramatic light can feel intense and powerful. Understanding how to see and shape light is a non-negotiable skill. Learn more with our beginner’s photo lighting guide or explore manipulating light and shadows for dramatic effects.
- Composition and background: How you arrange the elements within your frame directs the viewer’s attention. A clean, uncluttered background keeps the focus entirely on the subject, while an environmental background can add context and narrative depth. Rules like the Rule of Thirds can help create a balanced and visually pleasing image.
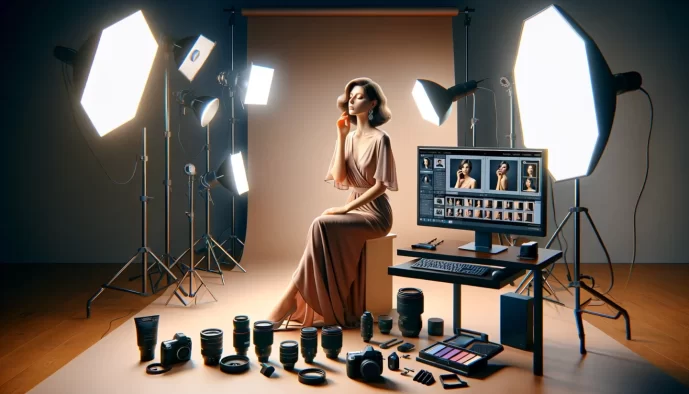
Essential Gear for Portrait Photography
While the photographer’s vision is paramount, the right equipment can help translate that vision into a tangible, beautiful image. Getting started doesn’t require a massive investment, but understanding the key pieces of gear will empower you to make informed choices as you grow. Here’s a breakdown of the essential tools for portrait photography.
Choosing the Right Camera
The camera is the heart of your kit, but today’s market offers incredible options at every level. The “best” camera is often the one that fits your needs and budget, but it’s helpful to understand the main categories.
- DSLR vs. Mirrorless for portraits: For years, the DSLR (Digital Single-Lens Reflex) was the professional standard. They offer excellent image quality, long battery life, and a vast selection of lenses. However, Mirrorless cameras have become the dominant force. They are typically lighter, more compact, and their electronic viewfinders show you a real-time preview of your exposure. Crucially for portrait work, modern mirrorless cameras boast incredibly sophisticated autofocus systems, including Eye-AF that automatically locks onto your subject’s eye—a game-changer for achieving sharp focus.
- The benefits of a Full-Frame sensor: A full-frame sensor is the same size as a 35mm film frame. This larger sensor size generally provides better performance in low light with less digital noise, a wider dynamic range, and the ability to achieve a shallower depth of field (more background blur) compared to smaller APS-C or Micro Four Thirds sensors. While not essential for beginners, it’s a feature many portrait photographers aspire to for its distinct look.
- Why your phone can also be a great starting point: Never underestimate the camera in your pocket. Modern smartphones have remarkable cameras with sophisticated “Portrait Mode” software that simulates background blur. Using your phone is a fantastic, no-cost way to practice composition, lighting, and interacting with your subject. It’s an invaluable tool for learning the fundamentals before investing in a dedicated camera system.
The Crucial Role of Lenses
If the camera is the heart, the lens is the eye. Your choice of lens has a more significant impact on the final look of your portrait than almost any other piece of gear. It determines the perspective, compression, and how much of the background is in or out of focus.
Prime Lenses: The Portraitist’s Choice
A prime lens has a fixed focal length—it doesn’t zoom. This simplicity often results in sharper optics, lighter designs, and, most importantly, wider maximum apertures. They force you to “zoom with your feet,” encouraging more thoughtful composition.
- Understanding focal length: Classic portrait focal lengths each offer a unique perspective. A 50mm lens provides a field of view similar to the human eye, making it a versatile “nifty fifty” for half-body or environmental shots. An 85mm is often considered the quintessential portrait lens, offering beautiful compression that flattens facial features flatteringly without requiring you to stand too far from your subject. A 135mm lens provides even more compression and subject separation, perfect for headshots and creating a truly dreamy background.
- The power of a wide aperture (f/1.8, f/1.4): The aperture is the opening in the lens that lets light in, measured in f-stops. A low f-stop number like f/1.8 or f/1.4 signifies a very wide opening. This allows for shooting in lower light and, crucially, creates a very shallow depth of field. This is how photographers achieve that beautifully soft, out-of-focus background known as bokeh, which makes the subject pop from the frame.
Versatile Zoom Lenses
Zoom lenses offer the flexibility of multiple focal lengths in one package, making them ideal for dynamic situations like events, weddings, or family sessions where you need to adapt quickly.
- When to use a 24-70mm or 70-200mm lens: A 24-70mm f/2.8 is a workhorse lens that covers wide-angle environmental portraits all the way to classic portrait lengths. A 70-200mm f/2.8 is another professional favorite, allowing you to capture candid moments from a distance with stunning compression and background separation, similar to a 135mm prime but with added flexibility.
- The trade-offs between primes and zooms: The primary trade-off is aperture and size. Professional zoom lenses are often large, heavy, and their widest aperture is typically f/2.8. While excellent, this is not as wide (or “fast”) as the f/1.8 or f/1.4 found on many affordable prime lenses, meaning primes often have an edge in low light and for creating the creamiest bokeh.
Lighting Equipment and Modifiers
Mastering light is the key to elevating your portraits from simple snapshots to professional-quality images. While natural light is a beautiful tool, learning to shape and create your own light opens up endless creative possibilities. Understanding manipulating light and shadows is crucial.
- Reflectors and diffusers: These are the simplest and most affordable lighting tools. A reflector (often with silver, gold, and white surfaces) bounces existing light back into the shadows on your subject’s face, creating a soft, flattering fill. A diffuser is a translucent material placed between the light source (like the sun) and your subject to soften harsh light and reduce strong shadows.
- Introduction to off-camera flash (strobes/speedlights): While your camera may have a pop-up flash, taking the flash off the camera is transformative. An external flash, whether a small speedlight or a more powerful studio strobe, gives you complete control over the direction, quality, and intensity of your light, regardless of the ambient conditions. This falls under the umbrella of beginner’s photo lighting.
- Basic light modifiers: Once you have an off-camera flash, modifiers are used to shape its output. The goal is usually to make a small, harsh light source larger and softer. A softbox creates a beautiful, soft, window-like light, while an umbrella spreads light over a wider area, with silver-lined ones creating more contrast and white ones creating a softer output. These are examples of creative lighting techniques.
Mastering Camera Settings for Portraits
Moving your camera dial from “Auto” to “Manual” is the single most empowering step you can take in portrait photography. It’s the difference between letting the camera make guesses and telling it exactly what you want to create. Understanding the core settings—aperture, shutter speed, and ISO—and how they work together is the key to unlocking your creative vision. This is a great starting point for anyone looking to improve their beginner’s photo lighting.
Aperture and Depth of Field
Aperture is arguably the most creative tool in a portrait photographer’s arsenal. It refers to the opening in your lens that lets light into the camera, but its creative effect is on the depth of field—the portion of your image that is in sharp focus. This is controlled by the “f-stop” number.
- Using a wide aperture for a blurry background: To achieve that classic professional portrait look with a beautifully blurred background (often called “bokeh”), you’ll want to use a wide aperture. This corresponds to a low f-stop number, such as f/1.4, f/1.8, or f/2.8. A wide opening creates a very shallow depth of field, meaning only a thin slice of the scene is in focus. This isolates your subject, makes them “pop” from the background, and directs the viewer’s eye exactly where you want it. This is a key aspect of creative lighting techniques.
- Using a narrower aperture for group shots or environmental portraits: When you need more of the scene to be in focus, you’ll use a narrower aperture. This means choosing a higher f-stop number, like f/5.6, f/8, or even f/11. This is essential for group photos where you need everyone in different rows to be sharp. It’s also perfect for environmental portraits where the background—a painter’s studio, a chef’s kitchen—is a crucial part of the story and needs to be recognizable.
Remember this simple rule: a low f-number (e.g., f/1.8) means a small amount of the scene is in focus, while a high f-number (e.g., f/11) means a large amount is in focus.
Shutter Speed: Freezing the Moment
Shutter speed determines how long the camera’s sensor is exposed to light. Its primary job in portraiture is to control motion. A fast shutter speed freezes action, while a slow one can introduce blur, either from your subject moving or from the camera shaking in your hands.
- Choosing a shutter speed to avoid motion blur: For a crisp, sharp portrait of a relatively still person, a shutter speed of 1/125s or faster is a safe starting point. If your subject is more active, like a child playing, you’ll want to increase that to 1/250s, 1/500s, or even higher to freeze their movement completely.
- Minimum handheld shutter speed rule: A useful guideline to prevent blur from your own hand movements is the reciprocal rule. Your shutter speed should be at least 1 divided by your lens’s focal length. For example, if you’re using an 85mm lens, your minimum shutter speed should be around 1/85s (you’d likely use 1/100s or 1/125s as the closest setting).
- Using shutter speed creatively: While sharpness is usually the goal, you can use a slower shutter speed for artistic effect. For instance, you could have your subject stand perfectly still while the background has motion, like passing cars, creating a dynamic and compelling image. This requires practice and often a tripod. This technique relates to manipulating light and shadows.
ISO: Managing Light Sensitivity
ISO measures your camera sensor’s sensitivity to light. Think of it as a way to digitally brighten your photo when you can’t add more light by widening the aperture or slowing the shutter speed. However, this brightness comes at a cost: higher ISO settings introduce digital “noise,” which looks like fine grain and can reduce image quality.
- Keeping ISO low for clean, noise-free images: Always aim to use the lowest possible ISO setting for your camera, often called the base ISO (typically ISO 100 or 200). In bright, sunny conditions, you should have no problem staying here. This will give you the cleanest, sharpest, and most detailed images.
– When and why to increase your ISO: You’ll need to increase your ISO when the light is low and you’ve already opened your aperture as wide as it can go, but your shutter speed is still too slow to handhold without blur. Shooting indoors without a flash or capturing portraits after sunset are common scenarios where bumping your ISO to 800, 1600, or even 3200 becomes necessary. It’s always better to have a sharp, slightly noisy image than a blurry, unusable one.
These three settings—Aperture, Shutter Speed, and ISO—form the Exposure Triangle. They are in a constant dance. If you change one, you must adjust at least one of the others to maintain the same exposure (brightness). Mastering this balance is the technical foundation of photography.
Focus Modes for Tack-Sharp Eyes
In portraiture, the eyes are everything. If the eyes are not perfectly in focus, the entire portrait can feel “off.” Modern cameras offer incredibly powerful tools to ensure your focus is always precise.
- Using Single-Point AF for precision: This is a classic, reliable method. In this mode, you manually select a single, small focus point and move it around your frame using your camera’s joystick or directional pad. You then place this point directly over your subject’s eye (specifically, the one closer to the camera) and lock focus. It gives you complete control and is highly accurate.
- The magic of modern Eye-AF technology: Perhaps the biggest technological leap for portrait photographers in recent years is Eye-AF (Eye Autofocus). Available on most modern mirrorless and many DSLR cameras, this mode automatically detects a human face in the frame and then finds and locks focus onto the nearest eye. It will even track that eye as the person moves. This technology is a game-changer, freeing you from worrying about focus and allowing you to concentrate fully on your composition and interaction with your subject. Learning how to elicit genuine smiles can make these shots even better, so check out these 20 Fun Ways to Elicit Laughter for Perfect Portrait Photography.
The Art of Lighting in Portraiture
Light is the language of photography, and in portraiture, it’s the element that sculpts the face, creates mood, and brings a subject to life. Understanding how to find, control, and shape light is arguably the single most important skill a portrait photographer can develop. Whether you’re using the sun or a studio strobe, mastering light is the key to transforming a simple picture into a breathtaking portrait.
Harnessing Natural Light
Natural light is the most accessible light source available, and it’s capable of producing stunningly beautiful results. It’s versatile, free, and changes constantly, offering an endless palette of moods. The trick is learning to see its quality and direction.
- Golden Hour: The best light of the day. This magical period, occurring shortly after sunrise and before sunset, bathes the world in a warm, soft, and directional light. The low angle of the sun creates long, gentle shadows that add depth and dimension to your subject’s features without being harsh. The warm color temperature is incredibly flattering for skin tones, making it a favorite time for portrait photographers.
- Open Shade: Your secret to soft, flattering light. Harsh midday sun can create unflattering, hard shadows. The solution is open shade. This is an area that is not in direct sunlight but is still illuminated by the bright, open sky, such as under a large tree, in the shadow of a building, or on an overcast day. The sky acts as a massive diffuser, wrapping your subject in soft, even light that minimizes harsh shadows and allows for beautiful, catchlights in the eyes.
- Using Window Light for classic indoor portraits. When shooting indoors, a large window is your best friend. It acts as a giant softbox, providing a beautiful, directional light source that has been celebrated by painters for centuries. Position your subject near the window, and experiment with their angle to it. Facing the window produces a flat, even light, while turning them 45 or 90 degrees to it will create more dramatic shadows and depth.
Introduction to Artificial Lighting
While natural light is wonderful, it’s not always available or ideal. Learning to use artificial light, like a flash or a strobe, gives you complete creative control over your images, allowing you to shoot anytime, anywhere, and achieve any look you can imagine. This is part of our Beginner’s Photo Lighting guide.
The first crucial distinction to understand is On-Camera vs. Off-Camera Flash. An on-camera flash, attached to your camera’s hot shoe, points directly at your subject. This often creates a flat, harsh look with stark shadows directly behind them. Taking that same flash off the camera and placing it to the side, controlled by a remote trigger, immediately creates dimension, shape, and a more professional, dynamic look. This is the foundation of creative lighting techniques.
Key One-Light Setups
You don’t need a complex, multi-light studio to create stunning portraits. A single off-camera light source (a speedlight or a strobe), often paired with a modifier like a softbox or umbrella to soften it, is all you need to master the classic lighting patterns. Simple diagrams can be incredibly helpful for visualizing these setups, showing the placement of the light, subject, and camera. This is where understanding manipulating light and shadows becomes critical.
- Rembrandt Lighting: Named after the famous painter, this pattern is identified by a small, inverted triangle of light on the cheek opposite the main light source. It’s achieved by placing the light about 45 degrees to the side and slightly above the subject. It creates a moody, dramatic, and classic look, a key aspect of Face Shadow Play.
- Loop Lighting: A very common and flattering pattern, loop lighting is created by placing the light slightly higher and about 30-45 degrees from the camera. It creates a small “loop” shadow from the nose that points down towards the corner of the mouth. It’s a safe and pleasing pattern that works for most face shapes.
- Split Lighting: For a very dramatic and high-contrast effect, place the light directly to one side of your subject (90 degrees). This splits the face into two halves: one brightly lit and one in deep shadow. It’s often used for masculine or artistically intense portraits.
- Butterfly Lighting: Also known as “paramount” lighting, this is a classic glamour style. The light is placed directly in front of and above the subject’s face, pointing down. This creates a small, butterfly-shaped shadow directly under the nose. It’s very flattering as it accentuates cheekbones and is often used in beauty and fashion photography.
Composition and Posing Techniques
Once your technical settings are dialed in, the next step is to arrange the elements within your frame. Composition and posing are the artistic pillars that transform a technically correct photo into a captivating portrait. This is where you guide the viewer’s eye and shape the narrative of your image.
Foundational Composition Rules
Think of these “rules” not as rigid laws but as time-tested guidelines that help create balance, interest, and visual harmony in your portraits. Mastering them will give you the confidence to break them intentionally for creative effect.
- The Rule of Thirds: Imagine your frame is divided into nine equal rectangles by two horizontal and two vertical lines. Instead of placing your subject dead center, position them along one of these lines or at one of the four intersection points. This simple technique creates a more dynamic and visually engaging image. Placing the subject’s dominant eye on an intersection point is particularly powerful.
- Using Leading Lines: Our eyes are naturally drawn to lines. Look for elements in the environment—like a path, a fence, a staircase, or the curve of a wall—that can act as lines leading the viewer’s gaze directly to your subject. This technique adds depth and focuses attention exactly where you want it.
- Framing Your Subject: Use elements within the scene to create a natural frame around your subject. This could be a doorway, a window, an archway, or even overhanging tree branches. Framing adds a sense of depth, context, and intimacy, making the portrait feel more deliberate and contained.
- Considering Negative Space: The empty space around your subject is just as important as the subject themselves. This “negative space” gives your subject room to breathe and can be used to evoke feelings of freedom, isolation, or simplicity. A well-balanced use of negative space prevents the image from feeling cluttered and helps the main subject stand out.
Posing Fundamentals for Flattering Portraits
Posing is not about forcing your subject into unnatural positions; it’s about guiding them into poses that feel natural and look flattering. The goal is to convey confidence, emotion, and personality through body language.
- Posing Individuals: To avoid a stiff, passport-photo look, focus on creating angles and curves. A classic tip is to ask your subject to shift their weight to one foot, which creates a natural ‘S’ curve in the body. Have them turn their body slightly away from the camera (about 45 degrees) and then turn their head back towards you. This is generally more flattering than a straight-on shot. Remind them to relax their shoulders and keep a slight bend in their arms and legs.
- Directing Couples and Groups: The key to group portraits is connection. You want to show the relationship between the people in the photo. Encourage them to interact—to lean on each other, touch hands, or share a look. Arrange them in varying heights and depths to create visual interest; a straight line of people often looks static. Think in terms of triangles, positioning heads at different levels to guide the viewer’s eye through the group.
- Tips for Natural-Looking Hand Placement: Hands can be awkward if left unattended. Give them something to do. They can be placed gently on a hip, in a pocket (with the thumb out), resting on a lapel, or brushing through hair. The key is to keep them relaxed and soft, not balled into fists or held rigidly straight. For couples, having them hold hands or place a hand on a shoulder or arm reinforces their connection.
- The Importance of Posture and Perspective: Good posture immediately projects confidence. Gently remind your subject to stand or sit up straight, roll their shoulders back, and slightly elongate their neck. Your shooting angle also matters immensely. Shooting from slightly above your subject is often flattering, especially for close-ups, as it de-emphasizes the chin and draws attention to the eyes. Conversely, shooting from a slightly lower angle can make your subject appear more powerful and heroic.
Candid vs. Posed: Capturing Authentic Moments
While posed shots are essential, some of the most memorable portraits are the ones that feel completely unscripted. The magic often lies in a blend of gentle direction and spontaneous capture.
- How to prompt genuine expressions: Instead of saying “smile!” or “look happy,” use prompts that evoke a real emotion. You could ask a couple to tell each other about the moment they first met, or ask a person to think about a favorite memory or a place they love. Asking them to walk, laugh, or interact with a prop can also break the tension and lead to genuine, unforced expressions.
- The value of shooting “in-between” the poses: Don’t put your camera down the second you get the “shot.” The most authentic moments often happen in the transitions—the quiet laugh after a joke, the glance between a couple as they reset their pose, or the moment your subject adjusts their hair. Keep shooting through these “in-between” moments to capture the unguarded personality that makes a portrait truly special.
Exploring Different Styles of Portrait Photography
Portraiture is not a single, monolithic genre; it’s a vast and varied field with numerous styles, each offering a different way to interpret and capture the human form. Understanding these styles can help you define your own artistic voice and choose the best approach for any given subject. While the lines between them can often blur, here are some of the primary categories you’ll encounter.
Traditional and Formal Portraits
When you think of a classic portrait, you’re likely picturing the traditional style. These images are often created in a controlled studio environment with deliberate lighting setups and carefully considered posing. The primary goal is to produce a timeless and flattering representation of the subject. Think of corporate headshots, official family portraits, and graduation photos. The background is typically simple—a solid color or a subtle texture—to ensure the focus remains entirely on the person. The photographer takes on a clear directorial role, guiding the subject into poses that convey confidence, warmth, or professionalism.
Environmental and Lifestyle Portraits
Environmental portraiture moves beyond the studio to place the subject within a meaningful context. The setting becomes a crucial part of the story, revealing something about the person’s life, profession, or passion. A portrait of a chef in their bustling kitchen or a musician in their recording studio tells a much richer story than a simple headshot. Lifestyle photography is a close cousin, aiming to capture authentic, life-as-it-happens moments with a more documentary feel. While still guided by the photographer, the goal is to capture genuine interactions and emotions in the subject’s natural element, like a family playing in their backyard or a couple making coffee at home.
Street and Candid Portraits
Street photography is the art of capturing unposed, fleeting moments in public spaces. A street portrait, therefore, is a photograph of a person, often a stranger, taken within this candid context. This style requires a keen eye, quick reflexes, and a great deal of patience. The photographer isn’t directing the scene but rather observing and anticipating moments of interest—an expressive glance, a unique interaction, or a compelling character whose face tells a story. It’s about finding beauty and narrative in the everyday flow of public life. For inspiration on capturing genuine expressions, consider these ways to elicit laughter.
Fine Art and Conceptual Portraits
In fine art and conceptual portraiture, the photographer uses the subject as a component in creating a piece of art that expresses a specific idea, emotion, or narrative. The goal is not simply to document the person’s appearance but to convey the photographer’s artistic vision. These portraits are often highly stylized and meticulously planned, involving elaborate costumes, props, unique locations, and advanced post-processing techniques. The final image transcends a simple likeness and operates on a more symbolic or metaphorical level, inviting the viewer to interpret its deeper meaning. Mastering manipulating light and shadows can greatly enhance the artistic impact of these images.
Post-Processing: Bringing Your Vision to Life
The click of the shutter is not the end of the creative process; it’s the halfway point. Post-processing, or editing, is where you refine your images, enhance the mood, and truly bring your artistic vision to life. It’s the digital darkroom where you can polish a good photo into a great one. This stage is about elevating the portrait, not fundamentally changing the person in it.
The Basic Portrait Editing Workflow
A consistent workflow saves time and ensures a polished, professional result. While every photographer develops their own nuances, most successful editing processes follow a similar path from initial selection to final export.
- Culling: How to select your best images. After a shoot, you’ll likely have hundreds of photos. Culling is the crucial process of sorting through them to find the “keepers.” Don’t just look for technically perfect shots; prioritize images with the strongest emotion, sharpest focus on the eyes, and most compelling composition. Be ruthless—it’s better to have a few incredible portraits than dozens of mediocre ones.
- Global adjustments: Exposure, contrast, and white balance. Before diving into fine details, adjust the entire image. This is where you correct the overall brightness (exposure), manage the range between light and dark tones (contrast), and ensure colors are accurate by setting the correct white balance. These foundational edits create a solid base for everything that follows.
- Cropping and straightening for impact. Sometimes the best composition isn’t captured in-camera. Use the crop tool to remove distracting elements from the edges, straighten a tilted horizon, or reframe your subject to better follow compositional rules like the Rule of Thirds. A simple crop can dramatically increase an image’s impact.
- Color grading to establish a mood. Color is a powerful storytelling tool. Color grading is the process of stylizing the colors in your image to evoke a specific feeling. You might add warmth to the highlights for a sunny, nostalgic feel or introduce cool, blue tones into the shadows for a more somber or cinematic mood. This is where you develop your signature style.
Essential Retouching Techniques
Retouching can be a sensitive subject, but when approached with care, it’s about making your subject look like themselves on their very best day. The goal of retouching is to enhance, not to alter reality. It’s about removing temporary distractions so the viewer can connect with the person, not the imperfections.
- Skin Retouching: The natural approach. The aim is to reduce distracting blemishes and even out skin tones while preserving natural skin texture. Overly smoothed, “plastic” skin is a common mistake. Modern software allows you to gently soften skin without erasing every pore, resulting in a clean but authentic look.
- Blemish removal and spot healing. Tools like the Spot Healing Brush are perfect for removing temporary imperfections such as pimples, scratches, or stray hairs. These are non-permanent features, and removing them helps focus the viewer’s attention on the subject’s expression.
- Frequency separation (for advanced users). This is a more sophisticated technique used in software like Photoshop. It separates the color and texture of the skin onto different layers, allowing you to edit them independently for incredibly clean and natural results. It offers maximum control but has a steeper learning curve.
- Enhancing the Eyes. The eyes are the focal point of any portrait. Subtle enhancements can make them more captivating. This often involves slightly brightening the iris to bring out its color, sharpening the eyelashes for definition, and gently reducing any redness in the whites of the eyes.
- Dodging and burning to add depth and sparkle. A classic darkroom technique, dodging (selectively lightening) and burning (selectively darkening) adds dimension and shape to your portrait. You can use it to enhance cheekbones, add a sparkle to the eyes, or guide the viewer’s attention to specific parts of the image, creating a more three-dimensional feel.
Popular Software for Portrait Editing
Choosing the right software depends on your needs and workflow. Most professional photographers use a combination of tools to get the job done efficiently.
- Adobe Lightroom Classic: This is the industry standard for a reason. Lightroom is an all-in-one powerhouse for importing, organizing (culling), and performing most of your edits. Its RAW processing engine is exceptional, and its tools for global adjustments and color grading are intuitive and powerful. For many photographers, 90% of their editing work happens here.
- Adobe Photoshop: When you need pixel-level control, you turn to Photoshop. It is the ultimate tool for detailed and complex retouching tasks like frequency separation, compositing multiple images, or advanced object removal. Most pros use a workflow where they do their main edits in Lightroom and then take specific images into Photoshop for finishing touches.
- Capture One: A leading competitor to Lightroom, Capture One is renowned for its superior RAW processing, incredible color rendering (especially for skin tones), and robust tethering features (shooting directly into the computer). Many professional studio, fashion, and commercial photographers prefer it for its exceptional image quality and precise color tools.