The Creative Process in Landscape Photography : From Inspiration to Final Image
From a spark of inspiration to a stunning final landscape.
Phase 1: The Spark of Inspiration
Finding Your Vision Before You Leave Home
The most compelling landscape photographs are rarely the result of simple luck. They begin long before the camera is ever removed from its bag, born from an idea, a feeling, or a flash of inspiration. This initial creative spark is the foundation upon which a powerful image is built. Instead of waiting for a scene to present itself, the intentional photographer seeks out inspiration to cultivate a vision. This process turns photography from a passive act of recording into an active art of creation.
Inspiration is all around us, often in places we might not expect. By expanding your visual diet, you can train your eye to see the world with greater depth and creativity. Consider these sources:
- Studying the Masters: Immerse yourself in the work of legendary photographers like Ansel Adams or Galen Rowell, but don’t stop there. Explore the landscape paintings of artists like Albert Bierstadt or J.M.W. Turner. They were masters of light, mood, and composition long before the camera was invented, and their interpretation of the natural world offers timeless lessons.
- Exploring Maps: Digital tools have made us all cartographers. Spend time exploring topographical and satellite maps of areas that interest you. Look for intriguing patterns, unique landforms, converging rivers, or isolated peaks that might not be obvious from a roadside viewpoint. This digital exploration can reveal hidden photographic gems.
- Watching Films: Pay close attention to films with powerful cinematography. Directors of photography are experts at using landscapes to evoke emotion and tell a story. Notice how they frame scenes, use light, and create a sense of place. This can be a potent source of ideas for mood and composition.
- Observing Your Local Environment: You don’t need to travel to exotic locations to find inspiration. The most profound connection to the landscape often comes from familiarity. Watch how the light changes on a local hill throughout the year, notice the arrival of morning fog in a familiar valley, or study the textures of trees in your nearby park. The changing seasons provide a constantly evolving canvas.
The Art of Pre-visualization
Pre-visualization is the practice of forming a clear, detailed mental image of your desired photograph before you even press the shutter. It’s the “making” of a photograph, as Ansel Adams famously distinguished from simply “taking” one. This mental blueprint is not a rigid set of rules, but a guiding vision that informs every decision you make in the field and in the digital darkroom.
When you pre-visualize an image, you begin to answer critical questions in advance. What is the mood you want to convey—serene, dramatic, mysterious? What time of day will provide the light that best serves this mood? From what angle will the composition be strongest? Will you need a slow shutter speed to blur the water or a deep depth of field to render everything sharp? This proactive approach transforms you from a reactive picture-taker, capturing whatever happens to be in front of you, into an intentional artist, executing a specific creative concept. This is a key part of elevating your photography.
Developing a Personal Style and Projects
As you gather inspiration and practice pre-visualization, you’ll naturally gravitate toward certain subjects, moods, and aesthetics. This is the beginning of your personal style. Are you drawn to the stark, powerful geometry of dramatic mountain ranges? Do you find beauty in the quiet minimalism of a misty coastline? Or perhaps you’re fascinated by the abstract patterns found in nature’s smaller details. Identifying these passions is the first step toward creating work that is not just technically proficient, but also deeply personal and authentic.
A powerful way to cultivate this style is to move beyond creating single, disconnected images and begin working on cohesive projects or series. A project—whether it’s documenting a specific river from its source to its mouth, capturing the different moods of a single tree through the seasons, or exploring coastal erosion—provides a narrative thread. It forces you to think more deeply about your subject, pushing your creativity and resulting in a body of work that is far more impactful than a collection of unrelated “best hits.”
Phase 2: The Blueprint for a Successful Shoot
Inspiration provides the “what,” but meticulous planning provides the “how.” The most compelling landscape images are rarely a result of pure luck; they are born from careful preparation long before the camera leaves the bag. This phase is about translating your creative vision into a practical, actionable plan that maximizes your chances of success in the field.
Digital Location Scouting
Some of the most critical work for a landscape shoot happens on a computer screen. Modern tools allow us to virtually explore, analyze, and plan our excursions with incredible precision, saving valuable time and energy on location. By scouting digitally, you can arrive with a solid plan, ready to focus on creativity rather than logistics.
- Google Earth/Maps: These are indispensable for understanding the lay of the land. Use satellite and terrain views to identify promising compositions, find potential access points, check for parking areas, and estimate hiking distances. You can discover hidden valleys, winding rivers, and unique geological features you might otherwise miss.
- The Photographer’s Ephemeris (TPE) or PhotoPills: These powerful apps are the landscape photographer’s secret weapon. They show you the precise direction and angle of the sun, moon, and Milky Way for any location, on any date, at any time. This allows you to plan exactly where the light will fall, whether you want to capture the sun rising through a natural arch or the Milky Way core aligning over a mountain peak.
- Weather Apps and Webcams: Beyond a simple forecast, look for detailed information on cloud cover (high vs. low clouds), fog potential, and storm systems. Local webcams can provide a real-time view of conditions, helping you decide if a long drive is worthwhile.
Reading the Light and Weather
Light is not just illumination; it is the subject itself. The quality, color, and direction of light dictate the mood, texture, and emotional impact of your photograph. Understanding its behavior—and embracing the weather that shapes it—is fundamental to the craft.
Different times of day offer distinct palettes:
- Golden Hour: The period shortly after sunrise and before sunset. The light is warm, soft, and directional, casting long, elegant shadows that reveal texture and create a sense of depth. It’s the classic, sought-after light for its universally appealing quality.
- Blue Hour: The time just before sunrise and after sunset when the sun is below the horizon. The world is bathed in a cool, ethereal, and even light. This is a perfect time for capturing serene cityscapes, tranquil water scenes, and moody landscapes with a peaceful atmosphere.
- Midday Sun: Often dismissed by photographers, the high, harsh sun of midday creates deep shadows and high contrast. While challenging, it can be used effectively for bold, graphic compositions, black and white photography, or capturing the vibrant blues in tropical waters.
Crucially, what most people consider “bad” weather is often a gift to the landscape photographer. A clear, blue sky can be the most uninteresting canvas. It’s the drama of weather that injects emotion and uniqueness into a scene. Fog and mist can simplify a cluttered background, isolating subjects and creating a sense of mystery. Approaching storms bring dramatic, swirling clouds and intense, fleeting moments of light. Dramatic clouds at sunrise or sunset act as a massive celestial canvas, catching the light and turning a good scene into an unforgettable one. These dynamic conditions create mood and provide opportunities for truly singular images that stand apart from the ordinary.
Packing with Purpose, Not Just Gear
Your gear should serve your vision, not dictate it. Packing with intention means selecting the right tools for the specific images you have pre-visualized. It’s a balance between being prepared and being weighed down by unnecessary equipment.
Choosing the Right Tools for Your Vision
- Lenses: A versatile kit often includes a range of focal lengths. A wide-angle lens (e.g., 16-35mm) is essential for grand, sweeping vistas and for exaggerating foreground elements. A mid-range zoom (e.g., 24-70mm) is a flexible workhorse for classic landscape compositions. A telephoto lens (e.g., 70-200mm) is invaluable for compressing distant mountain layers and isolating intimate details within a larger scene.
- Tripod: This is the single most important, non-negotiable accessory for landscape photography. It provides stability, allowing you to use low ISOs for maximum image quality and slow shutter speeds for creative motion blur. A sturdy tripod is the foundation of a sharp, thoughtfully composed photograph.
- Filters: A Circular Polarizer (CPL) is used to reduce glare on water and wet foliage, and to deepen the blue in the sky, adding contrast and saturation directly in-camera. Neutral Density (ND) filters are like sunglasses for your lens, reducing the amount of light that enters. This allows you to use very long shutter speeds even in daylight, which can be used to blur the motion of water or clouds for a smooth, ethereal effect.
Beyond the Camera
Your ability to create is directly linked to your safety and comfort. Essential non-photographic gear is just as important as your camera.
- Headlamp: You will often be hiking in the dark to catch sunrise or after sunset. A reliable headlamp (with extra batteries) is a safety necessity.
- Proper Footwear and Layers: Conditions can change rapidly. Sturdy, waterproof hiking boots and dressing in moisture-wicking layers will keep you comfortable, dry, and focused on your photography, not your discomfort.
- Navigation Tools: Whether it’s a dedicated GPS device or a reliable app on your phone (with offline maps downloaded), never venture into an unfamiliar area without a way to navigate.
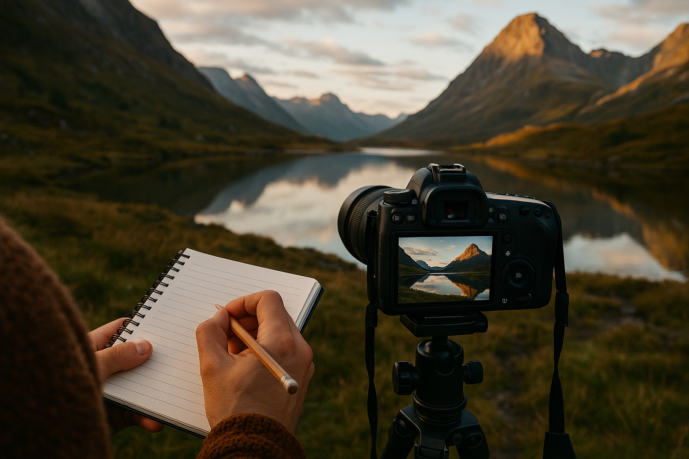
Phase 3: Execution in the Field
All the planning and inspiration have led to this moment. You’re on location, camera in hand, ready to translate your vision into a tangible image. This is where preparation meets reality, and your ability to see, adapt, and execute technically comes into play. Success in the field is a dance between meticulous control and creative flexibility.
Arriving and Adapting to the Scene
Your pre-visualization is a powerful guide, but it should never be a rigid set of instructions. The landscape is a living, breathing entity, and the most rewarding photographs often come from reacting to the conditions you find, not just the ones you expected.
- Arrive Early, Stay Late: The single most impactful habit you can develop is giving yourself ample time on location. Arriving at least an hour before your target shooting time (like sunrise or sunset) allows you to scout, find your composition, and, most importantly, watch the light evolve. The subtle shifts in color and shadow in the minutes leading up to the main event are often magical in their own right.
- Compare Vision to Reality: Set up your tripod where you planned. Look through the viewfinder. How does the scene compare to the image in your mind? Perhaps the clouds are different, a key tree has lost its leaves, or the tide is not where you expected. This isn’t a failure; it’s a new set of creative parameters.
- Embrace Flexibility: If your pre-visualized shot isn’t working, don’t force it. Look around. Is there a better composition just a few feet to your left? Does the unexpected fog create a more compelling, moody scene than the clear sky you had planned for? The best landscape photographers are masters of adaptation, turning unexpected conditions into unique opportunities.
Composition: The Language of an Image
Composition is how you arrange elements within your frame to tell a story and guide the viewer’s eye. It’s the visual grammar that transforms a simple snapshot into a compelling photograph. While rules are made to be broken, understanding these foundational principles is essential for building a strong image.
- Foreground Interest: A strong foreground element acts as an anchor, giving your image a sense of depth and providing an entry point for the viewer. This could be a textured rock, a cluster of wildflowers, or the swirling patterns of water on a beach. It connects the viewer to the scene, making them feel like they could step right into it.
- Leading Lines: Our eyes are naturally drawn to lines. Use them to your advantage. A winding river, a rustic fence, a road disappearing into the distance, or the curve of a shoreline can all act as powerful leading lines, pulling the viewer’s gaze from the foreground deep into the heart of your image.
- Rule of Thirds: Imagine your frame is divided by two horizontal and two vertical lines, creating a 3×3 grid. Instead of placing your main subject dead center, try placing it on one of the lines or at one of the four intersection points. This simple technique often creates a more balanced, dynamic, and visually interesting composition.
- Framing: Using natural elements within the scene to create a “frame” around your main subject can add depth and context. Look for overhanging tree branches, a natural rock arch, or a gap in a stone wall to frame the distant mountains or seascape.
Technical Craft: From Focus to Exposure
With a strong composition in mind, it’s time to master the technical settings that will bring it to life. For landscapes, the goal is typically to capture maximum detail, sharpness, and quality from corner to corner.
- Aperture: For a classic grand landscape, you want a large depth of field, meaning everything from your immediate foreground to the distant background is in sharp focus. This is achieved by using a mid-range aperture, typically between f/8 and f/16.
- Focusing: To ensure that deep depth of field is actually sharp, you can’t just focus on the most distant object. A common technique is to focus about one-third of the way into the scene. For more advanced control, photographers use techniques like hyperfocal distance to calculate the precise point of focus for maximum sharpness, or focus stacking—blending multiple images focused at different points—for ultimate front-to-back clarity.
- ISO: Your ISO setting controls the sensor’s sensitivity to light. For landscape photography on a tripod, always use the lowest native ISO your camera offers (usually ISO 100 or 200). This will produce the cleanest image with the least amount of digital noise and the highest dynamic range.
- Shutter Speed: While aperture and ISO are often set for quality, shutter speed is your primary creative tool for capturing motion. A fast shutter speed will freeze the action of a crashing wave, while a slow shutter speed (often requiring an ND filter) can blur the movement of clouds or turn flowing water into a soft, ethereal mist.
Working the Scene
Once you’ve captured your main, pre-visualized shot, your work isn’t done. The best images are rarely the first ones you take. Resist the urge to pack up and leave. Instead, take the time to truly explore the location and its potential.
Move beyond the obvious postcard shot that everyone else takes. Ask yourself, “What else is here?” Change your perspective. Get down low to the ground to exaggerate the scale of a small foreground flower. Find a higher vantage point to reveal new patterns and layers in the landscape. Walk around and see how the light interacts with different elements.
Don’t forget to switch lenses. While a wide-angle is great for capturing the grand vista, a telephoto lens is a powerful tool for creating “intimate landscapes.” Use it to isolate compelling details: the texture of bark on a distant tree, the abstract patterns of light on a mountain face, or the compression of atmospheric layers at sunrise. Working the scene thoroughly ensures you leave with not just one good photo, but a collection of images that truly represent the essence of the place.
Phase 4: The Digital Darkroom
The Philosophy of Post-Processing
The shutter click in the field is not the end of the creative journey; it’s the beginning of the final act. Post-processing, often called the “digital darkroom,” is where you bring your pre-visualized concept to life. It’s crucial to view editing not as a tool to “fix” a poorly executed photograph, but as the final, deliberate step in your artistic process. A great image begins with a great capture, and editing simply helps it realize its full potential.
- The Goal: Your primary objective in post-processing is to enhance the mood and story you intended to capture. Did you want to convey the quiet calm of a foggy morning or the raw power of a stormy sea? Every adjustment should serve that narrative.
- The Workflow: Establishing a consistent, non-destructive workflow is key. This means making changes in a way that preserves your original image data, allowing you to go back and make different choices without degrading the file quality.
A Practical Editing Workflow
While the specific tools may vary between software like Adobe Lightroom, Capture One, or others, the conceptual steps to a powerful edit remain remarkably consistent. This workflow is a logical progression from broad corrections to fine-tuned details, ensuring you build your edit on a solid foundation. For those new to editing, understanding editing photos in Lightroom for beginners can be a great starting point.
Step 1: Culling and Selection
The first step happens before you move a single slider. Culling is the disciplined process of reviewing all the images from your shoot and selecting only the strongest contenders. Be objective and critical. Look for the sharpest focus, the most compelling compositions, and the files that have the best potential to become a finished piece. It’s better to work deeply on one exceptional image than to apply a mediocre edit to ten average ones.
Step 2: Global Adjustments
Once you’ve chosen your hero shot, the goal is to create a balanced canvas. Global adjustments affect the entire photograph and set the stage for more detailed work. This involves correcting the overall exposure and tone adjustments to ensure no critical details are lost in pure black or white, setting an accurate white balance so colors feel natural, and adjusting the overall contrast to add initial depth and impact. Think of this as laying down the foundational base coat of a painting.
Step 3: Local Adjustments
This is where the true artistry begins. Local adjustments target specific areas of your image to guide the viewer’s eye and shape the mood. Using techniques analogous to traditional darkroom dodging (lightening) and burning (darkening), you can add dimension, emphasize your subject, and direct attention through the frame. You might subtly brighten a path that acts as a leading line or darken the corners to create a natural vignette. This is also where you can enhance color and tone in specific parts of the scene—for example, bringing out the warm glow of sunset on a mountain peak while keeping the shadowed valleys cool. Understanding how to manipulate light and shadow is key to avoiding images that feel flat, a common issue addressed in articles about why your landscape photos are boring.
Step 4: Final Touches
With the creative work done, the last step is to apply the final polish. This includes targeted sharpening, which should be applied thoughtfully to enhance fine details (like the texture of a rock) rather than blanketly across the entire image (which can introduce artifacts in smooth areas like the sky). If necessary, gentle noise reduction can be applied to clean up any digital grain from shooting in low light. These final adjustments should be subtle and serve to elevate the technical quality of the finished piece.
Realizing Your Pre-visualized Image
Throughout the editing process, it’s essential to keep your original inspiration in mind. Constantly ask yourself: does this adjustment bring the image closer to the feeling I had when I stood on that cliff edge or in that forest? The pre-visualized image in your mind is your creative North Star, guiding your decisions and helping you maintain a clear direction. Mastering these post-processing techniques is a vital part of elevating your photography.
One of the most difficult skills to learn is knowing when an image is “finished.” It’s easy to fall into the trap of over-editing—pushing saturation too far, making it overly sharp, or creating an unnatural level of contrast. A successful edit feels authentic to the scene and enhances the story without screaming “this has been photoshopped.” The goal is a final image that resonates emotionally and faithfully represents the vision that first sparked your journey.
Phase 5: The Final Image and the Creative Cycle
The click of the shutter and the final tweak in editing software might feel like the end, but they are merely the final notes in one movement of a larger symphony. The creative process doesn’t conclude with a finished file; it completes a cycle that feeds directly into your next artistic endeavor. This final phase is about sharing, reflecting, and turning every experience into fuel for future inspiration.
Sharing Your Work with Intention
An image seen by no one tells an incomplete story. Sharing your work is the act of completing the communication you started when you first pre-visualized the scene. However, how you share is just as important as the image itself.
- The Power of Context: A photograph rarely exists in a vacuum. A well-chosen title and a thoughtful caption can provide the context that elevates an image from a pretty picture to a meaningful statement. Share a brief story about the journey, the conditions you faced, or the feeling you wanted to evoke. This adds a layer of depth and helps the viewer connect with your vision on a more personal level.
- Choosing the Right Medium: Not all platforms are created equal. A high-resolution TIFF or JPEG file is essential for your professional portfolio or for creating large-scale prints where every detail matters. For social media, a carefully resized and sharpened sRGB JPEG will ensure your image looks its best on a variety of screens without suffering from compression or color shifts. Understanding the destination dictates the format.
- The Tangible Expression of a Print: In a digital world, the ultimate fulfillment of the photographic process is the physical print. Holding a print is a multi-sensory experience. It allows you to appreciate the texture of the paper, the true depth of the colors, and the subtle tonal transitions in a way a backlit screen never can. A print is the final, tangible artifact of your vision and hard work—a permanent testament to a fleeting moment.
Reflection and Self-Critique
The most crucial step for growth as an artist happens after the work is done. Honest self-critique is not about harsh judgment but about mindful analysis. It’s the bridge between the photographer you are today and the one you want to become tomorrow.
Take time to analyze your own work with a clear and objective eye. Move beyond a simple “I like it” or “I don’t like it” and ask more specific questions:
- What was my original intent for this image, and did I successfully achieve it?
- Is the composition compelling? Does it effectively guide the viewer’s eye?
- What technical aspects were successful, and what would I do differently next time? Perhaps I should have used a different aperture or tried luminosity masks.
- Does the post-processing enhance the mood, or does it feel overdone?
The value is found in the entire process, not just the final result. Remember the challenges of the shoot: the difficult hike, the rapidly changing weather, the unexpected light. Every decision made in the field and in the digital darkroom is a learning opportunity. Celebrate your successes, but more importantly, learn from your perceived failures. These lessons are far more valuable than any single photograph. To avoid such issues in the future, consider these reasons why your landscape photos are boring.
Ultimately, each completed image serves as the inspiration for the next creative journey. It closes one loop and opens another. The satisfaction of a successful shot fuels your passion, while the lessons from a challenging one provide the knowledge to try again. This is the creative cycle—a continuous, evolving process of inspiration, execution, and reflection that defines the life of a landscape photographer.
