Travel Drone Photography Essentials
Master drone photography basics, rules, and gear selection for stunning aerial shots.
Dreaming of capturing breathtaking aerial vistas of your next adventure? If you're looking to elevate your travel photography game with stunning drone shots, you've come to the right place. This article is your ultimate guide to mastering travel drone photography.
We'll equip you with everything you need to know, from selecting the perfect drone for your journeys and the essential accessories to pack, to crucial pre-trip planning and navigating the legalities. Get ready to transform your travel memories into unforgettable aerial masterpieces.
Essentials
Choosing the Right Travel Drone
Selecting the right drone is the first and most critical step in your aerial photography journey. For a traveler, the ideal model is a careful balance of portability, performance, and regulatory compliance. It’s not about finding the drone with the most features, but the one that best suits the unique demands of being on the move, allowing you to capture stunning perspectives without becoming a burden.
Key Factors to Consider
Before being drawn in by specific models, it’s essential to understand the core characteristics that separate a good travel drone from a great one. These factors will guide your decision and ensure your investment serves your creative ambitions on the road.
- Size and Weight: Portability is paramount. A compact, foldable drone that fits easily into a camera bag or daypack is one you’ll actually carry and use. The weight is also a major consideration. Drones weighing less than 250 grams, often called the “micro” category, bypass the need for registration and licensing in many countries. This significantly simplifies the legal aspect of flying abroad, making sub-250g models the default choice for most international travelers.
- Flight Time and Battery Life: Your time in the air is precious. A longer flight time—typically advertised as 30 minutes or more—gives you a realistic window to ascend, scout the location, compose your shot, and land safely with a power reserve. This extended time is invaluable when waiting for the perfect light or executing a complex maneuver, reducing the pressure to rush your creative process.
- Camera Quality: The camera is the heart of your drone. For serious photography, look beyond just megapixels. A larger sensor (such as a 1-inch or 4/3 CMOS) gathers more light, producing cleaner images with better dynamic range, especially during the golden hours of sunrise and sunset. The ability to shoot in RAW format is non-negotiable; it captures uncompressed sensor data, giving you complete flexibility in post-processing to adjust exposure, colors, and details. This is a key aspect of Travel Photography.
- Wind Resistance: Travel will inevitably place you in challenging environments, from gusty coastlines to high-altitude mountain passes. A drone’s ability to maintain a stable hover in windy conditions is crucial for capturing sharp, blur-free images. Check the manufacturer’s specifications for wind resistance levels; a higher rating means more confidence to fly and shoot when conditions are less than ideal.
- Intelligent Features: Modern drones are more than just flying cameras; they are sophisticated robotic tools. Features like multi-directional obstacle avoidance provide a vital safety net, especially when navigating complex environments. A reliable GPS system ensures a stable hover for crisp photos, while automated flight modes (like circling a point of interest) can execute smooth, cinematic shots that are difficult to perform manually, freeing you to focus on the composition. For drone pilots, learning to plan your drone routes can significantly enhance your aerial capture capabilities.
Top Drone Recommendations for Travelers
While the technology is constantly evolving, a few models consistently hit the sweet spot for travelers, offering a superb blend of the key factors discussed above.
The Ultra-Portable Option: DJI Mini Series (e.g., Mini 4 Pro
The DJI Mini series has become the gold standard for travel drone photography. By staying under the 250-gram weight limit, models like the DJI Mini 4 Pro eliminate many regulatory headaches. Yet, they make very few compromises, offering a high-quality camera capable of shooting RAW photos, impressive 4K video, robust wind resistance, and advanced features like obstacle avoidance. Its foldable, palm-sized design makes it the ultimate go-anywhere tool for capturing incredible aerials without weighing you down. This is a great example of how to Master Travel Photography.
The Pro-sumer Choice: DJI Air Series (e.g., Air 3)
For photographers seeking higher image quality and more creative versatility, the DJI Air series is a compelling upgrade. The DJI Air 3, for example, features a dual-camera system with both wide-angle and telephoto lenses, opening up new compositional possibilities. Its larger body provides enhanced stability in strong winds, and its larger sensor delivers superior image fidelity. It represents a step up in both size and capability, ideal for dedicated creators who prioritize image quality and are willing to carry a slightly larger kit.
Alternative Brands: Autel Robotics Evo Series (e.g., Evo Nano+)
While DJI leads the market, it is not the only option. Autel Robotics offers a strong line of alternatives. The Autel Evo Nano+ is a direct competitor in the sub-250g class, boasting an excellent camera sensor and garnering praise for its image quality. For some pilots, the appeal of an alternative ecosystem and different design philosophy makes brands like Autel worth serious consideration. Researching these alternatives ensures you find the drone that best aligns with your specific workflow and creative needs.
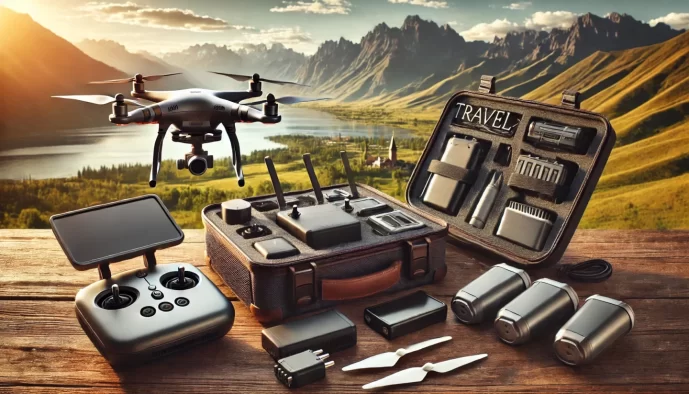
Essential Drone Accessories for the Road
Your drone is the centerpiece of your aerial photography kit, but the right accessories are what transform it from a simple flying camera into a reliable and versatile creative tool. Investing in a few key items ensures you can fly longer, protect your equipment, and ultimately capture higher-quality images on your travels.
Power and Batteries
The most common limitation for any drone pilot is flight time. A single battery typically offers 20 to 30 minutes in the air, which is rarely enough to scout a location, wait for the perfect light, and capture your desired shots. A robust power strategy is non-negotiable.
- Multiple Intelligent Flight Batteries: Carrying at least three batteries is standard practice. This gives you over an hour of potential flight time, allowing for more creative freedom. The most economical way to acquire these is by purchasing a Fly More Combo when you buy your drone. This bundle typically includes extra batteries, a charging hub, and other useful accessories at a significant discount compared to buying them separately.
- Multi-battery charging hub: This device allows you to charge several batteries sequentially without manual intervention. Simply plug it in overnight or during a meal break, and it will charge each battery one by one, ensuring you have a full set ready for your next flight.
- High-capacity power bank: For multi-day treks or locations without electricity, a powerful USB-C power bank is a lifesaver. It can recharge your drone batteries, controller, and phone, keeping you operational when you’re off the grid. Ensure it has a high enough wattage output (Power Delivery or PD) to charge drone batteries efficiently. This is a great companion for travel photography.
- Car charger: If your travels involve a vehicle, a car charger is invaluable. It allows you to replenish your batteries while driving from one location to another, maximizing your uptime and ensuring you arrive at your next destination ready to fly.
Protection and Portability
Travel inevitably exposes your equipment to bumps, dust, and changing weather. Proper protection ensures your investment survives the journey, while smart portability choices make it easier to bring your drone on any adventure.
- A dedicated drone bag or a hard case: While the soft bag included in many combos is great for portability, a dedicated drone backpack offers better organization and protection for all your accessories. For more rugged travel or when checking your gear, a waterproof, crushproof hard case provides the ultimate peace of mind.
- Propeller guards: These are lightweight frames that clip around the propellers. While not necessary for open-area flights, they provide an excellent safety buffer when flying indoors, in tight spaces like a narrow canyon, or near tree branches. They are particularly useful for new pilots.
- A lightweight, foldable landing pad: This simple accessory can save your drone’s sensitive gimbal and camera from damage. A landing pad provides a clean, flat surface for takeoffs and landings, preventing dust, sand, snow, or wet grass from kicking up into the motors and lens. Its bright colors also create a clear visual target for the drone’s automated landing systems.
Enhancing Your Images
Beyond keeping your drone safe and powered, a few optical and practical accessories can dramatically improve the technical and creative quality of your aerial photos and videos.
- Neutral Density (ND) and Polarizing (PL) Filters: This is arguably the most important accessory for elevating your image quality.
- ND filters act like sunglasses for the drone’s lens, reducing the amount of light that enters. This allows you to use slower shutter speeds, which is essential for achieving smooth, cinematic motion blur in videos. For photography, they enable long-exposure shots to blur the movement of water or clouds. Consider exploring tips on manipulating light and shadows to further enhance your shots.
- Polarizing filters work by cutting down on glare and reflections from non-metallic surfaces like water, glass, and wet rocks. They also deepen blue skies and increase color saturation for more vibrant, punchy images. Many filters are available as hybrid ND/PL versions.
- High-speed, high-capacity microSD cards: Your drone records a massive amount of data, especially when shooting 4K video or RAW photos. A slow or low-capacity card can lead to recording errors, dropped frames, or constant offloading. Invest in several reputable, high-speed cards (look for a U3 or V30 rating at a minimum) to ensure you never miss a shot.
- A tablet or phone sun hood: On a bright, sunny day, it can be nearly impossible to see your screen. A simple, collapsible sun hood attaches to your controller and shields your phone or tablet from direct sunlight. This allows you to properly judge exposure, focus, and composition without squinting or guessing. Learning how to maximize your mobile device while traveling can also be beneficial.
Pre-Trip Planning and Legalities
The freedom of aerial photography is exhilarating, but it comes with significant responsibility. A well-prepared pilot is a safe pilot. Before your drone’s propellers even begin to spin, diligent research and planning are paramount to ensure your journey is smooth, legal, and creatively fulfilling. Understanding the things you should do before any photography trip is crucial.
Researching Local Drone Laws
Navigating the global patchwork of drone regulations can seem daunting, but it is a non-negotiable part of your pre-trip checklist. Ignorance of local laws is not a defense and can lead to hefty fines or equipment confiscation. Begin your research well in advance of your departure.
- Identify the Governing Authority: Every country has a national aviation authority that sets the rules. This might be the FAA (Federal Aviation Administration) in the United States, EASA (European Union Aviation Safety Agency) across Europe, or the CASA (Civil Aviation Safety Authority) in Australia. A simple search for “[Country Name] drone laws” will typically lead you to the official government source.
- Utilize Specialized Apps: Several applications provide up-to-date airspace information. Apps like B4UFLY (primarily for the US) and Aloft offer detailed maps showing airports, national parks, and other restricted areas. Many countries have their own official or recommended apps, so be sure to check the local authority’s website. You can learn more about using apps like Litchi in our Using Litchi App for the first time: A Complete Guide.
- Understand Registration and Licensing: Your drone’s weight is often a key factor. While sub-250g drones are exempt from registration in many places, this is not a universal rule. Some countries may require you to register any drone, regardless of size, and may even require an online test or a local license to fly legally. Always verify these requirements before you travel.
Mapping Your Shots
The most compelling aerial images are rarely the result of spontaneous luck; they are born from careful planning. Scouting your locations digitally before you arrive saves valuable time on the ground and elevates the quality of your work. Utilizing tools like Google Earth can help you identify potential Location Chart features and plan your compositions.
- Scout with Satellite Maps: Tools like Google Earth and Google Maps’ satellite view are invaluable. You can explore a location from countless angles, identify interesting patterns, find potential leading lines, and visualize compositions before you even pack your bags.
- Check for Flight Restrictions: Beyond permanent no-fly zones (NFZs) around airports, be aware of Temporary Flight Restrictions (TFRs). These can be established for events, security operations, or natural disasters. Your drone app is the best resource for real-time information on TFRs.
- Plan Your Takeoff and Landing: A beautiful subject is only half the battle. Use your digital scouting to find a safe, flat, and open area for takeoff and landing. Consider public versus private land, potential obstructions like power lines, and how you will maintain a visual line of sight with the drone throughout the flight. This is an essential part of How to Plan Your Drone Routes in Litchi App.
Packing and Airport Security
Traveling with a drone by air requires understanding the specific regulations surrounding lithium-polymer (LiPo) batteries. Proper packing not only protects your equipment but also ensures a smooth passage through airport security. Being prepared for your trip is key to successful Travel Photography.
- Batteries Go in Your Carry-On: This is the most critical rule. Due to fire risk, most airlines strictly prohibit LiPo batteries in checked luggage. All of your drone batteries, including any spares and those in a power bank, must be in your carry-on bag. Proper battery management is one of the Photography tours Essentials: What to Bring and How to Prepare.
- Protect Battery Terminals: To prevent short-circuiting, it is recommended to cover the battery terminals with electrical tape or, better yet, store each battery in its own individual fire-resistant LiPo bag. It is also wise to discharge them to a storage level (typically 30-50%) before your flight.
- Navigating Security: Pack your drone and its accessories in a way that is easy to access. You will likely be asked to remove the drone and its batteries from your bag for screening. Having them neatly organized in a dedicated case or pouch makes the process efficient and demonstrates that you are a prepared and responsible operator.
Mastering In-Flight Photography Techniques
Once your drone is in the air, the real artistry begins. A drone offers a perspective unlike any other, but a compelling image requires more than just a high vantage point. It demands an understanding of light, composition, and the technical capabilities of your camera. By mastering a few fundamental techniques, you can transform simple aerial views into breathtaking photographs.
Fundamental Camera Settings
Before you focus on framing your shot, ensure your camera is set up to capture the highest quality data possible. Getting these settings right in the field will save you considerable effort in post-processing and unlock the full potential of your images.
- Shoot in RAW Format: This is arguably the most important setting for serious photography. A JPEG file is compressed and processed in-camera, discarding a vast amount of sensor data. A RAW file, by contrast, is an uncompressed digital negative that retains all the information captured by the sensor. This gives you maximum flexibility to adjust exposure, recover details from shadows and highlights, and fine-tune colors during editing without degrading image quality.
- Understand the Exposure Triangle: While drones simplify some aspects, the principles of exposure remain.
- ISO: Keep your ISO at its base level, typically 100, whenever possible. Drone sensors are small, and raising the ISO will quickly introduce unwanted noise or grain, making your images look soft. Only increase it as a last resort in very low-light conditions.
- Aperture: Most popular travel drones, like the DJI Mini series, have a fixed aperture. However, on more advanced models like the DJI Air or Mavic series, you can adjust it. A wider aperture (lower f-number) lets in more light, while a narrower one lets in less. For landscapes, a mid-range aperture like f/4 or f/5.6 often provides excellent sharpness across the frame.
- Shutter Speed: This setting controls how long the sensor is exposed to light. For photography, you generally want a shutter speed fast enough to freeze motion and prevent blur, especially on windy days. If you are using ND filters to achieve a cinematic look for video, remember to remove them or adjust your shutter speed accordingly for still photos.
- Use the Histogram: Your drone’s screen can be misleading in bright sunlight. The histogram is your most reliable tool for judging exposure. This graph displays the tonal range of your image. A well-exposed photo will have a graph that is spread across the middle. If the graph is bunched up on the far right, your highlights are “clipped” (pure white with no detail). If it’s pushed to the far left, your shadows are “crushed” (pure black). Aim for a balanced graph without clipping either end.
- Set White Balance Manually: While Auto White Balance (AWB) is convenient, it can shift slightly between shots, leading to inconsistent colors. For more professional results, set the white balance manually according to the conditions (e.g., ‘Sunny’ or ‘Cloudy’) or by setting a specific Kelvin temperature. This ensures a consistent color palette across all the photos you take in that location.
Composition from the Air
A new perspective requires a fresh look at the rules of composition. Classic principles become even more powerful when applied from hundreds of feet in the air, helping to bring order and beauty to complex scenes.
- Rule of Thirds: Imagine a 3×3 grid over your screen. By placing key elements—like a coastline, a building, or the horizon—along these lines or at their intersections, you create a more dynamic and visually pleasing image than if you simply centered the subject.
- Leading Lines: The world is full of lines when viewed from above. Use winding roads, flowing rivers, surf lines, or field patterns to guide the viewer’s eye through the photograph. A leading line creates a sense of depth and journey, drawing the viewer towards your main subject.
- Symmetry and Patterns: An aerial perspective is unparalleled for revealing the hidden geometry of the world. Look for natural symmetry in coastlines or man-made patterns in city blocks, farmland, or architecture. These repetitive shapes can create striking, almost abstract images that are incredibly powerful.
- Framing: Add depth and context to your shot by using natural elements to frame your subject. This could be flying low to use tree branches to frame a distant mountain, or positioning the drone so that a rock archway frames a boat on the water. Framing makes the viewer feel like they are peering into the scene.
Signature Aerial Shots
Beyond static compositions, certain flight maneuvers and camera functions are designed to create iconic and dynamic aerial shots. Mastering these will elevate your travel photography portfolio.
- The Top-Down (Bird’s-Eye View): Point your camera directly down (a 90-degree angle) for a completely unique perspective. This “flat-lay” style shot removes the horizon and emphasizes textures, patterns, and shapes. It’s perfect for capturing the turquoise swirls of the ocean, the intricate design of a town square, or the vibrant colors of a forest canopy.
- The Reveal: This is a classic cinematic technique that translates beautifully to still photography sequences or video. Start with your drone close to an object in the foreground—like a line of trees or a cliff edge—and slowly fly backward or upward to reveal the grand landscape behind it, such as a vast mountain range or a hidden beach.
- The Orbit: To highlight a single point of interest, like a lighthouse, a waterfall, or a historic ruin, use an orbit maneuver. Most modern drones have an automated flight mode for this. The drone flies in a perfect circle around your subject, keeping it centered in the frame. This allows you to capture the subject from every angle and show its relationship to the surrounding environment.
- AEB (Auto Exposure Bracketing): For scenes with extreme contrast, like a sunset where the sky is bright but the landscape is dark, a single photo may struggle to capture detail in both areas. Use Auto Exposure Bracketing mode. The drone will automatically take 3 or 5 photos of the exact same scene at different exposure levels. In post-processing, you can merge these images into a single High Dynamic Range (HDR) photo that is rich in detail from the deepest shadows to the brightest highlights.
Flying Safely and Responsibly
Capturing breathtaking aerial views comes with a significant responsibility. A safe flight is a successful flight, protecting your equipment, the environment, and the people around you. Adopting a professional, safety-first mindset not only ensures compliance with regulations but also elevates the quality of your work by fostering a calm and controlled approach to every launch.
The Pre-Flight Checklist
Before your drone’s propellers even begin to spin, a methodical pre-flight check is non-negotiable. This routine is your first line of defense against accidents and equipment failure. It takes only a few moments but can save you from significant trouble.
- Assess Conditions: Check the local weather forecast, paying close attention to wind speed and gusts. Most consumer drones have a maximum wind resistance rating; flying beyond this limit is courting disaster. Look for potential rain or fog that could compromise electronics and visibility.
- Inspect Your Equipment: Perform a physical check of the drone. Look for any cracks in the body or arms. Examine the propellers for nicks, chips, or stress marks, and replace them if any damage is found. Ensure the battery is fully seated and the camera gimbal is moving freely.
- Confirm GPS Signal: Wait for the drone to acquire a strong GPS signal lock before taking off. This is crucial for a stable hover, accurate positioning, and the reliability of the Return-to-Home (RTH) function. Most apps will show the number of connected satellites.
- Calibrate as Needed: While modern drones are quite robust, it’s wise to calibrate the compass when you’re in a new region far from your last flight location. The drone’s flight app will typically prompt you if a compass or Inertial Measurement Unit (IMU) calibration is required.
On-Location Awareness
Once you are ready for takeoff, your responsibility shifts to actively monitoring the drone and its surrounding environment. Situational awareness is the key to navigating a location safely and respectfully.
- Maintain Visual Line of Sight (VLOS): This is a fundamental rule in most parts of the world. You must be able to see your drone with your own eyes at all times. This allows you to avoid obstacles like trees, power lines, or other aircraft that may not be detected by onboard sensors.
- Avoid Sensitive Areas: Never fly over large gatherings of people, moving vehicles, or private property without explicit permission. Respect no-fly zones around airports, government buildings, and critical infrastructure. A moment of poor judgment can have serious legal consequences.
- Respect Wildlife and Habitats: Drones can be highly disruptive to wildlife. Avoid flying low over animals, birds’ nests, or sensitive marine areas. The ethical imperative is to observe from a respectful distance; no photograph is worth causing stress or altering an animal’s natural behavior.
- Be a Good Ambassador: People are often curious about drones. Be prepared to answer questions politely and explain what you are doing. A courteous and professional demeanor can de-escalate potential conflicts and promotes a positive image for all drone pilots.
Post-Processing Your Aerial Photos
Capturing the image is only half the journey. The magic of a truly breathtaking aerial photograph often comes to life in post-processing. This is where you refine the raw data from your drone’s sensor, correct imperfections, and guide the viewer’s eye to create a compelling final piece. A consistent and efficient editing workflow is essential, especially when you’re on the move.
Workflow and Software
Developing a solid routine for handling your files after a flight prevents data loss and makes editing far more manageable. While traveling, this discipline is even more critical. It’s wise to back up your footage from the microSD card to a portable hard drive or SSD as soon as possible, creating at least two copies of your valuable shots before formatting the card for its next use.
The software you choose will become your digital darkroom. While many options exist, a few have become industry standards for their robust features and quality results.
- Adobe Lightroom Classic/CC: A comprehensive tool for organizing, editing, and processing RAW files. Its cataloging system is invaluable for managing large volumes of photos from a trip.
- Luminar Neo: Known for its AI-powered tools that can simplify complex edits, such as sky replacement or structure enhancement, making it a fast and powerful option for many photographers.
- Capture One Pro: Praised for its superior color rendering and tethering capabilities, it’s a high-end choice for those who demand the utmost precision in their color work.
Most modern editing programs automatically apply lens correction profiles for popular drone models. These profiles are crucial as they correct the inherent distortion and vignetting of the drone’s small, wide-angle lens, ensuring straight lines appear straight and brightness is even across the frame.
Essential Editing Steps
Editing is a subjective art, but a fundamental process helps ensure every photo reaches its full potential. By working through these steps methodically, you can transform a good aerial shot into a great one. This is part of the broader journey of Master Travel Photography.
Basic Adjustments
This is the foundational stage of any edit. Start by straightening the horizon—nothing undermines an aerial landscape more than a crooked one. Crop the image to refine your composition, perhaps strengthening the rule of thirds or removing distracting elements from the edges. Finally, make global adjustments to exposure, contrast, highlights, and shadows to create a balanced image with a full range of tones.
Color Correction and Grading
First, focus on color correction. This involves setting the correct white balance to ensure whites are pure and colors are accurate to the scene you witnessed. Once the colors are true to life, you can move on to color grading. This is a more creative step where you can shift hues, saturation, and luminance to evoke a specific mood, whether it’s the warm glow of a sunrise or the cool, dramatic tones of a stormy coastline.
Sharpening and Noise Reduction
Aerial photos benefit from careful sharpening to bring out the fine details in landscapes and architecture. The key is subtlety; over-sharpening can introduce unsightly halos and a brittle, artificial look. Similarly, use noise reduction sparingly. Drone sensors, particularly on smaller models, can produce noise in low light or dark shadow areas. Apply noise reduction selectively to smooth out these areas without sacrificing overall image detail. This is part of local adjustments and retouching.
Advanced Edits
Two of the most powerful techniques in drone photography are creating High Dynamic Range (HDR) images and panoramas. If you used Auto Exposure Bracketing (AEB) in a high-contrast scene, you can merge the different exposures in your software to create a single HDR image that retains detail in both the brightest highlights and darkest shadows. For vast landscapes, stitching together a series of photos into a wide panorama can produce an immersive, high-resolution image that a single shot could never capture. If you’re interested in drone flight planning, consider looking into the Litchi App for drone route planning.
