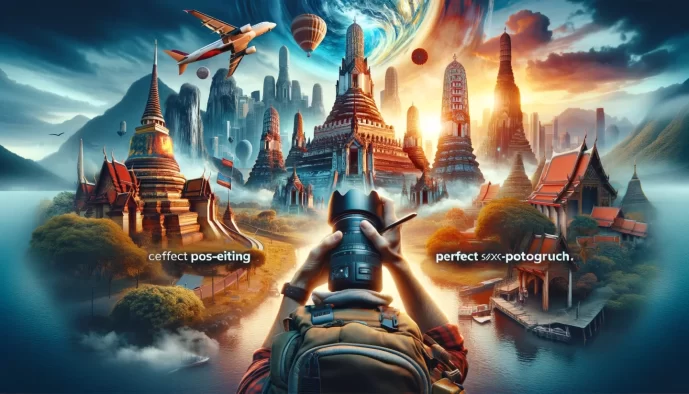
Travel Photography
Master travel photography: capture stunning shots, perfect post-editing, & gear tips.
Dreaming of capturing breathtaking landscapes and vibrant cultures on your next adventure? Travel photography is more than just pointing and shooting; it’s about telling a story with your lens. Whether you're a seasoned traveler or planning your first getaway, this guide is designed to elevate your travel photography skills.
We'll equip you with everything you need to know, from the essential gear and pre-trip preparation to mastering your shots in the field and specializing your techniques for diverse scenes. Get ready to transform your travel memories into stunning visual narratives.
Essentials
Before You Go: Preparation and Gear
The most memorable travel photographs often begin with thoughtful preparation long before the journey starts. While spontaneity is a beautiful part of travel, a well-considered approach to your equipment and planning provides the foundation for capturing stunning images. It’s not about bringing everything, but about bringing the right things.
Choosing Your Camera: Finding the Right Tool for the Trip
The debate over the “best” camera is endless, but the right camera for you is the one that fits your travel style, budget, and creative goals. The most expensive gear won’t help if it’s too heavy to carry or too complicated to use in a fleeting moment.
DSLR vs. Mirrorless: Pros and Cons for Travel
For years, the DSLR (Digital Single-Lens Reflex) was the standard for serious photographers, known for its optical viewfinder and robust build. However, mirrorless cameras have become the preferred choice for most travelers. By removing the bulky mirror mechanism, they offer a significantly smaller and lighter body, which is a considerable advantage when navigating crowded cities or hiking to a remote viewpoint. While both produce excellent images, the electronic viewfinder on a mirrorless camera allows you to see a real-time preview of your exposure, which can be a great learning tool. The primary trade-off used to be battery life, but modern mirrorless cameras have largely closed that gap.
The Power of Your Smartphone: When It’s Enough
Modern smartphone cameras are incredibly capable. For casual travel, well-lit conditions, and sharing directly to social media, your phone is often all you need. Computational photography allows them to create impressive images, blending multiple exposures for high-dynamic-range scenes or simulating a shallow depth of field in portrait modes. They are discreet, always with you, and perfect for capturing spontaneous moments. Their main limitations appear in low light and when using digital zoom, which significantly degrades image quality. You can learn more about maximizing your mobile device while traveling.
Action Cameras and Drones: For Unique Perspectives
For adventure travel, an action camera like a GoPro is invaluable. Its rugged, waterproof design and wide field of view are perfect for capturing immersive first-person perspectives while hiking, snorkeling, or cycling. A drone, on the other hand, offers a completely different viewpoint, revealing patterns and scale that are invisible from the ground. They are exceptional for dramatic landscapes and cityscapes, but be sure to research and strictly follow local regulations, as drone laws vary widely and are often restricted in national parks and urban centers.
Selecting Your Lenses: The Traveler’s Holy Trinity
Your lenses are arguably more important than your camera body. They are the eyes of your camera, shaping how you see and capture the world. While it’s tempting to pack for every possibility, most travel photography can be covered masterfully with three core types of lenses.
A quick note on focal length: In simple terms, focal length (measured in millimeters, or mm) determines your field of view—how much of the scene your camera captures. A small number like 16mm provides a very wide, expansive view, ideal for landscape photography. A large number like 200mm acts like binoculars, bringing distant subjects much closer.
- The Versatile Zoom Lens (e.g., 24-70mm): If you can only bring one lens, this is it. A 24-70mm (or its equivalent on different sensor sizes) covers a range from wide-angle for landscapes to a short telephoto for portraits. It’s the ultimate all-rounder, allowing you to react quickly to different scenes without changing lenses.
- The Wide-Angle Lens (e.g., 16-35mm): To truly capture the scale of a grand landscape, the height of a cathedral, or the energy of a bustling city street, a wide-angle lens is essential. It allows you to fit more into the frame and can be used to create a dramatic sense of depth and perspective.
- The Prime Lens (e.g., 35mm or 50mm f/1.8): A prime lens has a fixed focal length—it doesn’t zoom. Its advantage lies in its “fast” or wide aperture (the f/1.8 number). This allows it to gather much more light, making it perfect for shooting in dimly lit restaurants, at dusk, or inside museums. The wide aperture also creates a beautiful background blur (bokeh) that makes portraits pop. They are often sharper, smaller, and lighter than zoom lenses. For stunning travel portraits, consider learning how to use an 85mm lens.
Essential Accessories You Shouldn’t Leave Behind
The right accessories can elevate your photography from simple snapshots to thoughtfully crafted images. They are the support system that enables creativity when conditions are less than perfect.
- A sturdy but lightweight travel tripod: Essential for sharp photos in low light, such as during sunrise, sunset, or for capturing city lights at night. It also allows you to take long-exposure shots to blur moving water or clouds and is indispensable for taking photos with you in them.
- Extra batteries and a portable charger: A day of travel photography, especially in the cold or when using your screen frequently, can drain a battery surprisingly fast. Always carry at least one spare, fully charged battery. A portable power bank can be a lifesaver for recharging batteries and your phone on the go.
- Memory cards: More than you think you need: Memory cards are inexpensive and take up no space. Bring several smaller cards rather than one enormous one. This mitigates the risk of losing all your photos if a card corrupts or is lost.
- Filters: Polarizers (CPL) and Neutral Density (ND): A Circular Polarizer (CPL) filter is like sunglasses for your lens. It reduces glare from water and glass and deepens the blue in skies, making colors richer. A Neutral Density (ND) filter reduces the amount of light entering the lens, allowing you to use slower shutter speeds in bright daylight—the key to creating that silky, flowing water effect in waterfalls and rivers.
- A comfortable and secure camera bag: Your camera bag is your mobile base of operations. It should be comfortable to carry all day, provide quick access to your gear, offer protection from weather, and have discreet security features to deter theft in crowded areas.
Pre-Trip Planning and Research
The most compelling travel photos are rarely a result of pure luck. They are often the product of careful research and planning, which allows you to be in the right place at the right time. These pre-trip planning tips are crucial.
- Digital location scouting: Use tools like Google Maps (with Satellite and Street View) and Instagram (searching by location tags) to discover potential photo spots and see how others have photographed them. This helps you find classic viewpoints and hidden gems before you even arrive. You might find interesting spots on a location chart.
- Understanding the light: Light is the most critical ingredient in photography. Use sun-tracking apps like The Photographer’s Ephemeris or PhotoPills to know exactly where the sun will rise and set. Planning your visits to key locations during the “golden hour” (the first hour after sunrise and the last hour before sunset) will reward you with soft, warm light. Learning about manipulating light and shadows is also key.
- Creating a shot list (but staying flexible): Make a list of the key photographs you want to capture—a specific monument at sunrise, a bustling market scene, a particular landscape. This provides structure to your shooting. However, always be ready to deviate from the plan. The most magical moments are often the unexpected ones, and knowing good travel photo poses can help capture them.
- Researching local customs and photography restrictions: Photography is not welcome everywhere. Research the local etiquette. Is it acceptable to take pictures of people when you travel? Are there restrictions on photography in religious sites? Are drones permitted? Understanding and respecting these rules is a fundamental part of being a responsible traveler and photographer. This is also important when considering photography tours etiquette.
On Location: Mastering the Craft in the Field
You’ve arrived. Your gear is ready, and the adventure is unfolding before you. This is where preparation meets practice. In the field, your camera becomes an extension of your eye, and your success depends on understanding three key areas: technical control, artistic composition, and the nuanced quality of light. Mastering these will transform your travel snapshots into compelling visual stories.
The Exposure Triangle: Your Creative Controls
At the heart of photography lies the exposure triangle—a delicate balance between three settings that determine how much light reaches your camera’s sensor. Understanding how Aperture, Shutter Speed, and ISO interact is fundamental to moving beyond automatic mode and taking full creative control of your images.
- Aperture (f-stop): This refers to the opening in your lens that lets light in. A wide aperture (a low f-stop number like f/1.8) lets in more light and creates a shallow depth of field, beautifully blurring the background to make your subject pop. This is ideal for portraits. A narrow aperture (a high f-stop number like f/11) lets in less light and keeps more of the scene in sharp focus, which is perfect for expansive landscapes.
- Shutter Speed: This is the length of time the camera’s shutter stays open, exposing the sensor to light. A fast shutter speed (like 1/1000s) freezes motion, perfect for capturing a bird in flight or a bustling market scene. A slow shutter speed (like 1/2s or longer) creates motion blur, which can beautifully soften waterfalls or create light trails from moving traffic at night. A tripod is essential for slow shutter speeds to keep the rest of the image sharp.
- ISO: This setting controls your camera sensor’s sensitivity to light. A low ISO (like 100 or 200) is best for bright, sunny days, producing clean, high-quality images. As the light fades, you’ll need to increase the ISO to properly expose your photo. However, be mindful that a very high ISO can introduce digital “noise” or graininess into your image.
To understand how these work together, imagine filling a bucket with water. Your goal is to fill the bucket perfectly—not overflowing, not half-empty. Your aperture is how wide you open the tap. The shutter speed is how long you leave the tap on. The ISO is the water pressure. If you want to fill the bucket quickly (a fast shutter speed), you need to open the tap wider (wider aperture) or increase the water pressure (higher ISO). If you only open the tap a little (narrow aperture), you’ll need to leave it on for longer (slower shutter speed). Mastering photography is learning to balance these three elements to achieve your desired creative effect.
Composition is King: How to Frame a Compelling Image
A technically perfect photo can still feel flat without strong composition. Composition is the art of arranging elements within your frame to create a balanced, engaging, and visually pleasing image. It’s how you guide the viewer’s eye and tell your story effectively.
- Rule of Thirds: The most fundamental principle. Imagine your frame is divided into a 3×3 grid. Instead of placing your subject dead center, position it along one of the lines or at an intersection. This simple shift creates a more dynamic and interesting image.
- Leading Lines: Use natural or man-made lines—roads, rivers, fences, pathways—to draw the viewer’s eye through the image, often toward your main subject. This creates a sense of depth and journey.
- Framing and Sub-framing: Look for elements in the environment to create a natural frame around your subject, such as an archway, a window, or overhanging tree branches. This adds context and a powerful sense of depth to the scene.
- Symmetry and Patterns: The world is full of captivating patterns and symmetry. Highlighting these elements, whether in architecture, nature, or a market display, can create a strong sense of order and visual harmony. Sometimes, intentionally breaking the pattern can create a powerful focal point.
- The importance of foreground, midground, and background: Great travel photos often have layers. Including an interesting element in the foreground (like a flower or a rock), your main subject in the midground, and a compelling scene in the background (like mountains or a cityscape) creates a three-dimensional feel that pulls the viewer into the photograph.
The Magic of Light: Working With Your Greatest Asset
Photography is, quite literally, “drawing with light.” The quality, direction, and color of light will have the single greatest impact on the mood and quality of your images. Learning to see and use light is what separates good photographers from great ones.
- Golden Hour: This is the celebrated period shortly after sunrise and before sunset. The sun is low in the sky, casting a warm, soft, golden light that is incredibly flattering for both landscapes and portraits. Shadows are long and gentle, adding beautiful texture and depth to your scenes.
- Blue Hour: The period just before sunrise and just after sunset, when the sun is below the horizon but its light still illuminates the sky. This time is characterized by a cool, deep blue, and tranquil mood. It’s especially magical for cityscapes, as the soft ambient light balances perfectly with the warm glow of city lights.
- Handling harsh midday sun: The high, direct sun of midday creates strong, unflattering shadows and high contrast. Instead of putting your camera away, seek out open shade for portraits, which provides soft, even light. Alternatively, lean into the contrast by shooting scenes with bold shadows and graphic shapes, or focus on architectural details where the harsh light can emphasize texture.
- Using artificial light: Don’t stop shooting when the sun goes down. Cities come alive at night. Use the glow from streetlights, neon signs, and shop windows as your light source. This can create vibrant, moody, and cinematic images that capture the energy of a place after dark.
Capturing the Vibe: From Grand Vistas to Small Details
A compelling travel story is rarely told with a single image. To truly capture the essence of a place, think like a filmmaker and shoot a variety of scenes that, together, paint a complete picture of your experience.
- The establishing shot: This is your wide, sweeping vista. It’s the grand landscape or iconic cityscape that sets the scene and gives your viewer a sense of place and scale. Think of it as the opening shot of a movie.
- The human element: Adding a person to your landscape can do two things: provide a sense of scale, showing just how massive those mountains are, and add a narrative element. A lone figure walking down a street or looking out over a valley invites the viewer to imagine themselves in the scene.
- The detail shot: Zoom in. Focus on the small things that define a culture and place. This could be the texture of a weathered door, the steam rising from a bowl of noodles, a colorful textile in a market, or the intricate details of a tile mosaic. These shots add richness and sensory depth to your story.
- The candid moment: Some of the most powerful images are unposed moments of authentic life. A laugh shared between friends, a vendor arranging their goods, a child playing in a square. These photos require patience and observation, but they capture the true spirit of a destination.
Specializing Your Shots: Techniques for Different Scenes
Travel photography isn’t a single genre; it’s a collection of many. A single trip might call for you to be a portraitist, a landscape artist, and a street documentarian, sometimes all within the same hour. Mastering a few key techniques for different scenarios will elevate your travel portfolio from a simple collection of snapshots to a compelling visual story.
Photographing People and Cultures
The people you meet are often the most memorable part of any journey. Photographing them can create powerful, intimate images, but it requires sensitivity, respect, and a genuine connection. The goal is to create a portrait that honors the individual, rather than treating them as an exotic prop.
- Asking for Permission: The most important rule is to show respect. A simple smile and a gesture towards your camera is a universal language. If they agree, take your photo and show them the result on your screen—it’s a wonderful way to share the moment. If they decline, thank them with a nod and move on. Never insist or be intrusive. Check out our guide on how to take pictures of people when you travel for more tips on engaging and asking permission.
- Candid vs. Posed Portraits: A candid shot captures a genuine, unscripted moment of life. For this, a longer lens (like a 70-200mm or an 85mm prime) allows you to be discreet. Find a good vantage point and wait patiently for moments to unfold. For a posed portrait, engage with your subject. Learn a few words in the local language, ask about their craft, or simply share a laugh. A comfortable subject results in a much more natural and expressive portrait. You can learn more about finding the right poses in our travel photo poses guide.
- Environmental Portraits: An environmental portrait tells a story by showing a person in their natural context—a chef in their kitchen, a weaver at their loom, a fisherman with their boat. Use a wider lens (like a 35mm or 50mm) to include these crucial background elements. This technique moves beyond a simple face and tells the viewer who this person is and what they do. Learn how to take portraits of people in natural light to enhance these shots.
As you photograph people, it’s crucial to consider the ethics of your actions. This is especially true when photographing children. Always seek permission from a parent or guardian. Remember that your photographs represent real people with complex lives. Approaching every interaction with dignity and empathy is the foundation of responsible photography and will be a guiding principle throughout your travels.
Mastering Landscape and Cityscape Photography
From sweeping mountain ranges to glittering urban skylines, landscapes and cityscapes are the quintessential travel shots that capture the scale and grandeur of a destination. The key is to move beyond a simple record of the view and create an image that evokes the feeling of being there.
- Finding a Strong Focal Point: A grand vista can feel empty without a point of interest for the eye to land on. Look for a focal point—a lone tree, a winding road, a prominent skyscraper, or a boat on the water—to anchor your composition and give the scene a sense of scale. This is a key aspect of landscape photography.
- Using a Tripod for Sharpness: For the best quality, especially in the low light of sunrise and sunset, a tripod is essential. It eliminates camera shake, allowing you to use a low ISO for clean images and a small aperture (like f/11 or f/16) for maximum depth of field. It also unlocks creative possibilities like long exposures to smooth out water or capture dramatic light trails from traffic.
- Capturing the “Sense of Place”: What makes this location unique? Incorporate elements that define the character of the place. This could be the iconic red phone boxes in London, the vibrant tiles of Lisbon, or the unique silhouette of a temple against the sky. These details provide context and transform a generic scene into a specific story. Learning to capture this essence is vital for capturing the essence of destinations.
- Techniques for Dramatic Skies: The sky is often half of your landscape photo, so make it count. A circular polarizing filter can deepen blue skies and make clouds pop. The most dramatic light often appears just before or after a storm. When composing, pay attention to the clouds and light, and consider exposing for the sky to retain all the color and detail, then gently brightening the foreground in post-processing if needed. This is a great tip for manipulating light and shadows.
The Art of Street Photography
Street photography is the art of capturing the unstaged, candid moments of everyday life. It’s about finding beauty, humor, and humanity in the public sphere. It requires a quick eye, confidence, and an appreciation for the fleeting moments that tell the story of a city. For a comprehensive understanding, explore our guide to mastering street photography.
- Being Discreet and Observant: The best street photography happens when the photographer is unnoticed. Use a smaller, less intimidating camera if you can. Dress to blend in with your surroundings. Instead of wandering aimlessly, try finding a location with interesting light or a compelling background and wait for the right character or moment to enter your frame. Mastering the art of invisibility is key to great street photography.
- Zone Focusing for Quick Captures: Street moments happen in a split second. Waiting for your camera to autofocus can mean missing the shot. Zone focusing is a technique where you manually pre-focus your lens to a specific distance (e.g., ten feet) and set a moderately small aperture (like f/8). This creates a deep “zone” of acceptable sharpness, allowing you to raise your camera and shoot instantly. This technique is crucial for mastering photo panning and other quick capture methods.
- Telling Stories of Daily Life: Look for narratives. It doesn’t have to be a grand event. It can be a quiet interaction between two people, a vendor arranging their goods, a reflection in a puddle, or a striking juxtaposition of old and new. Look for emotion, gesture, and connection. This aligns with the principles of documentary and photojournalism.
- Overcoming the Fear of Shooting in Public: It’s natural to feel apprehensive about photographing strangers. Start by shooting in busy, tourist-heavy areas where cameras are common. You can also try shooting from the hip (without looking through the viewfinder) for more candid shots. Often, a simple, confident smile is all you need. Most people are either indifferent or flattered. The more you practice, the more your confidence will grow. This is part of the general preparation needed for any photo trip, as outlined in our things you should do before any photography trip.
After the Trip: The Digital Darkroom and Beyond
The journey doesn’t end when you return home. In many ways, a new and equally creative phase begins. The process of organizing, editing, and sharing your photographs is where you refine your vision and transform your travel memories into lasting stories. This is the realm of the digital darkroom, where you give your images their final voice.
Workflow for the Traveling Photographer
A structured workflow is essential for managing the hundreds, or even thousands, of images you bring back. It prevents files from getting lost and makes the editing process far more enjoyable. A little organization upfront saves a significant amount of time later.
- Backing up your photos on the road: The most crucial step is to protect your images from loss. Ideally, you should have three copies of your files. While traveling, this could mean one copy on your camera’s memory card, a second on a portable external hard drive, and a third uploaded to a cloud service like Dropbox or Google Prive whenever you have a stable internet connection. Do this daily to minimize the risk of losing an entire trip’s worth of work.
- Culling your images: The art of selecting your best work is known as culling. It’s tempting to keep everything, but being selective is key. Go through your photos and make a first pass, flagging or rating only the images that are technically sound and emotionally resonant. A simple star rating system in software like Adobe Lightroom can be very effective. Be decisive; if an image doesn’t immediately stand out, it’s often best to leave it behind.
- A simple and effective folder structure: Before you import anything, create a logical home for your photos. A system organized by date and location is often the most intuitive. For example, you might create a main folder for the year, a subfolder for the trip, and further subfolders for each day or specific location:
2024 > Italy_Trip > 01_Rome. Within each day’s folder, you can separate your original RAW files from your final edited JPEGs.
Essential Post-Processing Techniques
Post-processing is not about fabricating a scene but about enhancing what you captured, guiding the viewer’s eye, and ensuring the final image reflects the feeling of the moment. A light touch often yields the most powerful results.
- Basic adjustments: Nearly every image can benefit from a few fundamental tweaks. Adjusting exposure brightens or darkens the overall image, while contrast manages the difference between the light and dark areas. White balance is crucial for accurate colors, correcting any unnatural color casts from artificial lighting or tricky daylight conditions.
- Cropping and straightening: Our eyes are sensitive to tilted horizons. The first step is often to straighten the image. Cropping can dramatically improve composition by removing distracting elements from the edges of the frame or by re-framing the subject to better follow principles like the Rule of Thirds.
- The power of color grading: Color is a powerful storytelling tool. Color grading is the process of adjusting the hue, saturation, and luminance of your image to create a specific mood or a cohesive aesthetic across a series of photos. You might warm up the tones in a sunset shot to enhance its golden glow or cool down a cityscape to give it a more modern, cinematic feel.
- Software options: The tools for editing are more accessible than ever. For mobile editing, apps like VSCO and Snapseed offer powerful controls in a simple interface. For desktop users, Adobe Lightroom is the industry standard for its excellent organization and editing capabilities. Other professional options include Capture One, known for its superb color rendering. For those seeking free alternatives, Darktable and GIMP are robust open-source programs.
Sharing Your Work and Telling Your Story
Photographs are meant to be seen. Sharing your work allows you to connect with others, relive your experiences, and complete the narrative arc of your journey. How you present your images is just as important as how you capture them.
- Crafting a compelling narrative: Think beyond single images. Curate a small collection of photos from a location that, together, tell a story. Start with an establishing shot, move into the human elements and details, and conclude with a memorable final image. This sequence creates a more immersive experience for your audience, whether on a personal blog or a social media post.
- Best practices for Instagram: This platform is visual-first, but context is key. Write thoughtful captions that share a brief anecdote, a feeling, or an interesting fact about the location. Use a mix of popular and niche hashtags to reach a wider audience. Consider the format; portrait-oriented images (4:5 ratio) perform best in the main feed, while stories are perfect for sharing more casual, behind-the-scenes moments.
- Creating prints and photo books: There is a unique satisfaction in holding a physical print. A beautifully printed photograph on your wall or a carefully designed photo book on your coffee table transforms your digital files into tangible art. It’s a wonderful way to preserve your most cherished travel memories, free from the risk of a hard drive failure or an obsolete file format.
Responsible and Ethical Travel Photography
A powerful photograph can transport a viewer, but the story behind its creation matters just as much. As travelers with cameras, we are visitors and observers, and with that comes a profound responsibility. The best travel photography not only captures a moment but also honors the people, cultures, and environments within the frame. Adopting an ethical approach enriches your experience and ensures that the art of photography remains a positive force, leaving a legacy of respect rather than intrusion.
Respect for People and Privacy
Every face in your photograph belongs to a person with a story, a life, and a right to dignity. The most compelling portraits are often born from a moment of genuine connection, not a furtive click of the shutter. Approaching people with warmth and respect is the foundation of ethical portrait and street photography.
- Understanding cultural sensitivities: What is acceptable in one culture may be deeply offensive in another. In some communities, being photographed by a stranger is considered an intrusion or even spiritually harmful. Before your trip, research local customs regarding photography. When on location, observe how people interact. A smile and a gesture towards your camera can often transcend language barriers. Learning to ask, “May I take your picture?” in the local language is a simple gesture of immense respect. We cover this in detail when discussing how to take pictures of people when you travel.
- The ethics of “poverty tourism” photography: It can be tempting to document all aspects of a place, including its struggles. However, there is a fine line between documentation and exploitation. Photographing people in vulnerable situations without their consent or context reduces them to a spectacle. Ask yourself what your motivation is. Are you aiming to raise awareness with a clear, respectful narrative, or are you capturing an image for its shock value? Focus on telling stories of resilience, community, and humanity, not just hardship.
- When to put the camera away: The most important skill a photographer can learn is recognizing when not to take a picture. Sacred ceremonies, moments of private grief, or tense situations are not photo opportunities. Sometimes, the most meaningful thing you can do is to simply be present, to experience the moment with your own eyes rather than through a viewfinder. This restraint is not a missed shot; it is a sign of wisdom and respect.
–
–
Respect for Places and Wildlife
The landscapes and ecosystems we travel to see are often fragile. As photographers, we have a duty to protect the natural beauty we seek to capture, ensuring it remains for generations to come. This means treating every location, from a bustling city park to a remote wilderness, with care.
- Leave No Trace principles for photographers: This philosophy is simple: leave a place exactly as you found it, or better. This means staying on designated trails to avoid trampling delicate flora, not picking flowers or moving rocks for a better composition, and packing out everything you bring in. Your photograph should be the only thing you take from a location. This is a key aspect of responsible landscape photography.
- Maintaining a safe and respectful distance from wildlife: A truly great wildlife photograph captures an animal’s natural behavior in its own habitat. This is impossible if the animal is stressed or altered by your presence. Use a telephoto lens to get a close-up shot, rather than physically approaching. Never feed wildlife to lure it closer, as this can disrupt its diet and create a dangerous dependency on humans. Be patient, quiet, and observant, and let the moment unfold naturally.
- Avoiding geotagging sensitive natural locations: In the age of social media, sharing a beautiful, hidden location can have unintended consequences. A precise geotag can lead to a surge in visitors that a fragile environment cannot sustain. To protect these special places, consider being vague about the location in your posts. Instead of tagging the exact trail or landmark, you can mention the general region or national park. This allows you to share the beauty without contributing to overcrowding and potential damage.
–
–
