Understanding and Using Light in Street Photography
Discover how to harness natural light effectively to elevate your street photography skills and capture captivating images.
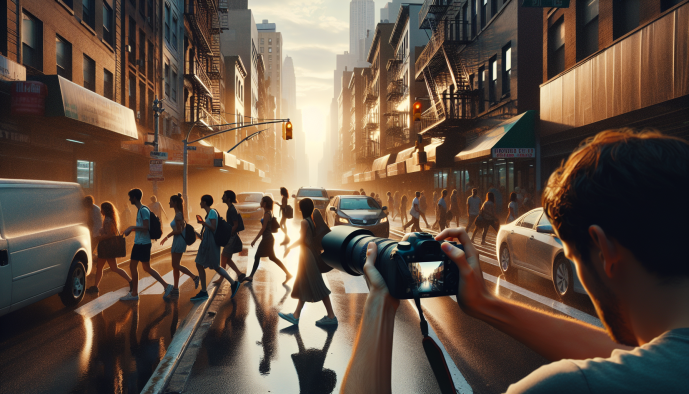
Street photography is a dance with the unexpected, but one element remains your most constant and powerful ally: light. Mastering it isn't just about capturing a scene; it's about sculpting emotion, defining form, and telling a story. If you've ever wondered how to truly harness the power of light in your street photography, you've come to the right place.
This article will demystify the language of light, exploring its core qualities and how to work with natural light from dawn till dusk. We'll equip you with the knowledge to see the street not just as a place, but as a canvas painted by the sun, transforming ordinary moments into extraordinary images.
Essentials
- Light as Storyteller: Beyond exposure, light in street photography defines mood, guides the viewer's eye, and transforms documentation into personal interpretation.
- Mood & Emotion: Different light qualities, from warm sunset glows to harsh midday sun, dramatically impact the emotional tone and atmosphere of your street scenes.
- Guiding the Eye: Utilize light and shadow strategically; brighter areas naturally attract attention, allowing you to direct viewers through your composition.
- Embrace Unpredictability: Shift your focus from subject to light first. Look for compelling pockets of light and shadows, then patiently wait for subjects to enter your perfectly lit frame.
Why Light is Your Most Powerful Tool on the Street
Beyond Exposure: Light as a Storyteller
In street photography, your camera’s primary function is to capture light. But thinking about light merely in terms of correct exposure is like thinking about words only in terms of spelling. It misses the entire point. Light is the language of photography; it’s the ink with which you write your visual stories. It doesn’t just illuminate a scene—it defines it, giving it emotion, depth, and a narrative voice.
Consider how different qualities of light can completely transform the same street corner:
- Mood and Atmosphere: The soft, warm glow of a setting sun can infuse a mundane scene with nostalgia and romance. In contrast, the harsh, high-contrast light of noon can create a sense of drama, grit, or even isolation. Light is the primary driver of the emotional tone of your image.
- Guiding the Viewer’s Eye: Our eyes are naturally drawn to the brightest parts of an image. As a photographer, you can use this instinct to your advantage. A single shaft of light cutting through a dark alley can act as a natural spotlight, immediately focusing attention on a person or object. By controlling where the light and shadows fall, you control the viewer’s journey through your frame.
- Documenting vs. Interpreting: Any camera can document what a street looks like. A flat, evenly lit scene simply says, “This is what was here.” But when you begin to use light selectively—hiding parts of the scene in shadow, highlighting a single face in a crowd, or using a long shadow to create a dynamic shape—you move from documenting to interpreting. You are no longer just showing a place; you are sharing your unique vision and feeling of that place.
The Unpredictable Nature of Street Light
Unlike a studio photographer who has full control over their lighting, the street photographer works with a source that is constantly in flux. The sun moves, clouds pass overhead, buildings cast shifting shadows, and day turns into a neon-drenched night. This unpredictability can be frustrating, but embracing it is fundamental to the craft. The fleeting, unrepeatable moments of light are what make street photography so exciting.
The key is to shift your mindset. Instead of looking for a subject and then hoping the light is good, learn to see the light first. Walk the streets and look for the stage before you look for the actors. Notice a dramatic shadow stretching across a crosswalk, a pool of light forming under a streetlight, or the reflection of the sky in a puddle. Find these pockets of beautiful or interesting light, compose your shot, and then wait with patience. When the right person walks into your pre-composed, perfectly lit scene, you’ll be ready to capture a moment that feels both spontaneous and masterfully crafted.
The Language of Light: Core Qualities to Master
To truly harness light, you must first learn to speak its language. Light isn’t just one thing; it has distinct qualities of hardness, direction, and color. Understanding these core characteristics is like learning grammar—it gives you the building blocks to construct powerful, intentional visual sentences on the street.
Hard Light vs. Soft Light
The most fundamental quality of light is its hardness or softness. This is determined by the size of the light source relative to the subject. A small, distant source creates hard light, while a large, close source creates soft light. Each has a unique voice and is suited for different narrative goals.
Hard Light
Hard light is the light of high drama. Sourced from the direct, unobstructed sun, typically around midday, it is defined by its high contrast and crisp, well-defined shadows. This kind of light carves scenes into bold, graphic shapes and emphasizes texture. It can feel gritty, intense, and unforgiving, making it a perfect tool for creating stark, geometric compositions and highlighting the raw energy of urban life.
Soft Light
Soft light is the gentle poet of the street. It comes from a large, diffused source, like an overcast sky or the open shade beneath a building’s awning. Its characteristics are the opposite of hard light: low contrast, gentle gradations, and soft, feathered shadow edges. This light wraps around subjects, making it incredibly flattering for street portraits. It fosters a calmer, more subtle, and often more intimate mood, allowing the viewer to focus on emotion and expression without the distraction of harsh shadows.
Direction of Light: Shaping Your Subject
Once you understand the quality of light, the next step is to observe its direction. Where the light is coming from radically changes how your subject is rendered, transforming a flat shape into a three-dimensional form full of depth and character.
Front Lighting
When the light source is behind you and falls directly onto the front of your subject, you have front lighting. This is the most straightforward type of light to work with. Its primary advantage is that it illuminates your subject evenly, revealing clear details and colors. However, this clarity can come at a cost; front lighting often eliminates shadows, which can make a scene or a person appear flat and lacking in depth or dimension.
Side Lighting
Side lighting occurs when the light source hits your subject from the left or right. This is where the magic of shaping and modeling happens. By illuminating one side of a subject while casting the other in shadow, side light reveals texture, contours, and form. It adds a powerful sense of depth and three-dimensionality to your images. This dramatic interplay of light and dark is perfect for creating mood and highlighting the character lines on a face or the texture of a brick wall, though you must be mindful of losing detail in the deep shadows it creates.
Backlighting
Positioning your subject between you and the light source creates backlighting. This can be one of the most challenging but rewarding lighting scenarios. It separates your subject from the background, often creating a beautiful rim light or “halo” effect around their hair and shoulders. If you expose for the bright background, your subject will be rendered as a dark, graphic silhouette. While it can be tricky to get the exposure right, backlighting is unmatched for creating a sense of mystery, drama, and separation.
Color Temperature and Mood
Light isn’t just bright or dim; it has color. This “color temperature” has a profound psychological impact, instantly setting the emotional tone of your photograph before the viewer even registers the subject matter.
Warm Light (Golden Hour)
Associated with the golden hour—the period shortly after sunrise and before sunset—warm light is characterized by soft, glowing tones of yellow, orange, and red. This light bathes the city in a beautiful glow that evokes feelings of warmth, nostalgia, happiness, and peace. It’s universally flattering and can make even the most mundane street corner feel magical and serene.
Cool Light (Blue Hour & Shade)
Cool light is found during the “blue hour” at twilight or within deep, open shade during the day. Its dominant blue and purple hues create a completely different atmosphere. This light can feel calm, tranquil, and quiet. It can also evoke a sense of melancholy, coldness, or urban isolation, providing a pensive and introspective mood to your street photography.
Mixed/Artificial Light
After the sun sets, the city comes alive with a chaotic and vibrant symphony of artificial light. The orange glow of sodium-vapor streetlights, the crisp white of modern LEDs, the blinking red of traffic signals, and the kaleidoscopic colors of neon signs all mix together. This complex lighting can create a dynamic, energetic, and quintessentially urban feel. Depending on the colors and context, it can also feel futuristic, lonely, or even eerie.
Working with Natural Light Throughout the Day
The sun is the street photographer’s ultimate, albeit unpredictable, lighting director. Its position in the sky dictates the quality, color, and direction of light, fundamentally changing the character of a scene from one hour to the next. Learning to read the clock and the sky is as crucial as knowing your camera settings. Each part of the day offers a unique visual language for you to work with.
The Magic of the Golden Hour
There’s a reason photographers are obsessed with the “golden hour”—that brief, magical period shortly after sunrise and before sunset. During this time, the sun is low in the sky, and its light travels through more of the Earth’s atmosphere. This process scatters the blue light, leaving behind a soft, warm, and directional glow that is incredibly flattering.
- Dramatic Shadows: The low angle of the sun casts long, stretching shadows across the streets. These shadows are not just voids of light; they are powerful compositional elements. You can use them as leading lines to guide the viewer’s eye, to create dramatic silhouettes, or to add a sense of depth and mystery to an otherwise simple scene.
- Flattering Glow: The warm, diffused quality of golden hour light wraps beautifully around subjects. It softens skin tones, making it an ideal time for candid street portraits. It also bathes architecture in a rich, golden hue, bringing out texture and warmth in brick and stone.
Taming the Midday Sun
Many photographers pack up their gear when the sun is high and harsh, but this is a mistake. Midday light is not a limitation; it’s an opportunity to create a different kind of image—one that is bold, graphic, and full of drama. Instead of fighting the harshness, you learn to embrace its characteristics.
The key is to stop looking for soft light and start seeing in terms of shapes and contrast. High-contrast scenes created by the midday sun are often perfect candidates for black and white conversion, which strips away distracting colors and emphasizes the raw interplay of light and shadow.
Look for how the hard sun interacts with the urban environment. Buildings, archways, and scaffolding become instruments that carve the light, casting deep, well-defined shadows onto the pavement. You can use these shadows to:
- Frame your subject: Position yourself so that a person walks into or out of a stark patch of light or a deep shadow.
- Create abstract patterns: Focus on the geometric shapes created by the shadows themselves, turning the street into a canvas of abstract forms.
- Isolate a moment: A single figure caught in a sliver of intense sunlight can create an incredibly powerful and focused image.


The Giant Softbox: Overcast and Cloudy Days
An overcast day is nature’s gift of a giant softbox. The clouds diffuse the sun’s harsh rays, scattering light evenly across the city. This creates soft, gentle shadows and low-contrast scenes. While it may lack the immediate drama of hard light, it offers its own distinct advantages.
The even light is exceptionally flattering for street portraits, as it minimizes harsh lines and skin imperfections. With the drama of light and shadow removed, other elements of the scene come to the forefront. This is the perfect time to focus on:
- Vibrant Color: Colors often appear more saturated and rich on an overcast day because they aren’t being washed out by intense sunlight. Look for a person with a bright red umbrella or a colorful jacket to create a strong focal point.
- Human Expression: Without distracting shadows, the viewer’s attention is drawn directly to the faces and emotions of the people in your frame. It’s a great time to capture subtle interactions and moods.
- Atmosphere: A cloudy, gray day can evoke a sense of melancholy, tranquility, or grit. Lean into that mood by capturing the reflections in rain-slicked streets or the quiet contemplation of a person waiting for a bus.
The Blue Hour and Twilight
Just after the sun has set but before the sky is completely black, you enter the “blue hour.” This is a time of delicate, cool-toned ambient light. It’s a period of transition where the city begins to reveal its second personality, lit by the glow of electricity.
The primary challenge and creative opportunity of twilight is balancing the fading natural light with the emerging artificial lights from street lamps, storefronts, and car headlights. This mix of cool blue ambient light and warm tungsten or LED light can create a beautiful and dynamic color palette.
Technically, this is a more demanding time to shoot. The low light levels will force you to make some compromises:
- Slower Shutter Speeds: You’ll need to slow your shutter speed to let in enough light. This means holding your camera very steady or bracing it against a wall to avoid camera shake.
- Higher ISOs: You will likely need to increase your camera’s ISO to maintain a usable shutter speed, which can introduce digital noise. Modern cameras handle this well, and a little grain can often add to the atmospheric feel of a nighttime shot.
Harnessing the Urban Glow: Artificial Light Sources
When the sun sets, the city doesn’t go dark; it transforms. A new set of light sources emerges, each with its own character, color, and potential for storytelling. Artificial light is not a substitute for daylight but a completely different medium. It offers a chance to paint with color, create theatrical drama, and capture the pulsing energy of the urban night. This exploration into creative lighting techniques can truly elevate your urban photography.
Streetlights, Headlights, and Neon
The night street is a dynamic canvas of isolated light sources. A single streetlight can act as a perfect spotlight, creating a small, self-contained stage on a dark sidewalk. By positioning yourself and waiting for a subject to walk through this pool of light, you can isolate them from the surrounding chaos, creating a moment of quiet drama. The quality of this light is also crucial; older sodium-vapor lamps cast a cinematic, warm orange-yellow glow that can feel nostalgic or gritty, while modern LED streetlights produce a cleaner, colder white light that lends scenes a more contemporary or sterile feel. Each type of light creates a profoundly different mood. Understanding how to use color in lighting is key here.
The constant flow of traffic provides another powerful tool: motion. By using a slower shutter speed and keeping your camera steady, you can transform the headlights and taillights of cars into vibrant streaks of red, white, and yellow. These light trails convey a sense of speed and energy, turning a static scene into a dynamic one. They can serve as leading lines that guide the viewer’s eye or as a chaotic, energetic backdrop for a still subject. This is a fundamental aspect of basic camera settings and techniques for capturing movement at night.
Neon and commercial signs offer a palette of intense, saturated color. A subject standing beneath a red neon sign is not just illuminated; they are bathed in an emotional, often surreal, hue. These colors can be challenging to expose correctly, but they provide an unparalleled opportunity to create images that are vibrant, moody, and distinctly urban. Instead of fighting the intense color cast, embrace it as a central element of your composition, much like exploring manipulating light and shadows.
Light from Windows and Doorways
Windows and doorways are natural frames within the urban landscape, and at night, they become illuminated stages. A person paused in a brightly lit doorway is instantly separated from the darker exterior, their silhouette or illuminated form becoming the clear focal point of a story. This “stage” effect is a classic technique for creating compelling, singular moments that feel both candid and theatrical, a core element of effective advanced compositional techniques in street photography.
Similarly, shop windows offer a complex interplay of light and narrative. They not only cast light onto the sidewalk and passersby but also provide a backdrop filled with their own stories. A person gazing into a window display creates a layered image of reflection, desire, and observation. The light from the display illuminates their face, revealing their expression, while the scene inside the window adds context and depth. This can be a great way to practice mastering the art of invisibility by observing without being intrusive.
The primary technical challenge here is balancing the vast difference in brightness between the illuminated interior and the dark exterior. Often, you must choose what to expose for. Metering for the light inside the window will plunge the street into deep shadow, emphasizing the subject’s isolation. Alternatively, trying to find a balance might require careful use of exposure compensation to retain just enough detail in both the highlights and shadows without losing the dramatic contrast. Mastering the exposure triangle is crucial for these situations.
Creative Techniques: Sculpting with Light and Shadow
Once you understand the qualities and direction of light, you can begin to actively manipulate it. This is where street photography transforms from documentation into art. Instead of simply accepting the light as it is, you start hunting for specific scenarios, using light and shadow as primary compositional elements to create images with drama, mystery, and depth. This is a core aspect of mastering street photography.
The Art of the Silhouette
A silhouette is one of the most powerful and graphic tools in a street photographer’s arsenal. It strips a scene down to its essential forms, creating a universal and often poignant image. The formula is beautifully simple: place your subject in front of a much brighter background. The rising or setting sun is a classic choice, but a brightly lit storefront, a reflective wet street, or a bright, overcast sky can work just as well. Learning about understanding natural light can help you find these perfect backdrops.
To capture a true silhouette with rich, deep blacks, you must tell your camera to expose for the highlights, not the subject. The easiest way to do this is to point your camera at the brightest part of the background (like the sky), lock your exposure, and then re-compose your shot with the subject in place. Alternatively, you can use spot metering on the background or simply dial your exposure compensation down (`-1` or `-2 EV`) until your subject becomes a pure black shape. By removing specific details, silhouettes focus the viewer’s attention on form, gesture, and the story implied by the subject’s outline and their environment. This is a key technique in street photography: basic camera settings and techniques.
Finding Pockets of Light
In the dense urban environment, light rarely falls evenly. It streams through alleys, reflects off buildings, and cuts through scaffolding, creating natural spotlights on the city’s stage. Learning to spot these “pockets of light” allows you to isolate your subjects and create images with a dramatic, almost theatrical quality. Imagine a pedestrian stepping into a single, sharp sunbeam cutting across a dark, shaded street—it’s an instant moment of visual drama. This is a great example of creative lighting techniques.
This technique is perfect for creating a “film noir” aesthetic, characterized by high contrast and a sense of mystery. The key is to expose only for the light, letting the surrounding shadows fall into complete darkness. This is where spot metering becomes invaluable. Meter directly on the bright patch of light where you anticipate your subject will appear. This ensures the illuminated area is perfectly exposed while plunging the rest of the frame into shadow, focusing the viewer’s eye exactly where you want it. This is part of manipulating light and shadows.
Using Reflections to Manipulate Light
The city is a hall of mirrors. Reflections offer a way to bend, multiply, and layer light in endlessly creative ways. They can add complexity, texture, and a touch of the surreal to an otherwise ordinary scene. Smartphones are particularly adept at capturing these dynamic scenes, offering the benefits of using a smartphone for street and travel photography.
- Puddles After Rain: A rain-slicked street or a simple puddle becomes a perfect mirror, reflecting the sky, city lights, and passing figures. Get low to the ground to maximize the reflection, effectively giving you two scenes and two light sources in one frame. This is a great technique for night city photography.
- Glass Facades and Shop Windows: Storefronts are a street photographer’s playground. They allow you to layer the scene inside the shop with the reflected world outside. You can capture a mannequin’s gaze seemingly directed at a person on the street, or blend the warm interior lights with the cool evening light reflected on the glass. This is a wonderful way to explore street photography styles and genres.
- Unexpected Surfaces: Don’t limit yourself to windows and water. Look for light bouncing off polished car hoods, the metallic side of a bus, wet cobblestones, or even the tiny, distorted world reflected in someone’s sunglasses. These unconventional surfaces can create abstract patterns and add a unique element of surprise to your photographs. Exploring these unique surfaces can contribute to your street photography portfolio.
Camera Settings for Controlling Light
While seeing and understanding light is an art, controlling how your camera captures it is a technical skill. Mastering a few key settings will give you the creative command you need to translate your vision into a final image. Think of these not as rigid rules, but as a toolkit to help you react quickly to the fleeting moments on the street.
Choosing the Right Metering Mode
Your camera’s light meter measures the brightness of a scene to determine a “correct” exposure. However, not all scenes are created equal. Your metering mode tells the camera which part of the frame to prioritize, a critical choice in the high-contrast world of street photography.
- Matrix/Evaluative Metering: This is the default mode for most cameras. It analyzes the entire frame and calculates an average exposure. It works well for evenly lit scenes, like a street on an overcast day, but can be easily fooled by scenes with very bright and very dark areas, often resulting in a muddy middle-ground.
- Center-Weighted Metering: This mode also looks at the entire frame but gives more importance to the central portion. It’s a good middle-ground and can be useful when your subject is generally in the center of your composition. It’s more predictable than Matrix metering in mixed lighting.
- Spot Metering: This is your precision tool. It measures light from a very small point in the frame (usually the active focus point). This mode is essential for tricky lighting situations. Want to expose for a face in a sliver of light, ensuring it’s not blown out? Use spot metering. Creating a perfect silhouette? Spot meter on the bright sky behind your subject.
The Power of Exposure Compensation
Your camera’s meter is programmed to see the world as “middle gray.” This means in very bright or very dark scenes, it will try to average things out, which isn’t always what you want. Exposure compensation (`+/- EV`) is your way of telling the camera, “I know better.” It allows you to manually override the meter’s suggestion to make the final image brighter or darker.
- Dialing Down (-EV): To make your image darker, you use negative exposure compensation. This is your go-to tool for creating dramatic, high-contrast scenes. If you want to deepen shadows, make a silhouette completely black against a bright sky, or preserve the highlights in a sunset, dial your EV down by one or two stops.
- Dialing Up (+EV): To make your image brighter, you use positive exposure compensation. This is crucial when your subject is in the shade but the background is bright. The meter might try to darken the whole scene, but by dialing up the EV, you can tell the camera to expose for the subject’s face, even if it means blowing out some of the background highlights. It’s also useful for creating a bright, “high-key” look.
Shutter Speed, Aperture, and ISO: The Balancing Act
These three settings form the “exposure triangle,” and learning how they work together is fundamental to controlling light and motion on the street. Adjusting one requires balancing the others to maintain your desired exposure. This is a core concept in basic camera settings and techniques for street photography.
- Shutter Speed: In bright, direct sun, you’ll have an abundance of light. This allows you to use a fast shutter speed (e.g., 1/500s or faster) to freeze the decisive moment—a gesture, a jump, or a fleeting expression—with perfect sharpness. Conversely, as light fades, a slow shutter speed becomes a creative tool. As mentioned when discussing headlight trails, you can intentionally use a slower speed (e.g., 1/15s) while holding the camera steady to transform moving lights and people into artistic blurs of motion and energy. This is a key aspect of manipulating light and shadows.
- Aperture: Your aperture controls how much light enters the lens. At night or in dark alleys, using a wide aperture (a low f-number like f/1.8 or f/2.8) is essential for gathering as much ambient light as possible. A secondary benefit is that it creates a shallow depth of field, helping your subject pop against a busy, out-of-focus background. This is particularly useful for night city photography.
- ISO: ISO determines your camera sensor’s sensitivity to light. On a sunny day, keep it low (e.g., ISO 100-400) for the cleanest image. As light disappears, you’ll need to increase your ISO to maintain a fast enough shutter speed to avoid camera shake. While higher ISOs introduce digital noise (grain), modern cameras perform exceptionally well. Don’t be afraid to push your ISO to 1600, 3200, or even higher. A slightly grainy, sharp photo is always better than a blurry, clean one. Understanding the exposure triangle is crucial for all photographers.