Using the “Frame in the Frame” in your compositions
Master the art of visual storytelling through our expert guide on frame within frame techniques.
Ever scroll through stunning photographs and wonder what makes them so captivating? Often, the secret lies in a simple yet powerful compositional technique: the "frame within a frame." This article will unlock the secrets of using the "frame in the frame" in your own compositions, transforming ordinary shots into extraordinary visual stories.
We'll dive into what this technique entails, exploring how to discover and harness the power of natural frames found all around you. Plus, we'll reveal how to leverage man-made structures and architectural elements to create compelling visual pathways. Get ready to elevate your photography and bring a new dimension to your visual storytelling.
Essentials
What is a “Frame Within a Frame”?
Defining the Compositional Technique
At its core, the “frame within a frame” is a compositional technique where the photographer uses elements within the scene to create a secondary, natural border around the primary subject. Imagine you’re looking through a window at a distant mountain. The window itself becomes a frame inside the larger frame of your photograph, drawing attention to the mountain. This inner frame is an organic part of the environment you’re capturing.
It’s crucial to differentiate this from the physical picture frame you might hang on a wall. The compositional frame is part of the story, an element of the scene itself. It’s not an afterthought; it’s an intentional choice made at the moment of capture to enhance the image’s structure and meaning. This could be anything from a classic doorway or archway to the subtle gap between two trees or the shadow cast by a building.
The Purpose of an Inner Frame
While creating a visually pleasing image is always a goal, using an inner frame serves several specific and powerful purposes in your composition. It’s a tool that can fundamentally change how a viewer interacts with your photograph. Here’s why it works so well:
- To add a sense of depth and layers. Photography is a two-dimensional medium, but a frame within a frame introduces a distinct foreground element. This simple act creates a powerful illusion of depth, making the scene feel more three-dimensional and immersive. The viewer feels like they are peering through one layer to see the next. See our guide on using depth & layering in your compositions for more on this.
- To lead the viewer’s eye directly to the subject. The human eye is naturally drawn to borders and enclosed spaces. An inner frame acts like a set of visual guideposts or a funnel, channeling the viewer’s attention directly to the most important part of the image—your subject. It leaves no ambiguity about where they should look first. This relates to other compositional guides like using leading lines in your compositions and using the rule of thirds.
- To provide context or narrative to the scene. The object you choose for your frame tells a story. Framing a person through a rustic barn window evokes a different feeling than framing them through the sleek, modern lines of a skyscraper. The frame adds a layer of context, mood, and narrative that enriches the entire photograph. Consider how different perspectives can impact your storytelling with our article on using point of view and perspective in your compositions.
- To isolate the subject from a busy or distracting background. In a chaotic environment, a frame can be your best friend. By using an element to block out distracting “visual noise” around your subject, you can create a clean, focused composition. The frame effectively tidies up the scene, ensuring the subject stands out without competition. This technique is also covered in our discussion on using negative space in your compositions.
Finding and Utilizing Natural Frames
Once you start looking for them, you’ll discover that potential frames are everywhere. Nature, in its beautiful and chaotic way, provides some of the most compelling and organic frames available. The key is to slow down and observe your surroundings not just for your primary subject, but for the elements that can enhance it.
In Landscapes and Nature
The natural world is a master of composition. From the grandest vistas to the smallest details, opportunities to frame your subject abound. Using these elements adds an authentic, unforced quality to your images, grounding your subject within its environment.
- Trees and Foliage: This is often the most accessible natural frame. Look for the low-hanging branch of an old tree to droop into the top of your shot, creating a canopy over a distant mountain or lake. A curtain of leaves or a V-shape formed by two tree trunks can perfectly bracket a subject, drawing the eye right where you want it to go.
- Rock Formations and Caves: The solid, unyielding nature of rock creates powerful, high-contrast frames. Shooting from inside a cave or through a natural arch in a rock formation creates a dramatic “light at the end of the tunnel” effect. The dark, textured foreground of the rock makes the bright, distant landscape pop with color and detail.


Using Light and Shadow
A frame doesn’t have to be a physical object. Sometimes, the most effective frames are ephemeral, created by the interplay of light and shadow. This technique requires a keen eye for lighting conditions and can produce incredibly moody and artistic results. Manipulating light and shadows can also create compelling framing opportunities.
Think of a single beam of light breaking through the clouds to illuminate a patch of a forest floor—that pool of light becomes a natural spotlight, framing whatever is within it and letting the surroundings fall into shadow. Similarly, the hard, graphic line of a shadow cast by a building or a bridge can slice across a scene. By placing your subject in the illuminated area, you can use the shadow’s edge as one or more sides of a frame, guiding the viewer’s gaze directly to the point of interest.
People as Framing Elements
Incorporating people as framing elements is a fantastic way to add a human touch and a sense of story to your images. It creates an immediate connection for the viewer, making them feel as if they are part of the scene.
- Over the Shoulder: This is a classic technique in cinematography and photojournalism. By positioning yourself behind someone and shooting over their shoulder, you use their silhouette or out-of-focus form to frame the scene they are observing. This instantly builds a narrative and adds a personal, subjective viewpoint.
- The Gap Between: The negative space between two or more people can create a powerful compositional window. Imagine two people talking in a market; the space between their heads and shoulders can perfectly frame a distant vendor or architectural detail, telling a richer story about the environment. Learning about using negative space is key to mastering this.
Leveraging Man-Made and Architectural Frames
While nature provides an abundance of organic frames, the built environment offers a wealth of geometric shapes, leading lines, and structured opportunities. Training your eye to see these man-made frames will unlock new compositional possibilities in architecture, street photography, and even your everyday surroundings.
The Classics: Doorways, Windows, and Archways
Architectural openings are the most intuitive and effective man-made frames. Doorways, windows, and arches are literally designed to frame a view, and we can use this to our advantage. They provide clean, strong lines that create a sense of order and structure within your image. The hard edges of a rectangular window can add a feeling of stability, while the soft curve of an archway can lend elegance and grace to your subject.
Don’t just think of them as simple rectangles or curves; consider the perspective they offer. This creates two distinct narrative approaches:
- The “looking in” perspective: By shooting from the outside through a window or doorway, you can frame a subject inside. This often creates a sense of intimacy, voyeurism, or mystery, as if the viewer is getting a private glimpse into a scene.
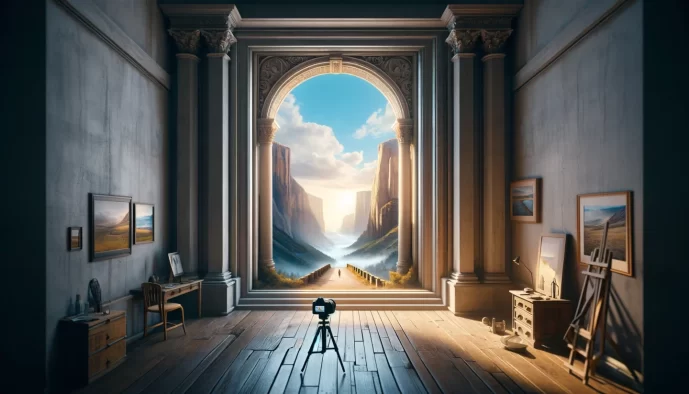
- The “looking out” perspective: Positioning yourself inside and shooting out through an opening frames the world beyond. This is perfect for capturing a grand landscape from a balcony, a bustling street scene from a café window, or a person silhouetted against a bright exterior.
Urban and Street Photography Frames
The city is a playground of compositional elements. Beyond the obvious doors and windows, the urban landscape is filled with structures that can guide the eye and contain your subject. Tunnels, bridges, and underpasses are fantastic for creating a sense of depth and scale, with their converging lines pulling the viewer directly toward the subject at the other end. Learn more about using leading lines in your compositions.
Look for more subtle opportunities as well. The repeating pattern of a fence can create a grid-like frame, while a narrow alleyway can compress the view and focus attention on a person or detail in the distance. Even temporary structures like scaffolding can offer interesting geometric patterns to shoot through. One of the most creative techniques in street photography is using reflections. A puddle after a rainstorm or the glass of a shop window can create a complete, self-contained frame around a reflection of the scene, adding a beautiful, often abstract, layer to your composition.
Everyday Objects as Unconventional Frames
This is where your creativity can truly shine. The “frame within a frame” technique isn’t limited to large, immovable structures; it’s a way of seeing. Once you start looking for them, you’ll find framing opportunities in the most unexpected places. The goal is to challenge yourself to see beyond an object’s function and recognize its compositional potential. Understanding point of view and perspective is key here.
Think about your immediate environment. You can:
- Shoot through the handle of a coffee mug to frame a friend’s face across the table.
- Use a car’s side-view mirror to capture a smaller, framed version of the scene behind you.
- Frame the view through your windshield with the curve of the steering wheel in the foreground.
- Peek through a gap between books on a shelf or through a latticework chair back.
These unconventional frames add a personal, often whimsical, touch to your photos. They tell the viewer not just what you saw, but how you saw it. Practicing this trains your photographic eye to deconstruct the world around you and find compelling compositions in the mundane, turning ordinary scenes into thoughtfully constructed images. This is a great way to improve your craft.
Technical Execution: Camera Settings and Focus
Identifying a compelling frame is a creative victory, but translating that vision into a technically sound photograph requires a deliberate approach to your camera settings. The interplay between aperture, focus, and exposure is what elevates a simple snapshot into a carefully constructed composition. Here’s how to master the technical side of the frame within a frame technique.
Aperture and Depth of Field
Your aperture setting is the primary tool for controlling the relationship between your foreground frame and your subject. It determines the depth of field, or how much of your scene is in sharp focus. You have two main creative paths, each yielding a dramatically different result.
To create a soft, ethereal frame that isolates your subject, use a wide aperture (a low f-number, such as f/1.8 to f/4). This produces a shallow depth of field, causing the foreground elements to blur beautifully while your subject remains crisp and clear. This technique is perfect for drawing the viewer’s attention directly to the point of interest, removing the distraction of a busy foreground and adding a professional, painterly quality to the image. This is a great way to use negative space effectively.
Conversely, if you want both the frame and the subject to be sharp, you’ll need a narrow aperture (a high f-number, like f/8 to f/16). This creates a deep depth of field, rendering detail in the foreground, mid-ground, and background. This approach is ideal when the frame itself provides important context or texture—think of the rugged rock of a cave opening framing a distant landscape. The result is a richly layered image where every element contributes to the story. For more on this, explore how to achieve depth and layering in your compositions.
Aperture Cheat Sheet
- Use a Wide Aperture (f/1.8 – f/4) when: You want to isolate your subject, the foreground frame is distracting, or you desire a soft, dreamy aesthetic. The focus is entirely on the subject.
- Use a Narrow Aperture (f/8 – f/16) when: The frame provides essential context, you want to showcase texture in both the frame and the subject, or you are capturing a deep landscape scene.
Nailing Your Focus Point
One of the most common pitfalls when shooting through a foreground element is incorrect focus. Your camera’s autofocus system often defaults to what’s closest and largest, which is typically your frame. This leaves you with a sharp image of a branch or a window frame and a blurry main subject. To avoid this, you must take control. Understanding point of view and perspective can help you anticipate focus challenges.
The most reliable method is to switch your camera to Single-Point AF mode. This allows you to move a single focus point around the screen and place it precisely on your subject, no matter where it is in the composition. Simply position the point over your subject, half-press the shutter to lock focus, and then take the shot. For ultimate precision, especially in low-contrast situations or when the frame is very close to the lens, switching to Manual Focus and using your camera’s focus peaking or magnification tools will guarantee your intended subject is perfectly sharp.
Exposure and Metering
Framing often creates scenes with high dynamic range—a mix of deep shadows and bright highlights. Imagine shooting from inside a dark archway out into a sunlit courtyard. Your camera’s default metering mode (like Matrix or Evaluative) will try to average the entire scene, often resulting in a muddy, poorly exposed image where the shadows are too bright and the highlights are blown out. Learning to manipulate light and shadows is key to overcoming this.
The solution is to use Spot Metering. This mode measures the light from a very small area of your frame—the spot you have selected. By aiming this spot directly at your main subject, you are telling the camera, “Expose for this part of the scene correctly, and let everything else fall where it may.” This ensures your subject is perfectly lit, even if it means the dark, framing archway becomes a deep, dramatic silhouette. This technique is essential for improving your landscape photos.
As a final safety net in these tricky lighting situations, consider using Exposure Bracketing. This function tells your camera to automatically take three or more photos in quick succession: one at the meter’s suggested exposure, one underexposed, and one overexposed. This gives you multiple options to work with later and is a professional habit that can save a potentially magnificent shot from a simple exposure error. This is a great way to start elevating your photography.
Common Mistakes to Avoid
The frame-within-a-frame technique is a powerful tool, but like any tool, it can be misused. When executed poorly, it can detract from an image rather than enhance it. By being aware of a few common pitfalls, you can ensure your frames serve their intended purpose: to elevate your subject and strengthen your composition.
The Overpowering Frame
The most frequent error is creating a frame that steals the show. The inner frame is a supporting character, not the star. Its job is to direct attention to the main subject, not demand it for itself. If your frame is too visually complex, brightly colored, or inherently more interesting than what it contains, the viewer’s eye will get “stuck” on the edges of the photo instead of moving toward the focal point.
- The Problem: A frame with vibrant colors, intricate patterns, or distracting elements pulls focus away from your primary subject. Imagine framing a subtle portrait with a chaotic graffiti wall—the graffiti will likely win the battle for attention.
- The Solution: Strive for simplicity and subordination. The best frames are often those that are darker than the subject, out of focus, or have simple, clean lines. This contrast naturally pushes the viewer’s gaze toward the brighter, sharper subject within.
Awkward or Incomplete Frames
A successful frame feels intentional and complete. An awkward frame, on the other hand, can make a composition feel unbalanced and sloppy. This often happens when the photographer doesn’t take the time to refine their position and perspective. The frame should feel like a deliberate window, not an accidental obstruction. Learning about using point of view and perspective can help avoid this.
Common issues include:
- Cutting off the subject: Be careful that your framing element doesn’t awkwardly slice through a key part of your subject. For example, a tree branch that cuts across a person’s face is more distracting than compositional.
- Ambiguous borders: A frame that only partially encloses the scene can be confusing. If you’re using two trees to frame a mountain, ensure they create a clear visual corridor. A single, randomly placed branch in the corner doesn’t achieve the same effect.
- The Fix: The solution is almost always physical movement. Don’t be afraid to take a step to the left or right, crouch down, or stand on your toes. Small adjustments in your position can dramatically change the relationship between the frame and the subject, allowing you to perfect the alignment and create a clean, effective border. This is part of advanced compositional techniques.
Forcing a Frame
Once you learn a new compositional technique, it’s tempting to use it everywhere. However, the frame-within-a-frame is not a one-size-fits-all solution. Forcing a frame into a scene where it doesn’t belong can make the resulting photograph feel contrived, gimmicky, or unnatural. The goal is to discover frames that add narrative, depth, or focus—not just to check a compositional box. Understanding how to use depth and layering can help create more natural framing.
Before you press the shutter, ask yourself a simple question: “Does this frame actually improve the photo?” If the answer is no, or if you’re struggling to make it work, it’s a sign that the scene might be stronger without it. Some of the most powerful photographs are simple and direct. Recognizing when to use a framing element—and, just as importantly, when not to—is a mark of a thoughtful photographer.
