Wildlife Photography
Capture nature's essence: learn the secrets of stunning wildlife photography.
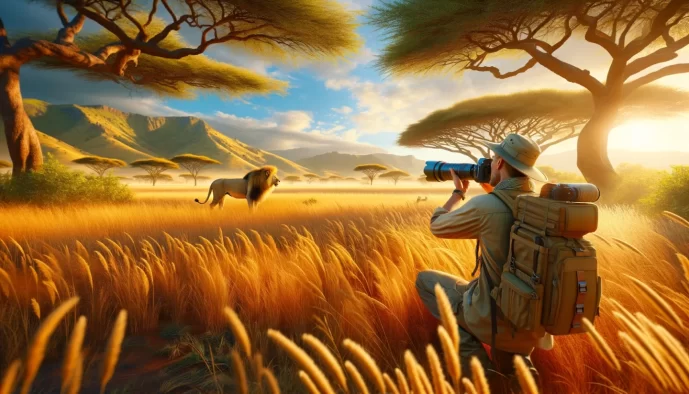
Ever dreamed of capturing the raw beauty of nature, freezing a fleeting moment of wild action, or revealing the hidden lives of animals through your lens? If the thrill of wildlife photography calls to you, you've come to the right place. This article is your comprehensive guide to getting started and excelling in this rewarding genre.
We'll delve into the essential gear that will set you up for success, demystify camera settings crucial for capturing sharp, impactful wildlife images, and explore the vital art of fieldcraft – the patient and respectful approach needed to find and photograph your subjects ethically. Get ready to transform your passion into stunning photographs.
Essentials
Gearing Up: The Essential Wildlife Photography Kit
Embarking on a wildlife photography journey is thrilling, but success often hinges on having the right equipment. While a photographer’s skill is paramount, the proper gear provides the capability and reliability needed to capture fleeting moments in nature. This isn’t about owning the most expensive items, but about choosing tools that are best suited for the unique challenges of photographing wild animals in their natural habitats.
Choosing the Right Camera Body
The camera is the heart of your kit. The debate between DSLRs and mirrorless systems is ongoing, but modern technology has made both incredibly capable. The best choice depends on your specific needs and preferences.
- DSLR vs. Mirrorless: DSLRs (Digital Single-Lens Reflex) offer robust build quality, exceptional battery life, and a clear optical viewfinder that shows you exactly what the lens sees with no digital lag. Mirrorless cameras, on the other hand, are typically lighter, offer silent shooting modes (a massive advantage around skittish animals), and feature advanced autofocus systems with incredible subject tracking and real-time electronic viewfinders that show you the final exposure before you press the shutter.
- Sensor Size (Full-Frame vs. APS-C): A full-frame sensor is the same size as 35mm film, offering excellent low-light performance and image quality. An APS-C (or crop-sensor) camera has a smaller sensor, which introduces a “crop factor.” This effectively multiplies your lens’s focal length (usually by 1.5x or 1.6x), giving you extra “reach” without extra cost—a significant benefit for distant subjects.
- Key Features: Look for a camera with a fast and intelligent autofocus system to track moving subjects reliably. A high frame rate (measured in frames per second, or fps) allows you to capture a rapid sequence of shots, increasing your chances of nailing the perfect moment of action. Finally, strong low-light performance (clean images at high ISOs) is crucial, as many animals are most active during the dim light of dawn and dusk.
The Crucial Role of Lenses
Many seasoned photographers will tell you to invest in high-quality glass before upgrading your camera body. For wildlife, your lens is your connection to your subject, allowing you to fill the frame without disturbing the animal.
- Why telephoto lenses are king: A telephoto lens is non-negotiable for wildlife. Lenses with focal lengths of 300mm and beyond are standard, with 400mm, 500mm, and 600mm lenses being common among serious enthusiasts and professionals. They allow you to capture intimate, detailed shots from a safe and respectful distance. The Canon RF 200-800mm is a great example of a versatile telephoto option.
- Prime vs. Zoom lenses: A prime lens has a fixed focal length (e.g., 500mm). They are often sharper and have wider maximum apertures than zooms, making them exceptional in low light. A zoom lens (e.g., 200-600mm) offers versatility, allowing you to adjust your composition without moving, which is invaluable when animals are on the move.
- Understanding aperture: The aperture (e.g., f/2.8, f/5.6) controls how much light enters the lens. A wider aperture (lower f-number like f/2.8) is better for low-light conditions and creates a shallow depth of field, beautifully blurring the background to isolate your subject. A narrower aperture (higher f-number) keeps more of the scene in focus.
- Considering teleconverters: A teleconverter (or extender) is a small optic that fits between your camera and lens to multiply its focal length (typically by 1.4x or 2x). It’s a cost-effective way to get more reach, but it comes at the cost of reducing the amount of light reaching the sensor and can sometimes slightly soften the image or slow down autofocus.
Essential Support Gear
Long, heavy lenses are difficult to hold steady for extended periods. A stable support system is critical for achieving tack-sharp images, especially when using slower shutter speeds.
- Tripods: The gold standard for stability. A sturdy tripod eliminates camera shake, which is essential for sharp photos in low light or when waiting patiently for an animal to appear. Look for carbon fiber models for a good balance of strength and low weight.
- Monopods: Offering a single leg of support, a monopod is a fantastic compromise between stability and mobility. It takes the weight of a heavy lens off your arms while allowing you to pan and move quickly to track subjects.
- Gimbal heads: When mounted on a tripod, a gimbal head allows a large, heavy lens to be balanced perfectly. This makes it feel almost weightless, enabling fluid, smooth movements to follow unpredictable action like a bird in flight.
- Beanbags: A surprisingly versatile and effective tool. A simple beanbag can be draped over a car door, fence post, or rock to create a stable, low-profile shooting platform. They are perfect for shooting from the relative cover of a vehicle.
Accessories You Shouldn’t Forget
The devil is in the details, and a few small accessories can be the difference between a successful outing and a frustrating one. These items are essential for any wildlife photographer’s bag.
- Extra batteries and a portable charger: Cold weather, continuous autofocus, and reviewing images drain batteries fast. Always carry at least one or two fully charged spares. A portable power bank can be a lifesaver on multi-day trips.
- High-speed, high-capacity memory cards: Shooting in RAW format and using high-speed burst mode fills up memory cards quickly. Invest in large-capacity cards with fast write speeds (like CFexpress or UHS-II SD cards) to ensure your camera’s buffer clears quickly and you don’t miss a shot.
- Lens cleaning cloths and blowers: Dust, pollen, and water spots are a constant reality in the field. A rocket blower and a few microfiber cloths are necessary to keep your lens front element and camera sensor clean for spotless images.
- Weather protection: Nature is unpredictable. A simple rain cover for your camera and lens will allow you to keep shooting in a drizzle and protect your expensive gear. A durable, well-padded camera bag is also crucial to shield your equipment from bumps, drops, and the elements.
Mastering Your Camera Settings for Wildlife
Having the right gear is only the first step. To truly capture the wild, you must learn to speak your camera’s language. Understanding the core settings—aperture, shutter speed, and ISO—and how they work together is what separates a lucky snapshot from a breathtaking photograph. This is where technical skill meets artistic vision. For those looking to get started, exploring capturing wildlife with a smartphone can be a great entry point.
Aperture: Controlling Depth of Field
Aperture, measured in f-stops (e.g., f/2.8, f/8), controls how much light enters your lens and, crucially, your depth of field—the area of your image that is in sharp focus. For wildlife, this is a powerful creative tool.
- Isolating Your Subject: To create that classic wildlife portrait with a soft, dreamy background (known as bokeh), you’ll want to use a wide aperture (a low f-number like f/2.8 or f/4). This shallow depth of field melts away distracting backgrounds, forcing the viewer’s attention directly onto the animal.
- Environmental Portraits: Sometimes, the animal’s habitat is just as important as the animal itself. To keep both the subject and its surroundings in focus, you’ll need to use a narrower aperture (a higher f-number like f/8 or f/11). This increases the depth of field, telling a more complete story about where the animal lives.
- Typical Scenarios: For close-up portraits, start with the widest aperture your lens allows. For an animal in a landscape, f/8 is a great starting point. If you’re photographing a group of animals at different distances, you may need to go to f/11 or higher to ensure they are all acceptably sharp.
Shutter Speed: Freezing Motion
Shutter speed determines how long your camera’s sensor is exposed to light. In wildlife photography, its primary job is to freeze motion, ensuring your subject is crisp and sharp, even when it’s on the move.
- The Rule of Thumb: A classic guideline to avoid blur from camera shake is to use a shutter speed that is at least the reciprocal of your focal length. For example, with a 500mm lens, you should aim for a shutter speed of at least 1/500s. However, for wildlife, this is just a bare minimum. Using a lens like the Canon RF 200-800mm can give you the reach needed for many wildlife shots.
- Capturing Fast Action: For a bird in flight, a running cheetah, or a leaping dolphin, you need to be much faster. Shutter speeds of 1/1000s, 1/2000s, or even higher are often necessary to freeze every feather and muscle without a hint of motion blur. This is crucial for sports and action photography as well.
- Creative Motion Blur: You can also use shutter speed creatively. By intentionally selecting a slower speed (e.g., 1/30s) and panning your camera to follow a moving animal, you can create a dynamic image where the subject is sharp but the background is streaked with motion. This technique takes practice but yields spectacular results, similar to techniques used in high-speed photography.
ISO: Balancing Light and Noise
ISO is the third corner of the “exposure triangle,” along with aperture and shutter speed. It measures your camera sensor’s sensitivity to light. When you can’t open your aperture any wider or slow your shutter speed any further without compromising your image, it’s time to increase the ISO.
- The Exposure Triangle: Think of these three settings as a balancing act. If you change one, you must adjust one of the others to maintain the same exposure. For example, if you need a faster shutter speed to freeze action, you’ll likely need to increase your ISO to compensate for the loss of light. This fundamental concept applies across many genres, including landscape photography.
- When to Increase ISO: Wildlife is most active during the “golden hours” of dawn and dusk, when light is low. In these situations, or when shooting in a dense forest, increasing your ISO from its base (usually 100 or 200) to 800, 1600, or even 6400 is essential to achieve the fast shutter speeds needed for sharp photos. Exploring different best spots for wildlife photography might also present varying light conditions.
- Managing Digital Noise: The trade-off for higher ISO is an increase in digital noise, which can appear as a grainy texture in your image. Modern cameras handle high ISOs exceptionally well, but it’s still best to use the lowest ISO you can for the given conditions. Noise can also be effectively reduced in post-processing software.
Focusing Modes for Sharp Images
A perfectly exposed, well-composed photograph is meaningless if the subject is out of focus. Mastering your camera’s autofocus (AF) system is non-negotiable for capturing consistently sharp images of unpredictable animals.
- Continuous Autofocus: Your camera’s go-to mode for wildlife should be Continuous AF (AF-C for Nikon/Sony, AI Servo for Canon). In this mode, the camera will continuously track and refocus on your subject as long as you half-press the shutter button, ensuring it stays sharp as it moves toward or away from you. This is a key technique for capturing dynamic action, much like in documentary and photojournalism.
- Single-Point vs. Zone AF: For a stationary or slow-moving animal, using a single AF point gives you pinpoint precision, allowing you to place focus directly on the eye. For more erratic subjects, like a small bird flitting through branches, a Zone or Group AF mode is more effective, as it uses a cluster of focus points to track the subject within a larger area. This precision is also vital in genres like street photography.
- Eye-AF: A Game-Changer for Animal Portraits: The development of Animal Eye-AF, particularly in modern mirrorless cameras, has completely revolutionized wildlife photography. This incredible technology allows the camera to automatically detect an animal’s eye—be it a mammal or a bird—and lock focus onto it with tenacious accuracy. This frees you from having to manually move a focus point, allowing you to concentrate entirely on your timing and composition, knowing the most critical part of the portrait will be perfectly sharp.
The Art of Fieldcraft: Finding and Approaching Wildlife
The most advanced camera gear is only a tool; the real secret to exceptional wildlife photography lies in fieldcraft. This is the art of understanding the natural world, anticipating animal behavior, and moving through the environment with respect and skill. It’s about becoming an observer first and a photographer second, allowing you to capture authentic moments without disturbing your subjects. For those starting out, learning the basics of capturing wildlife with a smartphone can be a great first step.
Researching Your Subject
Success in the field often begins long before you pick up your camera. Thorough research transforms a hopeful outing into a productive one by putting you in the right place at the right time. The more you know about your subject, the better you can predict its movements and behaviors.
- Learn Animal Behavior: Understand the daily and seasonal routines of your target species. When do they feed? When do they rest? Are they active during the day (diurnal), at night (nocturnal), or at dawn and dusk (crepuscular)? Knowing these patterns is fundamental to finding them.
- Identify Prime Times: The “golden hours” shortly after sunrise and before sunset offer beautiful, soft light and are also peak activity times for many animals. Similarly, the “blue hour” just before sunrise and after sunset can provide unique lighting conditions and opportunities. Researching mating seasons or migration periods can also lead to incredible photographic events.
- Use Local Resources: Tap into the wealth of information around you. Invest in regional wildlife guidebooks. Talk to park rangers and naturalists—they have invaluable, up-to-the-minute knowledge. Online forums and birding apps can provide recent sighting reports, but always use this information responsibly to avoid overwhelming a specific location.
Patience and Observation
In wildlife photography, patience isn’t just a virtue; it’s an essential skill. Animals operate on their own schedule, and the most rewarding images often come after long periods of quiet waiting. This time, however, is not passive. It’s an opportunity to observe, learn, and immerse yourself in the environment.
- Embrace the Waiting Game: Find a comfortable, concealed spot and be prepared to stay for a while. Many photographers spend hours or even days in one location waiting for a specific animal or behavior. This dedication is often what separates a good shot from a great one.
- Read the Environment: Learn to look for subtle clues. Fresh tracks, droppings, or signs of feeding can tell you an animal has been in the area recently. Listen for alarm calls from birds or squirrels, which can often signal a predator is nearby. Anticipating action is key to being ready when it happens.
- Minimize Your Presence: Move slowly and deliberately. Avoid sudden movements and loud noises. Turn off all camera beeps and put your phone on silent. The less you disturb the environment, the more likely wildlife will behave naturally around you.
Stealth and Concealment Techniques
Getting close to wild animals without causing stress requires a thoughtful approach to concealment. The goal is to blend into the scenery so you are no longer perceived as a threat, allowing you to witness and photograph intimate, natural moments.
- Use Natural Cover: Your best concealment is often the environment itself. Use trees, boulders, tall grass, and changes in terrain to break up your human silhouette and hide your movements.
- Wear Appropriate Clothing: While full camouflage isn’t always necessary, wearing drab, earth-toned colors (greens, browns, grays) will help you blend in. Camouflage wraps for your camera and lens can also make your large, dark equipment less conspicuous and threatening to wary animals.
- The “Car as a Blind” Method: In many parks and reserves, animals are habituated to vehicles. They often perceive a car as a harmless part of the landscape. Shooting from your vehicle can be an incredibly effective technique. Use a beanbag on your open window to stabilize your lens, and remember to turn off your engine to reduce noise and vibration.
Safety and Situational Awareness
No photograph is worth risking your safety or the well-being of an animal. Responsible fieldcraft is built on a foundation of respect and a deep awareness of your surroundings. Always prioritize safety above all else.
- Maintain a Safe Distance: Your telephoto lens is your best tool for safety. It allows you to fill the frame without encroaching on an animal’s personal space. Learn the signs of stress in different species (e.g., flattened ears, a raised tail, direct stares) and back away immediately if you see them.
- Be Aware of Your Surroundings: Pay attention to more than just your subject. Be mindful of the terrain to avoid falls, watch for other animals like snakes or insects, and keep an eye on changing weather conditions. Situational awareness keeps you safe and prepared.
- Never Corner an Animal: Always ensure your subject has a clear and unobstructed escape route. A cornered animal feels threatened and may react defensively. Position yourself so the animal can leave peacefully if it chooses to.
Composition Techniques for Compelling Images
A technically perfect photograph can still fall flat if the composition is uninspired. Composition is the art of arranging elements within your frame to create a visually pleasing, impactful, and story-driven image. While technical settings capture the light, composition captures the emotion and guides the viewer’s eye. It’s what elevates a simple record of an animal into a compelling work of art.
Getting on Eye Level
One of the most transformative changes you can make to your wildlife photography is to alter your perspective. We are used to seeing the world from our own height, looking down on most animals. By getting down to their level, you enter their world and create a far more intimate and engaging portrait.
Shooting at eye level forges an immediate emotional connection. When an animal looks directly into your lens from its own perspective, the resulting image feels personal and direct, as if you are sharing a moment. A simple photo of a fox becomes a powerful portrait when you are at its eye level, capturing the intelligence and curiosity in its gaze. This perspective shift instantly removes the feeling of a human observing from above and instead creates a sense of mutual presence.
Safely getting low requires some practice and preparation:
- Use a ground pod or beanbag: These provide stable support for your camera and lens right on the ground, allowing you to lie down comfortably while shooting.
- Utilize an articulating screen: Many modern cameras have flip-out LCD screens, which are invaluable for composing shots from a low angle without having to press your face into the mud.
- Wear appropriate clothing: Waterproof trousers or a ground mat can make the experience of lying on damp or rough terrain much more comfortable.
- Be mindful of your subject: Always approach low-angle photography with caution. Ensure the animal is comfortable with your presence and that you are not perceived as a threat.
Telling a Story with Your Frame
A great wildlife photograph does more than just show what an animal looks like; it tells a story. By carefully considering what you include and exclude from your frame, you can provide context, show behavior, and evoke a specific mood.
- Include the Environment: Sometimes, pulling back to show an animal within its habitat is more powerful than a tight portrait. An image of a mountain goat on a precarious cliff edge tells a story of survival and adaptation. A polar bear set against the vast, empty arctic ice speaks to its isolation and the scale of its environment. These “environmental portraits” provide context and a deeper narrative.
- Capture Interactions and Behaviors: The most memorable images often capture a specific moment or action. Look for animals grooming each other, a parent feeding its young, a predator on the hunt, or birds engaged in a courtship display. These behavioral shots are dynamic and give the viewer a fascinating glimpse into the animal’s life.
- Use Negative Space: Don’t feel the need to fill the entire frame with your subject. Negative space—the empty area around your subject—can be a powerful compositional tool. It can create a sense of scale, isolation, or freedom, and it helps draw the viewer’s eye directly to the animal without distraction. A bird in flight against a vast, empty sky is a classic example of using negative space effectively.
Classic Compositional Rules
While rules in art are often meant to be broken, understanding the fundamentals of composition provides a strong foundation for creating balanced and visually appealing images. These are not rigid laws but proven guidelines that help create harmony in a photograph.
- The Rule of Thirds: Imagine your frame is divided into nine equal rectangles by two horizontal and two vertical lines. The Rule of Thirds suggests placing your subject along these lines or at their intersections. This simple technique creates a more dynamic and natural-looking composition than placing the subject directly in the center of the frame. For an animal looking to the side, place it on a vertical line and give it “looking room” in the empty space it is facing.
- Leading Lines: Use natural lines within the scene to guide the viewer’s eye toward your subject. A winding river, a fallen log, a game trail, or the curve of a coastline can all act as leading lines. This technique creates depth and actively directs attention, making the image more engaging and easy to interpret.
- Framing: Look for natural elements in the environment to create a frame around your subject. Shooting through the V of a tree branch, an opening in tall grass, or a rocky arch can add depth and context to your image. This technique isolates the subject, draws focus, and makes the viewer feel as though they are peeking into a private scene.
Ethical Wildlife Photography: A Non-Negotiable Guideline
Capturing a breathtaking image of an animal in its natural habitat is a profound privilege. With this privilege comes an immense responsibility. Ethical photography ensures that our passion for capturing nature’s beauty does not come at the expense of the subjects we admire. It is the silent, foundational skill that separates a good photographer from a great one, placing the well-being of wildlife and their environments above the pursuit of any single shot.
The Welfare of the Animal Comes First
The core principle of ethical wildlife photography is simple yet absolute: the animal’s life and welfare are more important than your photograph. This means learning to observe from a distance and understanding when your presence is causing a disturbance. Your goal is to be a passive observer, a temporary guest in their world.
- Recognizing signs of stress: Learn to read animal body language. Signs of distress can include flattened ears, a fixed stare directly at you, agitated tail movements, alarm calls, or a sudden halt in feeding or preening. If you observe any of these behaviors, you are too close. It is your cue to back away slowly and quietly.
- The principle of “Do No Harm”: This extends beyond direct physical harm. Causing an animal to flee can expend precious energy reserves, separate a parent from its young, or expose it to predation. Never alter an animal’s behavior for the sake of a photograph.
- Avoiding baiting, calling, or any form of harassment: Using food to lure an animal is not only unethical but also dangerous. It habituates wildlife to humans, which can lead to conflict and is often fatal for the animal. Similarly, using calls to attract a bird can disrupt mating or territorial behavior. Chasing an animal is never acceptable.
Respecting Habitats and Regulations
Our responsibility extends beyond the individual animal to the entire ecosystem it calls home. A healthy environment is essential for wildlife to thrive, and we must do our part to preserve it. Every footstep we take has an impact, and it is our duty to minimize it.
- Staying on designated trails and paths: Trails exist for a reason—to protect fragile plant life, prevent soil erosion, and minimize disturbance to nesting sites or dens. Venturing off-trail can cause irreparable damage to the habitat you came to enjoy.
- Understanding and following park and refuge rules: Every protected area has its own set of regulations concerning wildlife viewing distances, permitted areas, and drone usage. Research these rules before you visit and adhere to them strictly. They are designed for the protection of both the wildlife and visitors.
- The “Leave No Trace” philosophy: This universal outdoor ethic is paramount. Pack out everything you pack in, including food scraps. Leave natural objects like feathers, bones, or nests where you find them. In short, leave the environment exactly as you found it, if not better.
Responsible Sharing on Social Media
In the digital age, our ethical obligations continue long after we’ve packed up our gear. How we share our images can have significant real-world consequences, both positive and negative. A single post can inspire thousands or inadvertently endanger a species.
- The danger of geotagging sensitive locations: Be extremely cautious about sharing precise locations, especially for vulnerable, rare, or heavily trafficked species like owls, rhinos, or bears. Poachers and irresponsible photographers can use this data to find and harass animals. If you must share a location, be general (e.g., “Yellowstone National Park” instead of a specific GPS coordinate).
- Avoiding sharing images that depict unethical practices: Think before you post. Sharing a photo of someone petting a wild fox or standing dangerously close to a bison normalizes and encourages this harmful behavior, even if you add a “don’t do this” caption. Curate your feed to showcase respectful wildlife interaction.
- Using your platform to promote conservation and respect for wildlife: Your photography is a powerful tool for good. Use your images and your voice to tell compelling stories about the natural world, raise awareness about conservation issues, and inspire others to appreciate and protect our planet’s biodiversity. As a wildlife photographer, you are more than just an image-maker; you are an ambassador for the wild, and your work can foster a connection that is the first step toward conservation.
Post-Processing: Bringing Your Vision to Life
The click of the shutter is a pivotal moment, but it’s often just the halfway point in creating a breathtaking wildlife photograph. Post-processing, or editing, is where you take the raw data captured by your camera and refine it to match the scene you witnessed. It’s not about creating something fake; it’s about enhancing the reality, guiding the viewer’s eye, and bringing your creative vision to its full potential.
The Importance of Shooting in RAW
If there is one technical decision that will fundamentally change your editing capabilities, it is choosing to shoot in RAW format instead of JPEG. A RAW file is the digital equivalent of a film negative—it contains all the unprocessed image data captured by your camera’s sensor. A JPEG, by contrast, is a compressed, processed image with much of that original data discarded by the camera.
- Greater flexibility in editing: Because a RAW file holds a vast amount of information, you have incredible latitude to adjust settings like exposure, contrast, and color without degrading the image quality. It’s the difference between sculpting with a large block of marble versus a small, pre-shaped stone.
- Recovering details in shadows and highlights: Have you ever taken a photo where the sky is completely white or the shadows are a solid block of black? A RAW file often retains the detail in these “clipped” areas, allowing you to recover information that would be permanently lost in a JPEG. This is a lifesaver in the challenging, high-contrast light you often encounter in the wild.
- Correcting white balance accurately: With a JPEG, the white balance is “baked into” the file. Correcting an inaccurate color cast can be difficult and often produces strange results. In a RAW file, white balance is simply a piece of metadata. You can change it non-destructively in your editing software, ensuring the colors of fur, feathers, and foliage are perfectly true to life.
Essential Adjustments in Editing Software
Once you import your RAW files into a program like Adobe Lightroom, Capture One, or DxO PhotoLab, a few fundamental adjustments form the backbone of nearly every great wildlife image.
- Exposure, contrast, and color correction: This is your starting point. Adjusting the overall exposure ensures the image is not too dark or too bright. Tweaking the contrast can add punch and make your subject stand out. Finally, fine-tuning the white balance, vibrance, and saturation will bring the colors to life in a natural, pleasing way.
- Cropping for a stronger composition: Cropping is one of the most powerful compositional tools in post-processing. You can trim away distracting elements at the edge of the frame, recompose your shot to better follow the rule of thirds, or simply get a tighter view of your subject, enhancing its impact.
- Sharpening and noise reduction techniques: Careful sharpening can bring out the exquisite details in an animal’s eye, fur, or feathers. The key is to be subtle. At the same time, if you shot in low light at a high ISO, you’ll likely have some digital noise (a grainy texture). Modern noise reduction tools are incredibly effective at smoothing this out while preserving critical detail.
Advanced (But Simple) Edits
Beyond the basics, a few simple but powerful techniques can elevate your images from good to great. These tools allow you to make selective adjustments, guiding the viewer’s attention exactly where you want it.
- Using radial and graduated filters to guide the eye: These tools allow you to apply adjustments to specific parts of your image. A graduated filter is perfect for darkening a bright sky without affecting the subject below. A radial filter can be placed over your subject to subtly brighten it or, conversely, placed around it to darken the background, creating a natural vignette that makes the animal pop.
- Dodging and burning to add depth and dimension: A technique inherited from the traditional darkroom, dodging (lightening) and burning (darkening) is the art of painting with light. By selectively brightening the highlights and darkening the shadows on an animal, you can enhance its form, add a sense of three-dimensionality, and create a dramatic, sculpted look.
- Cloning out distracting elements (use with ethical consideration): Sometimes, a small, bright blade of grass or a stray stick can pull attention away from your subject. The clone stamp or healing brush can neatly remove these minor distractions. However, this tool should be used with great care and ethical consideration. The goal is to remove minor, inconsequential distractions, not to alter the reality of the scene or mislead the viewer about the animal’s environment or behavior.
