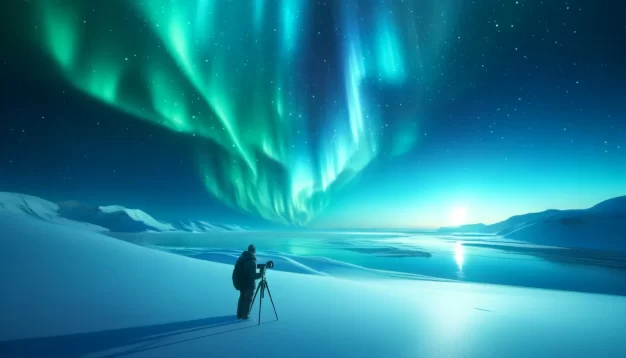
How to photography Aurora Borealis ?
Capture the Northern Lights like a pro with these tips!
Understanding the Aurora Borealis
What is the Aurora Borealis?
The Aurora Borealis, commonly known as the Northern Lights, is a natural light display predominantly seen in high-latitude regions around the Arctic. This phenomenon occurs when charged particles from the sun collide with atoms in Earth’s atmosphere, causing bursts of light. These lights can appear in various colors, although pale green and pink are the most common. Shades of red, yellow, green, blue, and violet can also be seen. The best displays are typically under the auroral oval, where the magnetic field lines closest to Earth guide more particles.
Best Times to Photograph the Aurora
To capture the Northern Lights in their full glory, timing is crucial. The aurora is most active during the equinoxes, around March 21 and September 21, when geomagnetic activities are heightened. However, the lights are visible from late August to mid-April when the nights are dark. For the best photographic opportunities, aim for between 10 PM and 2 AM local time. During this window, the sky is darkest, and the aurora tends to be at its most intense. Also, ensure you’re shooting under a new moon or during a moonless night to avoid light pollution washing out the aurora.
Preparing for the Shoot
Researching Locations
Choosing the right location is essential for aurora photography. Ideal spots are those with clear northern horizons and minimal light pollution. Tromsø in Norway, Abisko in Sweden, and Yellowknife in Canada are renowned for their high auroral activity. Closer to home, places like Fairbanks, Alaska, and the upper reaches of the Great Lakes in the U.S. offer good viewing opportunities. Use apps like Aurora Forecast to track geomagnetic activity and cloud cover in real time.
Essential Gear
To photograph the aurora effectively, you need the right gear:
- A digital SLR or mirrorless camera capable of manual mode is essential.
- Wide-angle lenses with a large aperture (at least f/2.8) are ideal for capturing expansive night skies.
- A sturdy tripod is non-negotiable to keep your camera stable during long exposures.
- Bring extra batteries; cold temperatures can drain battery life quickly.
- A remote shutter release can help avoid camera shake when pressing the shutter button.
Camera Settings Overview
Start with these baseline settings and adjust based on the aurora’s intensity and your creative vision:
- Mode: Manual, to control the shutter speed, aperture, and ISO.
- Focus: Set to manual and pre-focus on a distant light to ensure sharp stars.
- Shutter Speed: Between 5 and 25 seconds. Longer exposures capture more light but can blur moving aurora.
- Aperture: As wide as possible, ideally between f/1.4 and f/2.8, to capture as much light as possible.
- ISO: Start around 1600; increase to capture fainter lights or decrease if the aurora is bright and detailed.
Camera Settings in Detail
Manual Mode
Shooting in manual mode gives you total control over the exposure settings, which is critical for night photography. Set your camera to manual mode to adjust the shutter speed, aperture, and ISO independently, adapting to the aurora’s brightness and movement.
Aperture
Use the widest aperture your lens allows, typically between f/1.4 and f/2.8. This maximizes the amount of light entering the lens, crucial for capturing the dim glow of the aurora against the dark sky. A wide aperture also helps in capturing sharp stars and a well-defined Milky Way if it’s visible.
ISO Settings
Set your ISO to 1600 as a starting point. If the aurora is very bright, you can lower this to prevent overexposure; if it’s faint, you might need to increase the ISO up to 3200 or 6400. Higher ISOs can introduce noise, so balance sensitivity with image quality. Modern cameras with good noise performance can go higher without significant quality loss.
Shutter Speed
The shutter speed can vary from 5 to 25 seconds. Faster auroras require shorter exposures to capture their shape and texture before they move, while fainter lights might need longer exposures. Experiment and check your results; if the stars start to trail, shorten the exposure.
Focus Tips
Autofocus often fails in low light, so manual focus is the way to go. Set your lens to infinity (∞), but check by taking a few test shots. Focusing on a distant light source or using live view to zoom in on a bright star can help ensure sharp focus.
Composition and Planning
Composing Your Shots
Composition in aurora photography isn’t just about the lights; include interesting foregrounds to create depth. Trees, mountains, reflections in water, or even man-made structures can add to the composition. Use the aurora’s shape to lead the eye through the image, creating a natural flow.
Using Foreground Elements
Foreground elements like icy lakes, rugged rock formations, or even local wildlife can anchor your composition, adding context and scale to the display above. If you’re near water, try to capture reflections for a symmetrical composition, doubling the effect of the lights.
The Rule of Thirds in Aurora Photography
Place the horizon along the bottom third of the frame to give more space to the sky, where the aurora plays. If the foreground is particularly interesting, flip this and place the sky on the upper third. This balance keeps the viewer’s eye moving naturally through the photo.
Shooting Techniques
Long Exposure Basics
Long exposures are a staple in aurora photography, allowing your camera to capture more light and detail than is visible to the naked eye. Use a shutter speed between 5 and 25 seconds, adjusting based on the aurora’s brightness and speed. Remember, too long a shutter speed will blur the aurora into a uniform glow, while too short can fail to capture its full majesty.
Reducing Camera Shake
To minimize camera shake and ensure sharp images:
- Always use a tripod. Ensure it’s stable and secure, especially in windy conditions.
- Utilize a remote shutter release or your camera’s timer to take the photo without touching the camera.
- If you must touch your camera, do so gently and use the viewfinder or back screen to avoid nudging it.
Panoramas and Wide Shots
For an expansive view of the aurora over a wide landscape, consider shooting a panorama:
- Use a wide-angle lens and set your camera vertically.
- Overlap each shot by about 30-50% to ensure easy stitching.
- Keep your settings consistent across each shot to avoid exposure mismatches.
- Software like Adobe Lightroom or PTGui can help stitch these frames into a single wide image that captures the grandeur of the scene.
Post-Processing
Basic Adjustments
Start your post-processing with basic adjustments:
- Correct white balance to ensure the colors look natural. A temperature of 3800-4500 K often works well for night skies.
- Adjust exposure and contrast to enhance the aurora against the night sky.
- Increase clarity and vibrance slightly to make the lights pop without looking unnatural.
Enhancing the Aurora Colors
The aurora’s colors can be subtle and sometimes get lost in the capture process. To enhance them:
- Use the HSL (Hue, Saturation, and Luminance) panel to selectively boost the greens, purples, and reds.
- Apply a luminosity mask to brighten just the aurora without affecting the sky’s deep blues and blacks.
Noise Reduction
High ISO settings can introduce noise. To mitigate this:
- Use luminance noise reduction in Lightroom or Adobe Camera Raw to smooth out noise while preserving detail.
- Avoid overdoing it to prevent the image from becoming too soft; find a balance where noise is reduced but sharp edges and details are still clear.
- For severe noise, consider third-party software like Topaz DeNoise or DxO PureRAW for more advanced noise reduction.
Safety and Etiquette
Dressing for the Cold
Photographing the aurora often means spending several hours in sub-zero temperatures. Dress in layers to keep warm:
- Start with a thermal base layer to wick away moisture.
- Add an insulating layer, such as fleece or down, to trap heat.
- Top with a windproof and waterproof outer layer to protect against the elements.
- Don’t forget warm gloves, a hat, and thermal boots. Hand and foot warmers can also make a big difference.
Respecting the Environment
While seeking the perfect aurora shot, it’s crucial to respect the natural environment:
- Stick to marked paths and public areas to avoid damaging fragile ecosystems.
- Use a red flashlight or headlamp to preserve your night vision and minimize light pollution.
- Take all your trash with you, including batteries and small plastic pieces.
- Be considerate of other photographers and viewers; avoid walking into their shots or using bright lights.
By following these guidelines, you can enjoy the incredible experience of photographing the aurora borealis responsibly and safely, creating memories and images that will last a lifetime.