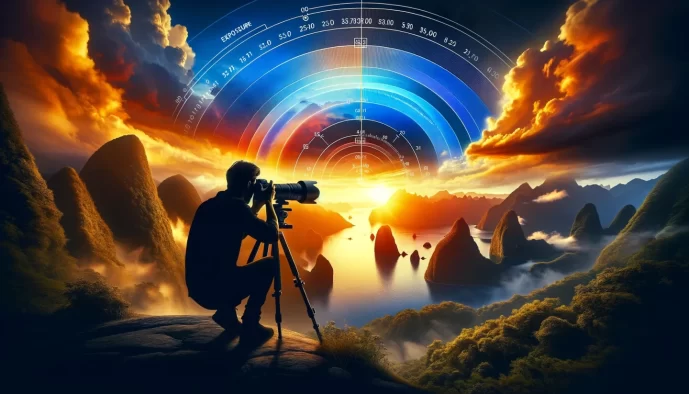
Advanced Exposure Control
Unlock the secrets to perfect photos with our exposure mastery guide.
Tired of wrestling with your camera, hoping for the perfect exposure? While the exposure triangle is a fundamental concept, truly mastering your images requires going deeper. This article is your guide to unlocking advanced exposure control, moving beyond the basics to achieve consistent, stunning results.
We’ll delve into how to effectively utilize your camera’s metering modes, understand the nuances of the histogram as your ultimate truth for exposure, and explore techniques that empower you to take complete creative command. Get ready to elevate your photography and capture exactly the image you envision, every single time.
Essentials
Moving Beyond the Exposure Triangle
You’ve mastered the relationship between aperture, shutter speed, and ISO. You can confidently switch to Aperture Priority or Shutter Priority and get a decent shot. But every so often, the camera gets it wrong. The brilliant white snow in your photo looks dull and gray, or your friend standing against a beautiful sunset is rendered as a dark, featureless silhouette. This is the moment you graduate from simply understanding the exposure triangle to truly controlling it.
When Automatic Modes Fail
Your camera’s automatic and semi-automatic modes (like Aperture and Shutter Priority) are incredibly sophisticated, but they are built on a fundamental assumption that can be easily fooled. They don’t see a “snowy field” or a “portrait”; they just see patterns of light and dark, and their goal is to average it all out.
This leads to what photographers call the 18% gray problem. Your camera’s internal light meter is calibrated to assume that the world, on average, reflects 18% of the light that hits it—a neutral, middle gray. When it looks at any scene, its primary goal is to adjust the settings until the overall brightness of the image matches this middle gray. For an average landscape on a partly cloudy day, this works beautifully. But for scenes with a lot of white or a lot of black, the camera’s logic backfires.
Common scenarios that consistently fool a camera’s light meter include:
- Snowy landscapes or white sand beaches: The camera sees an overwhelming amount of brightness and thinks the scene is overexposed. To “correct” this, it darkens the image, turning your pristine white snow into a muddy, underexposed gray.
- Backlit subjects: When you place your subject in front of a bright light source like a sunset or a bright window, the meter is dominated by the background. It exposes for the bright background, plunging your actual subject into a deep, dark shadow or silhouette.
- Stage performances: A performer under a bright spotlight against a black background presents a high-contrast challenge. The meter sees all the blackness surrounding the subject and tries to brighten the entire scene to middle gray, which severely overexposes the performer in the spotlight.
- Subjects against a very dark or black background: The opposite of the snow problem. The camera sees a lot of black, thinks the scene is underexposed, and tries to brighten it, often making the dark background look gray and potentially overexposing your main subject.
The Goal: Intentional Exposure, Not Just Correct Exposure
Understanding these limitations is the key to shifting your mindset from a purely technical one to a creative one. The objective is no longer just to get a “correct” exposure—an image where the meter reads ‘0’. The goal is to achieve an intentional exposure that captures the mood, feeling, and story you want to tell. Learn more about achieving proper exposure.
A “correct” exposure of a dark, moody forest at dusk might make it look like it was shot in the middle of the day, destroying the atmosphere. An intentional exposure would preserve those deep shadows and that sense of twilight. Conversely, you might want to create a bright, airy, high-key portrait where the background is almost pure white. Your camera’s meter would see this as a massive overexposure error, but creatively, it’s exactly the look you’re aiming for. Advanced exposure control is about telling your camera, “I know what you think is right, but this is what I want.” It’s about using the tools at your disposal not just to document a scene, but to interpret it.
Mastering Your Camera’s Metering Modes
To move beyond automatic settings, you first need to understand how your camera sees and interprets the world. It does this through its built-in light meter, and you have several powerful ways to guide its interpretation. Selecting the right metering mode is your first step toward taking full control of your exposure and translating your creative vision into a final image. Understanding the exposure triangle is also crucial for managing light.
How Your Camera Measures Light
Your camera’s light meter doesn’t measure the light falling onto a scene (incident light); instead, it measures the light reflecting off of it. This is called reflective light metering. By default, it is calibrated to see the world as a neutral, middle gray (often called 18% gray). It takes the light bouncing off your subject and calculates the shutter speed, aperture, and ISO needed to render that light as a midtone. This works brilliantly for average scenes but, as we’ve discussed, can be easily fooled by subjects that are predominantly bright or dark.
Evaluative or Matrix Metering
This is the default, all-purpose metering mode on most modern digital cameras (Nikon calls it Matrix, Canon calls it Evaluative, etc.). It’s the most sophisticated of the bunch. The camera divides the entire frame into numerous zones and analyzes each one for brightness, color, and sometimes even focus distance. It then compares this complex data against a vast internal database of photographic scenarios to arrive at what it believes is a balanced exposure. It’s a smart system designed to produce a good result in the widest variety of situations.
- Best for: General, everyday photography, evenly lit landscapes, and any situation where you need a reliable “average” reading of a complex scene without having to think too much about it. It’s the mode your camera is likely in when you first take it out of the box.
Center-Weighted Metering
A classic metering mode that predates complex matrix systems, Center-Weighted Metering measures light from the entire frame but gives much greater importance—typically around 75%—to the area in the center of your viewfinder. The size of this central circle can often be adjusted in your camera’s menu. It ignores the corners and edges of the frame, making it more predictable than Evaluative metering when your main subject is in the middle and the background is unusually bright or dark.
- Best for: Classic portraiture where the subject’s face is centered, or any photo where your primary point of interest is in the middle of the composition. It provides a good balance between the specificity of Spot Metering and the broad analysis of Evaluative.
Spot Metering
Spot Metering is the most precise and powerful mode, but it’s also the easiest to misuse. It measures light from a very small, single point in the frame—usually only 1-5% of the total area, often linked to your active autofocus point. It completely ignores everything else in the scene. This precision gives you surgical control, allowing you to tell the camera, “Expose for this exact tone and nothing else.” If you point it at a dark shadow, the camera will try to make that shadow middle gray, overexposing the rest of the scene. If you point it at a bright cloud, it will make the cloud middle gray, underexposing everything else.
- Best for: High-contrast scenes where you need to prioritize a specific element, such as a person’s face against a bright sky (backlighting). It’s also perfect for metering a specific skin tone for a perfect portrait exposure or for intentionally creating dramatic silhouettes by metering for the bright background.
Highlight-Weighted Metering
A relatively newer mode found on many mirrorless and high-end DSLR cameras, Highlight-Weighted Metering is designed for one specific purpose: to protect your highlights from blowing out. The meter scans the entire scene and bases its exposure calculation primarily on the brightest parts of the image, ensuring they retain detail. It will allow other parts of the image to fall into shadow if necessary to prevent the highlights from turning into pure, detail-less white. This is invaluable in situations where preserving highlight detail is more important than lifting shadows.
- Best for: Stage performances with harsh spotlights, musicians under dramatic lighting, sunsets where you want to retain color and detail in the sky, or any subject against a very bright background where highlight preservation is your top priority.
The Histogram: Your Ground Truth for Exposure
While metering modes give you an educated guess, the histogram provides the objective, undeniable facts about your exposure. It is the single most important tool for moving beyond “correct” and into the realm of “intentional” exposure. Learning to read it is like learning to read a light meter for your entire scene at once. Understanding the exposure triangle will help you grasp how aperture, shutter speed, and ISO all contribute to achieving proper exposure.
Why You Can’t Trust Your LCD Screen
The image preview on the back of your camera is incredibly useful for checking composition and focus, but it is a notoriously unreliable tool for judging exposure. It’s a small, low-resolution screen whose appearance is influenced by several external factors.
- Screen Brightness: Your camera’s LCD brightness is an adjustable setting. If it’s turned up too high, an underexposed image can look perfectly fine. If it’s too dim, a well-exposed shot might look dark, causing you to overexpose the next one.
- Ambient Light: Your perception of the screen changes dramatically with your environment. In bright sunlight, the screen’s glare will make everything look darker, tempting you to overexpose. In a dark room, the screen’s glow will make images appear much brighter than they actually are. This is especially relevant when considering night photography or shooting during the golden hour and blue hour.
- Color and Contrast Perception: The LCD screen shows you a processed JPEG preview, even if you are shooting in RAW. It doesn’t represent the full range of color and tonal data that your camera’s sensor has actually captured.
The histogram bypasses all these issues by showing you the raw data, not a subjective interpretation of it.
Decoding the Histogram Graph
At first glance, the histogram can look like an intimidating mountain range from a math textbook. In reality, it’s a simple graph that plots tonal values. Understanding its two axes is all you need to do to unlock its power.
- The Horizontal Axis: This represents the range of tones from dark to light. The far left edge is pure black (shadows), the middle section represents all the midtones, and the far right edge is pure white (highlights).
- The Vertical Axis: This represents the quantity of pixels at each specific brightness level. A tall spike indicates that a large portion of your image has that particular tone. A flat area means very few pixels have that tone.
By looking at the shape and distribution of the graph, you can instantly understand the tonal characteristics of your image without ever being fooled by your LCD screen.
Identifying Critical Exposure Flaws
The most crucial function of the histogram is to show you where you have lost image data permanently. This data loss occurs at the extreme ends of the graph, a phenomenon known as “clipping.”
- “Crushed” Blacks: When you see the graph piled up like a wall against the far-left edge, it means you have “clipped” your shadows. These areas of the image are recorded as pure black, with no detail or texture. While sometimes a creative choice, it often means you’ve lost information in the dark parts of your scene that you can never recover in post-processing.
- “Blown-out” Highlights: A spike slammed against the far-right wall is generally a more critical flaw. This indicates clipped highlights—areas that are pure white with zero detail. Think of the texture on a white wedding dress or the subtle colors in a cloud; if they are blown out, that information is gone for good. This is particularly important when considering techniques like HDR photography, where managing highlights is key.
Beyond identifying flaws, the histogram’s overall shape tells a story. A photo of a black cat in a dark room should have a histogram with most of its data on the left side (a “low-key” image). A photo of a white dog in the snow should have its data pushed to the right (a “high-key” image). Neither is wrong; they are simply accurate representations of the scene’s tonality.
The Technique of Exposing to the Right (ETTR)
Exposing to the Right, or ETTR, is an advanced technique that uses the histogram to capture the maximum amount of image quality from your camera’s sensor. The core idea is to make your image as bright as possible—pushing the data on the histogram as far to the right as you can—without clipping any important highlights. The resulting image will look overexposed on your LCD screen, but it contains the highest quality data, which you then darken back to a normal level during editing.
Why do this? There are two major benefits:
- Maximizing Sensor Data: Digital sensors are not linear; they capture significantly more information in the brighter tones than they do in the darker tones. ETTR leverages this by recording the scene in the highest-quality part of the sensor’s range. This is also why understanding your camera’s ISO settings and how they affect exposure is crucial.
- Minimizing Shadow Noise: When you take an underexposed photo and try to brighten the shadows in software, you also amplify the digital noise hiding in those dark areas. By capturing brighter shadows to begin with (via ETTR), you get a much cleaner image with less noise once you correct the exposure in post. This is especially relevant when shooting in low light conditions, which is a core aspect of night city photography.
However, ETTR comes with a significant risk. If you push the exposure too far and clip important highlights, that detail is permanently lost. It’s a technique that requires careful attention to the histogram and is best used in controlled situations like landscape or architectural photography, not for fast-paced event or sports photography where you might miss a shot while perfecting the exposure. In such fast-paced scenarios, techniques like photo panning or high-speed photography might be more appropriate to capture the action.
Strategic Use of Exposure Compensation
If metering modes are about telling your camera where to look, exposure compensation is about telling it how to interpret what it sees. It is your most direct and immediate tool for overriding the camera’s automatic decisions. Represented by a +/- button or dial on your camera, it allows you to intentionally make your image brighter or darker than the camera’s meter suggests, without leaving the convenience of semi-automatic modes.
Taking Direct Control in Aperture and Shutter Priority
Exposure compensation is the key to unlocking creative control in modes like Aperture Priority (A or Av) and Shutter Priority (S or Tv). In these modes, you set one or two variables, and the camera automatically sets the remaining one to achieve what it deems a “correct” exposure. When you adjust the exposure compensation, you are simply applying a manual offset to the camera’s final calculation. This is a core concept in mastering camera settings.
For example, in Aperture Priority, if you dial in +1 EV (Exposure Value), you’re telling the camera, “Your calculated shutter speed is too fast; I want a brighter image.” The camera will then use a shutter speed that is one stop slower to double the amount of light hitting the sensor. Conversely, dialing in -1 EV will cause the camera to use a faster shutter speed to halve the light. It’s a simple, powerful command that says, “I know better than your meter for this specific scene.” Understanding achieving proper exposure is crucial for photographers.
When to Add Light (+EV)
Dialing your exposure compensation into the positive range is necessary when you recognize a scene that is inherently brighter than middle gray, and you know your camera’s meter will be fooled into underexposing it.
- Brightening a backlit subject: This is a classic portrait scenario. When you place a person in front of a bright background like the sky or a sunny window, your camera’s meter sees the overwhelming brightness and darkens the entire image to protect the highlights. This turns your subject into a dark, underexposed shadow. By adding positive compensation (often +1 to +2 EV), you force the camera to overexpose the background, correctly exposing your subject’s face.
- Correcting for large white areas: Photographing a snowy landscape, a bride in a white dress, or a subject against a clean white wall will consistently trick your camera’s meter. The camera sees all that white and, in its attempt to render it as 18% gray, it produces a dark, muddy, and underexposed image. Adding +1 EV or more tells the camera that the scene is supposed to be bright, resulting in clean, white snow instead of dull gray slush.
When to Subtract Light (-EV)
Just as often, you’ll need to tell your camera to darken an image, either to correct for a metering error or for a specific creative effect. This is where negative exposure compensation comes into play.
- Preserving a dark, moody atmosphere: When shooting a low-key scene—like a dimly lit room or a dark forest—your camera may try to “help” by brightening the shadows and raising the overall exposure. This can destroy the very mood you’re trying to capture. Dialing in negative compensation (-0.7 or -1 EV) tells the camera to respect the shadows and keep the scene appropriately dark and atmospheric. This relates to concepts found in night photography.
- Creating dramatic silhouettes: To create a powerful silhouette, the subject must be rendered as a solid black shape against a much brighter background. Your camera’s meter will often try to find a middle ground, leaving you with a gray subject and a washed-out background. By using significant negative compensation (-2 or -3 EV), you force the camera to expose only for the bright background (like a sunset), plunging your subject into deep, featureless shadow. This is a common technique in night city photography.
- Correcting for large black areas in the frame: The opposite of the snow problem occurs when a large part of your frame is black or very dark. A person wearing a black coat or a shot of a dark car can fool the meter into overexposing the image, turning the rich blacks into a washed-out gray. A touch of negative compensation will tell the camera to keep the blacks black and maintain a correct exposure for the rest of the scene.
Advanced Manual Mode and ISO Control
While priority modes offer a fantastic blend of control and convenience, full Manual mode is where you gain ultimate authority over your camera’s exposure. But “manual” doesn’t have to mean slow or rigid. Modern cameras offer hybrid approaches that combine the consistency of manual settings with intelligent automation, giving you the best of both worlds.
Manual Mode for Unwavering Consistency
In Manual (M) mode, you set the aperture, shutter speed, and ISO yourself. The camera’s light meter will still show you if it thinks your settings will result in an over, under, or correctly exposed image, but it will not change anything automatically. This absolute consistency is not just for control freaks; it’s technically essential for several advanced photographic techniques:
- Panoramas: When stitching multiple images together to create a wide panorama, each frame must have the exact same exposure. If the camera adjusts the exposure for each shot, the final stitched image will have visible bands of different brightness levels across the scene.
- Focus Stacking: This technique involves combining several images taken at different focus points to achieve a deep depth of field. Just like with panoramas, the exposure and lighting must be identical across all frames for a seamless final blend.
- Studio Flash: When using strobes or studio flash, the light from the flash is the primary exposure source. You set your camera’s aperture and ISO to work with the flash power and lock in a shutter speed at or below your camera’s sync speed. The ambient light is secondary, so letting the camera automate any setting would disrupt this carefully controlled balance.
Combining Manual Settings with Auto ISO
One of the most powerful features in modern digital cameras is the ability to use Auto ISO while in Manual mode. This hybrid setup provides a remarkable level of flexibility. You dictate the creative elements—setting the aperture for your desired depth of field and the shutter speed to control motion—and the camera adjusts the ISO to achieve the target exposure as the light changes.
To make this work effectively, you need to configure it properly in your camera’s menu. You can set an Auto ISO range (e.g., a maximum of ISO 6400) to prevent the camera from introducing excessive noise in very dark situations. You can also set a minimum shutter speed, which tells the camera to start increasing the ISO only after it can no longer maintain that shutter speed.
This combination is a complete game-changer for event and wildlife photography. An event photographer can move from a bright room to a dim corner, keeping their aperture and shutter speed constant for a consistent look, while the camera seamlessly handles the changing light. A wildlife photographer can set a fast shutter speed (like 1/1000s) to freeze an animal’s movement and a wide aperture to blur the background, then let Auto ISO adapt instantly as the animal moves from bright sun into shadow.
The Zone System in the Digital Age
Long before histograms, legendary landscape photographer Ansel Adams developed the Zone System as a method for achieving precise tonal control in his black and white prints. He visualized the world in eleven “zones,” from pure black (Zone 0) to pure white (Zone X), with middle gray falling in Zone V.
While originally designed for film, the core principle is incredibly relevant for digital photography. It’s about moving beyond what the meter says is “correct” and intentionally placing specific tones where you want them. Here is how you can apply it:
- Identify a key tone: Look at your scene and decide what part is most important tonally. It might be the sunlit skin of a portrait subject, a gray rock in a landscape, or the deep shadow under a tree.
- Meter that specific tone: Switch your camera to Spot Metering mode and take a reading directly from that small area. Your camera’s meter will assume you want this tone to be middle gray (Zone V).
- Place the tone: Decide where that tone should actually fall. For example, you might decide that fair, sunlit skin should be brighter than middle gray, perhaps in Zone VI (+1 EV). To achieve this, you would use exposure compensation to add one stop of light (+1.0) or make the equivalent adjustment in Manual mode.
- Verify with the histogram: After taking the shot, check your histogram. By placing that key tone in Zone VI, you have shifted the entire tonal range of the image one stop to the right. This powerful technique gives you complete creative command over the mood and feel of your final image.
Bracketing and Blending for Extreme Dynamic Range
Sometimes, a scene’s range of light—from the deepest shadows to the brightest highlights—is simply too vast for your camera’s sensor to capture in a single shot. This is known as a high dynamic range scene. Think of a sunset over a mountain landscape or a room with a bright window. In these situations, you need to capture multiple exposures and combine them. This is where bracketing and blending come into play, allowing you to create one perfectly exposed image from several imperfect ones.
Auto Exposure Bracketing (AEB) Explained
Instead of manually adjusting your exposure for multiple shots, your camera can do the heavy lifting for you with a feature called Auto Exposure Bracketing (AEB). When enabled, AEB instructs your camera to take a sequence of photos—typically three or more—at different exposure levels. You take one shot, and the camera automatically captures a standard exposure, an underexposed shot (to retain highlight detail), and an overexposed shot (to capture shadow detail).
Setting this up is usually straightforward in your camera’s menu. You’ll need to define two key parameters:
- Number of frames: This is how many pictures the camera will take in the sequence. The most common options are 3, 5, or 7.
- EV steps: This sets the exposure difference between each shot. A step of 1.0 EV means each photo will be one full stop brighter or darker than the last. A common setup is 3 frames with a 2.0 EV step, resulting in shots at -2, 0, and +2 EV.
So, when should you use more frames? The choice depends entirely on the scene’s contrast.
- 3-shot brackets: This is the workhorse for most high-contrast situations. A +/- 2 EV spread is usually enough to capture the full range of light in a typical landscape with a bright sky.
- 5-shot brackets: For more extreme scenarios, like shooting directly into a sunrise or sunset, 5 shots provide more data to blend. This gives you smoother tonal transitions and ensures you capture every last detail in the brightest and darkest areas.
- 7 or 9-shot brackets: Reserve this for the most challenging light possible, such as architectural interiors with blown-out windows or complex night scenes with bright artificial lights and deep shadows.
High Dynamic Range (HDR) Photography
Once you have your bracketed sequence of images, the next step is to combine them. This is the core of High Dynamic Range (HDR) photography. The goal is to merge your bracketed shots into a single, cohesive image that contains the full tonal range of the original scene. Modern software like Adobe Lightroom and Photoshop has powerful, built-in “Merge to HDR” functions that can automatically align your images and blend them together seamlessly. The resulting file gives you incredible flexibility in post-processing, allowing you to pull details out of the shadows and highlights that would have been completely lost in a single exposure.
Manual Exposure Blending
While automated HDR software is incredibly capable, some photographers prefer a more hands-on, artisanal approach called manual exposure blending. This advanced post-processing technique offers ultimate control over the final image and often produces more natural-looking results.
The process involves loading your bracketed images into a program like Adobe Photoshop as separate layers. From there, you use layer masks to selectively “paint” in the best-exposed parts of each frame. For example, you might use the underexposed shot for the bright sky, the standard exposure for the midtones, and the overexposed shot to reveal details in the dark foreground. While it requires more time and skill, manual blending allows you to guide the viewer’s eye and craft an image that truly reflects your artistic vision, avoiding the overly processed, hyper-real look that can sometimes result from automated HDR processing.
Practical Application: Tying Techniques to Scenarios
Theory is the foundation, but the real test of a photographer is applying that knowledge in the field. Different situations demand different approaches, often requiring a combination of the techniques we’ve discussed. Let’s walk through three common, challenging scenarios and build a “technique stack” for each one to achieve intentional, professional results.
Scenario 1: The High-Contrast Landscape
Imagine a classic sunrise scene: a brilliant, colorful sky above a deep, shadowed valley. Your camera’s sensor cannot possibly capture the full range of light from the brightest highlights in the clouds to the darkest details in the foreground in a single frame. This is the ultimate test of dynamic range.
Your technique stack for this situation should be methodical:
- Start with Spot Metering: Instead of letting the bright sky fool your meter, switch to spot metering. Aim the small metering point at a midtone in the scene—something that isn’t in deep shadow or direct, bright light. A patch of sunlit grass, a gray rock, or the blue part of the sky away from the sun are all good candidates. This provides a solid, neutral baseline exposure.
- Check the Histogram: Take a test shot using your spot-metered settings. Now, ignore the LCD image and look at the histogram. You will almost certainly see a “U” shape, with data bunched up against the left wall (shadows) and the right wall (highlights). This visual confirmation tells you the scene’s dynamic range exceeds what your camera can capture in one go.
- Use Auto Exposure Bracketing (AEB): This is the final tool to solve the problem. Activate your camera’s AEB function and set it to capture at least 3, or preferably 5, frames with a 1 or 2 EV step between them. When you press the shutter, the camera will take a series of photos: one at your metered exposure, and others that are progressively brighter and darker. Later, in software like Adobe Lightroom or Photoshop, you can merge these bracketed exposures into a single High Dynamic Range (HDR) image that retains detail across the entire tonal range, from the darkest shadows to the brightest highlights.
Scenario 2: The Outdoor Portrait Session
When shooting portraits outdoors, your primary goal is to ensure your subject’s skin is perfectly exposed, regardless of a bright sky or a dark, wooded background. The light can also be inconsistent as clouds pass or you move between open areas and shade.
Here is a flexible technique stack for beautiful outdoor portraits:
- Choose Center-Weighted Metering: This mode is a portrait photographer’s classic choice. It assumes your subject is in or near the middle of the frame and prioritizes the light there, reducing the influence of a potentially distracting background. It gives you a more reliable starting point than Evaluative/Matrix metering, which might try too hard to balance the subject with a very bright sky.
- Fine-tune with Exposure Compensation: Metering gets you close, but your creative eye gets you the rest of the way. Look at your subject’s face on the LCD. Is it a little too dark? Add positive exposure compensation (+0.3, +0.7 EV). A little too bright? Dial in negative compensation. For fair skin tones, you often need to add a bit of light to prevent the camera’s meter from rendering them a dull gray. This is your primary tool for dialing in the perfect look.
- Consider Manual + Auto ISO for Changing Light: If you and your subject are moving around and the light is shifting, constantly adjusting settings can be disruptive. This is where Manual mode with Auto ISO shines. Set the aperture you want for your desired depth of field (e.g., f/2.8) and a safe shutter speed to prevent motion blur (e.g., 1/250s). Then, turn on Auto ISO. Now you can focus entirely on composition and interacting with your model, while the camera automatically adjusts the ISO to maintain a consistent exposure as the ambient light changes.
Scenario 3: Indoor Action or Sports
Photographing an indoor basketball game, a concert, or a play presents a unique challenge: low, often poor-quality light, fast-moving subjects, and chaotic backgrounds with bright scoreboards or spotlights. Your goal is to freeze the action with a crisp, well-exposed subject.
This scenario demands a specific and powerful technique stack:
- Lock in Manual + Auto ISO: This combination is the professional’s choice for event and sports photography. First, go into Manual (M) mode. You need absolute control over motion and light. Set your shutter speed fast enough to freeze the action—1/800s, 1/1000s, or even faster. Set your aperture to its widest setting (e.g., f/1.8, f/2.8) to gather every possible bit of light. With those two variables locked, enable Auto ISO. Now you can focus entirely on composition and interacting with your model, while the camera automatically adjusts the ISO to maintain a consistent exposure as the ambient light changes.
- Pair with Spot Metering: To make this setup foolproof, you must tell the camera what to expose for. Use Spot Metering and, if possible, link it to your active autofocus point. As you follow an athlete across the court, the camera’s meter will read the light falling directly on them, completely ignoring the dark crowd behind them or a bright light above them. This ensures your subject is consistently exposed, even as they move through different lighting zones, giving you the power to capture decisive, dramatic moments.
