Camera Anatomy & Functions
Uncover the essentials of camera anatomy, from sensor to shutter.
Ever wondered what makes your camera tick? From the satisfying click of the shutter to the crisp focus of your favorite shots, there's a whole world of engineering working together. If you're looking to truly understand your photographic tool, this article will break down camera anatomy and functions.
We'll delve into the essential parts, starting with the camera body as your control center, exploring the magic of the lens, and uncovering the core components that bring your images to life. Get ready to see your camera in a whole new light!
Essentials
The Camera Body: Your Control Center
Think of the camera body as the brain and chassis of your entire photographic system. It houses the critical internal components and provides all the physical controls you need to craft an image. While lenses get a lot of glory, mastering the controls on the body is the first step toward taking creative control.
The Grip and Shutter Button
The first thing you’ll notice when you pick up a camera is the grip. This sculpted section is your primary point of contact, designed for a secure and comfortable hold. Atop the grip, perfectly placed for your index finger, is the shutter button. This isn’t just a simple on/off switch; it’s a sophisticated two-stage control. A half-press activates the camera’s autofocus and metering systems, allowing it to lock focus on your subject and measure the light in the scene. Once you’re satisfied, a full-press of the button captures the photograph.
Command Dials
Typically found near the grip for easy access with your thumb and index finger, command dials (often one on the front and one on the back) are your primary tools for making quick adjustments. When you move beyond automatic modes, these dials become essential. They allow you to rapidly change core settings like shutter speed, aperture, and exposure compensation without ever taking your eye away from the viewfinder.
The Mode Dial
The mode dial is a prominent, clearly labeled dial on top of the camera that lets you select a shooting mode. This is where you tell the camera how much control you want to have over the exposure settings. Understanding these modes is fundamental to growing as a photographer.
- Auto (The “Green” Mode): In this mode, the camera makes all the decisions for you—aperture, shutter speed, ISO, white balance, and even whether to use the flash. It’s a true point-and-shoot experience, great for beginners or when you need to capture a moment without thinking.
- Program (P): A step up from Auto. The camera still chooses the shutter speed and aperture for a correct exposure, but it gives you control over other settings like ISO, white balance, and exposure compensation. It’s a great “safety net” mode for learning.
- Aperture Priority (A or Av): In this semi-automatic mode, you choose the aperture (which controls depth of field), and the camera automatically sets a corresponding shutter speed for a good exposure. This is a favorite among portrait and landscape photographers who want to control how much of the scene is in focus.
- Shutter Priority (S or Tv): The opposite of Aperture Priority. You choose the shutter speed (to freeze or blur motion), and the camera automatically selects the appropriate aperture. This mode is ideal for sports, wildlife, or any situation where controlling motion is the top priority.
- Manual (M): This mode gives you full control. You set both the aperture and the shutter speed yourself, guided by the camera’s light meter. It offers the ultimate creative freedom but requires a solid understanding of how exposure works.
- Scene Modes: These are presets optimized for specific situations. You might see icons for Portrait (which uses a wide aperture for a blurry background), Landscape (which uses a narrow aperture for deep focus), or Sports (which uses a fast shutter speed to freeze action).
Buttons, Ports, and The Hot Shoe
The camera body is dotted with other essential controls. Dedicated buttons for ISO, White Balance (WB), and Drive Mode (single shot, burst, timer) provide direct access to frequently changed settings. Many modern cameras also feature an AF-ON button, which allows you to separate the act of focusing from the shutter press. Along the side, you’ll find a variety of ports covered by protective flaps, including USB for transferring files and charging, HDMI for viewing photos on a TV, and jacks for external microphones or headphones to improve audio quality in videos.
Finally, on the very top of the camera body is the hot shoe. This metal bracket is more than just a place to rest your thumb; it’s an electronic connection point that allows you to mount and sync external accessories like speedlight flashes, radio triggers, or high-quality microphones, vastly expanding your camera’s creative capabilities.
The Lens: The Camera’s Eye
If the camera body is the brain, the lens is most certainly the eye. It’s the first component to interact with the light from your scene, and its quality and characteristics have a profound impact on the final image. A lens doesn’t just see the world; it interprets it, shaping the light before it ever reaches the sensor.
The Lens Mount
The lens mount is the critical junction where the lens physically attaches and electronically communicates with the camera body. This secure, bayonet-style connection ensures the lens is perfectly aligned with the sensor and allows the body to control functions like autofocus and aperture.
It’s important to know that these mounts are proprietary. Each major camera manufacturer has its own system, meaning a Canon lens won’t naturally fit on a Nikon or Sony body without a specific adapter. This creates distinct ecosystems, like Canon’s EF and RF mounts, Nikon’s F and Z mounts, and Sony’s E-mount.
Lens Elements and Groups
Peer inside a lens, and you won’t find a simple piece of glass. Instead, you’ll see a complex arrangement of precisely shaped and coated glass pieces, known as lens elements. These elements are organized into functional clusters called groups. Their sole purpose is to gather the chaotic light rays reflecting off your subject and meticulously bend, direct, and focus them into a sharp, coherent image on the flat surface of the camera’s sensor.
The Aperture Diaphragm
Tucked within the lens barrel is the aperture, an adjustable diaphragm made of overlapping metal blades that form a circular opening. Much like the pupil of a human eye, this opening can expand (open up) or constrict (stop down) to control the exact amount of light that passes through the lens to the sensor.
This opening size is measured in f-stops, which are written as numbers like f/1.8, f/4, or f/11. Confusingly at first, a smaller f-number (like f/1.8) represents a much wider opening that lets in more light, while a larger f-number (like f/11) signifies a smaller opening that lets in less light.
Focus and Zoom Rings
The exterior of most lenses features one or two adjustable rings for manual control. The Focus Ring allows you to precisely adjust the lens elements to change which part of the scene is in sharpest focus. While autofocus is excellent, manual control with this ring is invaluable for creative effects or challenging lighting situations. Understanding how to achieve proper exposure is key to great photos.
On zoom lenses, you will find a second ring: the Zoom Ring. Turning this ring changes the lens’s focal length, allowing you to seamlessly adjust your field of view from a wide perspective to a tighter, telephoto shot without having to physically move closer or further from your subject. Exploring different lens types and their uses can greatly expand your creative options.
Inside the Box: The Core Components
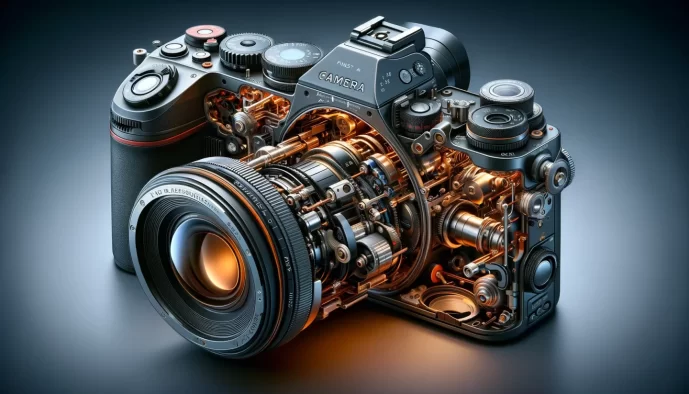
While the camera body provides the controls and the lens gathers the light, the real magic happens inside the box. Hidden from view are the core components that work in concert to transform a fleeting moment of light into a permanent digital image. Let’s look at the engine room of your camera.
The Image Sensor
The image sensor is the heart of any digital camera, serving as the modern equivalent of a frame of film. This small, rectangular chip is a grid of millions of microscopic, light-sensitive diodes called photosites. Its sole function is to capture the focused light that passes through the lens and convert it into a set of electronic signals, which form the basis of your photograph.
Pixels and Resolution
Each tiny photosite on the sensor corresponds to a single pixel in your final image. The total number of these pixels is the camera’s resolution, typically measured in megapixels (millions of pixels). A camera with a 24-megapixel sensor captures an image made up of 24 million individual pixels. Higher resolution allows for more fine detail and gives you more flexibility to crop your images or print them in very large sizes without a significant loss of quality.
Sensor Size
Not all sensors are created equal; their physical size is one of the most significant factors affecting image quality. Common sizes include:
- Full-Frame: This is the largest standard sensor size, equivalent to a classic 35mm film frame. Full-frame sensors have a larger surface area, allowing each individual pixel to be larger. This generally results in better performance in low light, less digital noise, and a greater ability to create a shallow depth of field (blurry background).
- APS-C: A smaller, more common, and more affordable sensor size found in many enthusiast DSLRs and mirrorless cameras. Due to its smaller size, it introduces a “crop factor,” which makes lenses appear more magnified, effectively increasing their reach.
- Micro Four Thirds: Smaller than APS-C, this sensor format allows for significantly more compact and lightweight cameras and lenses, making it a popular choice for travel and street photography.
In general, a larger sensor can gather more light, which often translates to cleaner images with a wider range of tones, especially in challenging lighting conditions.
The Shutter Mechanism
Positioned directly in front of the image sensor is the shutter, a crucial gatekeeper that controls time. Its purpose is to control the exact duration that light is allowed to reach the sensor. This duration is what we call the shutter speed.
- Mechanical Shutter: This is a physical set of curtains that travel across the sensor to expose it to light. The distinctive “click” you hear when taking a photo on many cameras is the sound of these curtains rapidly opening and closing.
- Electronic Shutter: Instead of a physical curtain, an electronic shutter works by simply turning the sensor’s pixels on and off for a specific amount of time. This allows for completely silent shooting and incredibly fast shutter speeds, though it can sometimes cause distortion with very fast-moving subjects.
The Mirror and Pentaprism (DSLR Specific)
This intricate mechanical system is the defining characteristic of a DSLR (Digital Single-Lens Reflex) camera. When you look through the eyepiece of a DSLR, you are not looking at a screen; you are seeing a true optical view of what the lens sees. This is achieved through a clever arrangement of a mirror and a pentaprism.
Light enters the lens and strikes a mirror that is angled in front of the sensor. This mirror reflects the light vertically up into a pentaprism—a five-sided piece of glass that corrects the image orientation and directs it into the optical viewfinder. When you press the shutter button, this mirror rapidly flips up and out of the way, allowing the light to pass through to the shutter and the image sensor. This mirror and pentaprism system is precisely what is removed in a mirrorless camera, which instead uses a direct digital feed from the sensor to an electronic viewfinder.
The Image Processor
If the sensor is the camera’s heart, the image processor is its brain. This powerful, dedicated computer takes the raw, unprocessed electrical signal from the millions of photosites on the sensor and performs a series of complex calculations to turn it into a recognizable photograph. It interprets color and brightness data, applies user settings like white balance and picture style, reduces digital noise, and sharpens the image.
The processor is also responsible for writing the final image file to your memory card, either as a compressed JPEG file ready for sharing or as a much larger RAW file that contains all the original, unprocessed data from the sensor. Beyond just creating the image, the processor manages nearly all of the camera’s high-speed functions, including autofocus calculations, video recording, and overall operational speed.
The Exposure Triangle: How the Parts Work Together
Now that we’ve seen the individual parts, let’s explore how the three most critical settings—Aperture, Shutter Speed, and ISO—work together to create a properly exposed photograph. This relationship is known as the Exposure Triangle. A change in one setting requires a compensatory change in another to maintain the same level of brightness.
Think of it like filling a bucket with water. Your goal is to fill the bucket perfectly—not overflowing and not half-empty. In this analogy:
- Aperture is the width of the hose. A wider hose lets more water through at once.
- Shutter Speed is how long you leave the tap on. The longer it’s on, the more water fills the bucket.
- ISO is the water pressure. Higher pressure forces water into the bucket faster.
You can fill the bucket with a wide hose for a short time, a narrow hose for a long time, or by cranking up the pressure. The goal is a balanced combination, and each choice has a creative side effect.
Aperture (The “How Much”)
The aperture, as we learned, is the opening inside the lens that controls how much light passes through to the sensor. A wider opening, denoted by a smaller f-number (like f/1.8), lets in a large volume of light. A narrow opening, denoted by a larger f-number (like f/16), lets in very little light.
Beyond just controlling brightness, aperture’s primary creative function is managing Depth of Field (DoF). This refers to how much of your scene is in sharp focus from front to back. A wide aperture (e.g., f/1.8) creates a shallow depth of field, resulting in a sharply focused subject with a beautifully blurred background—perfect for portraits. A narrow aperture (e.g., f/11) creates a deep depth of field, keeping everything from the foreground to the distant mountains in focus, which is ideal for landscape photography.
Shutter Speed (The “How Long”)
Shutter speed dictates the duration that the image sensor is exposed to light. This is the “how long the tap is on” part of our analogy. A fast shutter speed, like 1/1000th of a second, exposes the sensor for a tiny fraction of time, letting in very little light. A slow shutter speed, like 2 seconds, keeps the sensor exposed for much longer, letting in a lot of light.
The creative power of shutter speed lies in its control over motion. To freeze a fast-moving subject, like a bird in flight or a racing car, you need a very fast shutter speed. This captures a crisp, sharp moment in time. Conversely, to intentionally show movement, you use a slow shutter speed. This can turn the headlights of moving cars into flowing ribbons of light or make a waterfall look smooth and silky.
ISO (The “Sensitivity”)
ISO is a digital enhancement of the light signal captured by the sensor. At its base level (e.g., ISO 100), the sensor is at its native sensitivity. As you increase the ISO number (to 800, 1600, or higher), you are essentially telling the camera to amplify the light it has received, making it more sensitive. This is like increasing the water pressure to fill the bucket faster in low-light conditions.
Its creative function is purely practical: it allows you to achieve a good exposure in dark environments without having to use a very slow shutter speed or a super-wide aperture. It’s the setting that lets you take photos indoors or at dusk without a flash. However, this sensitivity comes with a trade-off. Pushing the ISO too high introduces digital “noise” or grain into the image, which can make it look speckled and reduce overall sharpness and color quality.
Focusing and Composition: Framing Your Shot
Understanding the internal components is crucial, but how you interact with the camera to frame and focus your image is where art meets science. The viewfinder, LCD screen, and autofocus system are your primary tools for composing a compelling photograph. This is a great topic to get started with if you’re just beginning your photography journey. You can learn more in our Beginner’s Photography 101 guide.
The Viewfinder
The viewfinder is the small window you look through to see what the lens sees, allowing you to compose your shot with precision. It helps you isolate your subject from the surrounding environment and focus on the frame. There are two main types you’ll encounter in modern cameras.
- Optical Viewfinder (OVF): Found exclusively in DSLR cameras, the OVF uses a system of mirrors and a pentaprism to show you a direct, real-time optical view through the lens. It’s a pure, unfiltered look at your scene, with no digital lag.
- Electronic Viewfinder (EVF): A hallmark of mirrorless cameras, the EVF is a tiny, high-resolution screen inside the eyepiece. Instead of an optical view, it displays a live digital feed from the image sensor. Its major advantage is showing you exactly what the final image will look like, complete with exposure and white balance adjustments, before you even press the shutter.
The LCD Screen
The large screen on the back of your camera, the LCD (Liquid Crystal Display), serves several vital functions. It’s your interface for navigating menus and changing settings, but it’s also a powerful composition tool. Using “Live View,” you can compose your shot on the larger screen instead of the viewfinder, which is especially useful for tripod work or shooting at awkward angles. A good tripod is essential for this. After you take a picture, the LCD screen is where you can instantly review it, check for sharpness, and confirm your exposure. Many modern cameras feature advanced LCDs with touchscreen capabilities for intuitive control and articulating or tilting screens that can flip out, making it easier to shoot from high or low perspectives.
The Autofocus (AF) System
The autofocus system is the complex technology that allows your camera to automatically achieve a sharp focus on your subject. It’s a sophisticated interplay between sensors in the camera body and motors in the lens. While you can always focus manually, a modern AF system is incredibly fast and accurate, making it essential for capturing fleeting moments. Understanding a few key concepts will help you master it. For example, the autofocus on the Canon EOS R5 is highly regarded. You can also learn about different lens types and their impact on focus.
- AF Points: These are the specific points or zones within your frame that the camera can use to lock focus. Basic cameras may have a handful, while professional models can have hundreds or even thousands covering nearly the entire frame. You can typically select a single point for precise focus or let the camera automatically choose one for you.
- AF Modes: Cameras offer different modes tailored to the subject you’re shooting. The two most fundamental are Single (AF-S or One-Shot AF), which locks focus once on a stationary subject, and Continuous (AF-C or AI Servo), which constantly re-evaluates and tracks a moving subject to keep it sharp. Mastering these modes is part of camera settings mastery.
From Light to Image: The Complete Process
Now that we’ve explored the individual components, let’s put it all together. Creating a photograph is a remarkable, near-instantaneous sequence of events where physics and technology converge. Here is a step-by-step journey of how light travels through your camera to become a digital image.
Step 1: Light Enters the Lens and Aperture
Everything begins with light. Light rays reflect off your subject and enter the front of the lens. They travel through a precisely arranged series of internal glass elements, which bend and focus these rays into a sharp, coherent image. As this focused light travels through the lens barrel, it passes through the aperture diaphragm. Based on your settings, this opening is either wide or narrow, controlling the exact volume of light that is allowed to continue its journey into the camera body.
Step 2: The Shutter Opens and Closes
When you fully press the shutter button, you set a mechanical ballet in motion. In a DSLR, the first action is the mirror, which has been directing light to the optical viewfinder, flipping up and out of the way, blacking out the viewfinder for a fraction of a second. With the path now clear, the shutter curtain opens. This curtain stays open for the precise duration you’ve set as your shutter speed—be it a blistering 1/4000th of a second or a long 30 seconds. Once that time has elapsed, the shutter closes, and the light’s journey ends.
Step 3: The Sensor Captures the Light
With the shutter open, the focused light finally strikes the heart of the camera: the image sensor. This silicon chip is covered in millions of microscopic light-sensitive wells called photosites (which become the pixels in your final image). As photons of light hit each photosite, they generate a tiny electrical charge. The brighter the light that hits a photosite, the stronger the charge it generates. In this moment, the scene is “painted” with light onto the sensor, which converts the patterns of light and color into a raw digital signal.
Step 4: The Processor Creates the File
The raw electrical signal from the sensor is immediately sent to the camera’s image processor—its internal computer. This powerful brain performs a multitude of tasks in an instant. It interprets the raw data, applies your chosen settings for things like white balance, sharpness, and color profile, and performs noise reduction based on your ISO setting. Finally, it compresses and converts all this information into a recognizable image file, such as a JPEG or a more data-rich RAW file. This final file is then written and saved to your memory card, ready for you to view, share, or edit.
